 If you ask me, one of life’s greatest pleasures is getting to soak in a big warm tub full of bubbles. The idea of a great bubble bath conjures up images of starlets caked in fluffy lather, chilling in cast iron tubs with suspiciously perfect hair and makeup.
While I’m yet to experience a bubble bath quite that idyllic, I’m not giving up anytime soon. My bath time ambitions are alive and well—giving me plenty of motivation to try out new DIY bath and body recipes on the regular.
I’ve been dying to try out a bubble bar recipe for quite a while, and when I found this one from Laura at Baking Outside the Box, I knew I had to try it out. I ended up adjusting the recipe a bit during my experiments, but what I loved most about Laura’s formula stayed put.
While many DIY bubble bar recipes call for powdered detergents like SLS, these cute little flower-shaped bars use liquid bubble bath as the main ingredient. As a person with sensitive skin, I LOVE this. I’m very choosy when it comes to bubble bath, and I tend to avoid anything with SLS, parabens, or synthetic fragrances.
One thing to keep in mind is that bubble bath brands vary quite a bit when it comes to bubble production. Natural brands and gentle formulations do tend to foam less than others because they often contain less aggressive ingredients. For the biggest, fluffiest bubbles possible, use a brand like Mr. Bubble that is known for its bulky suds.
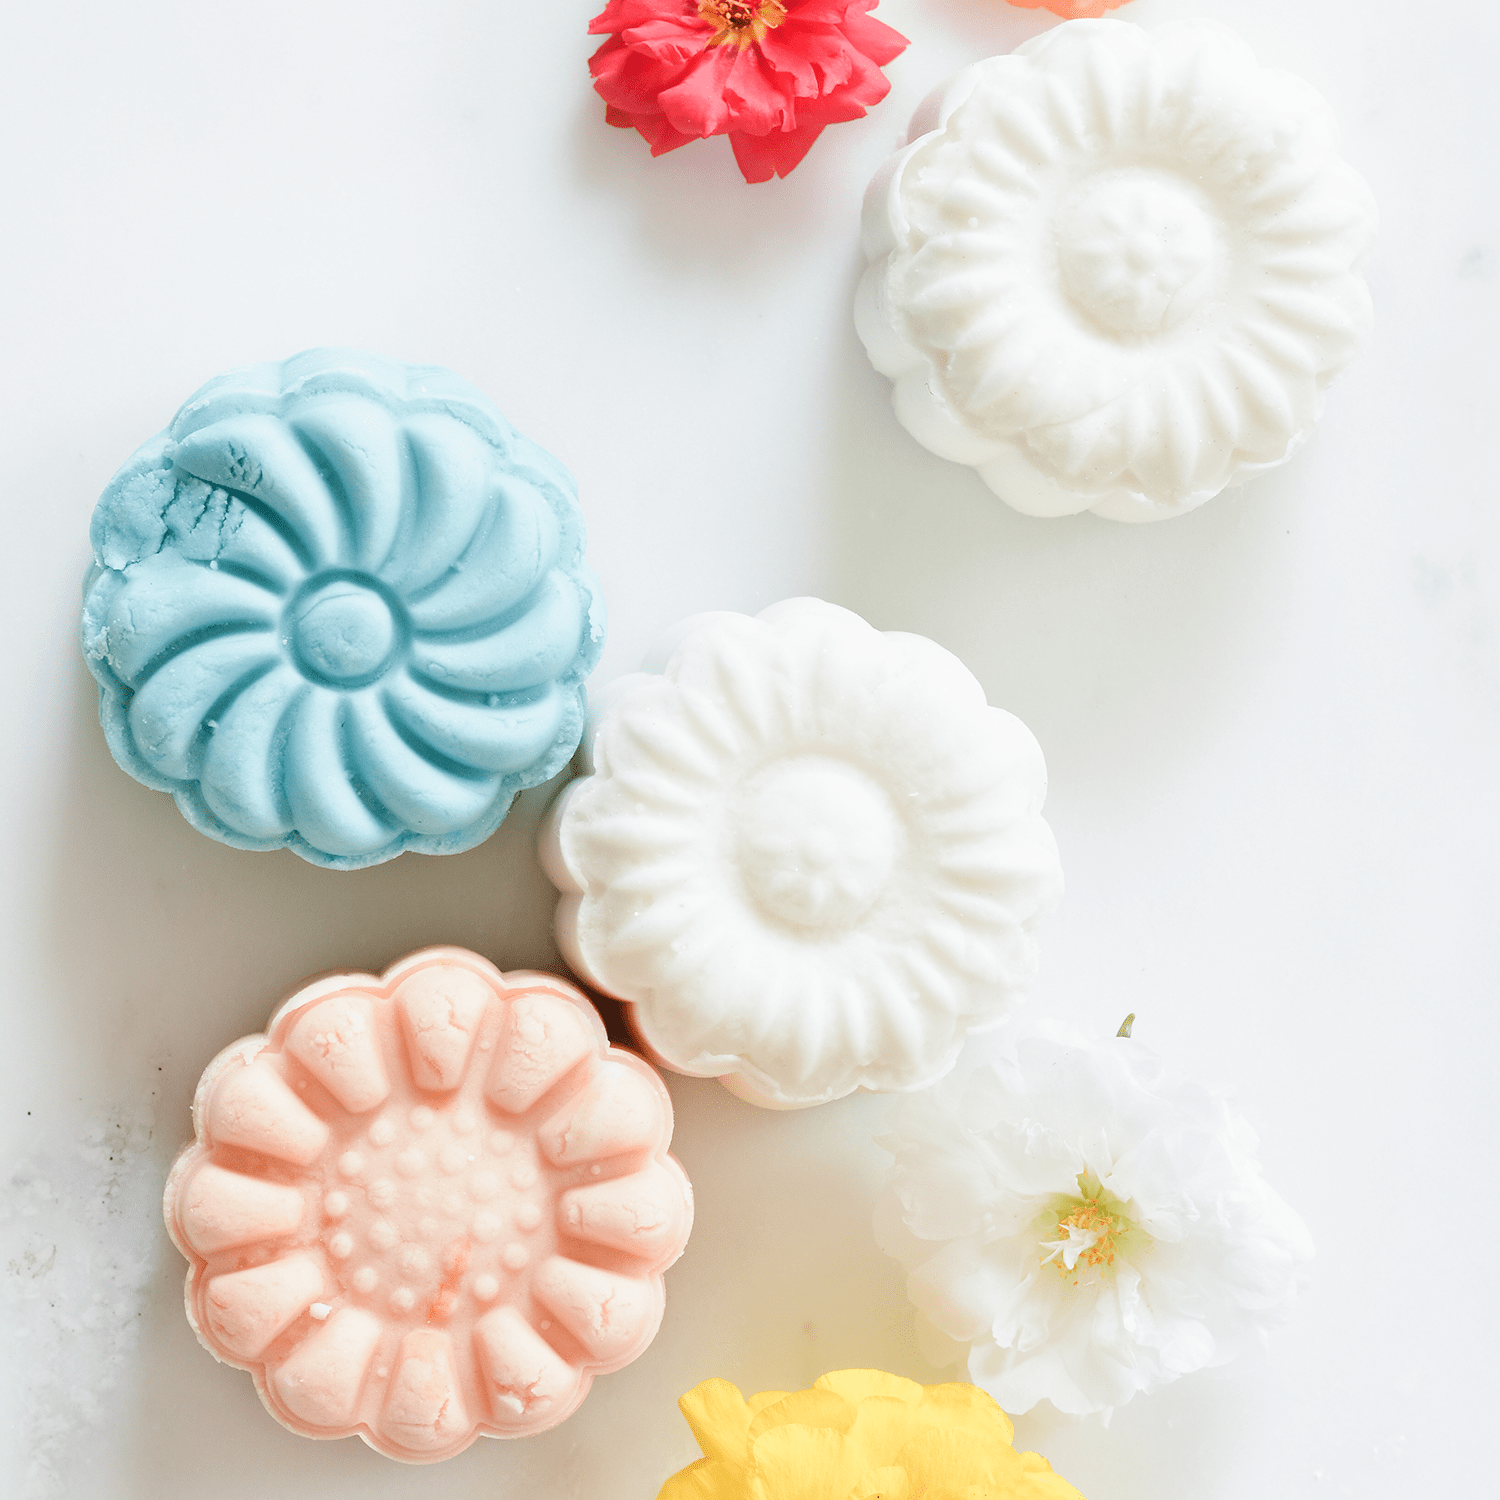
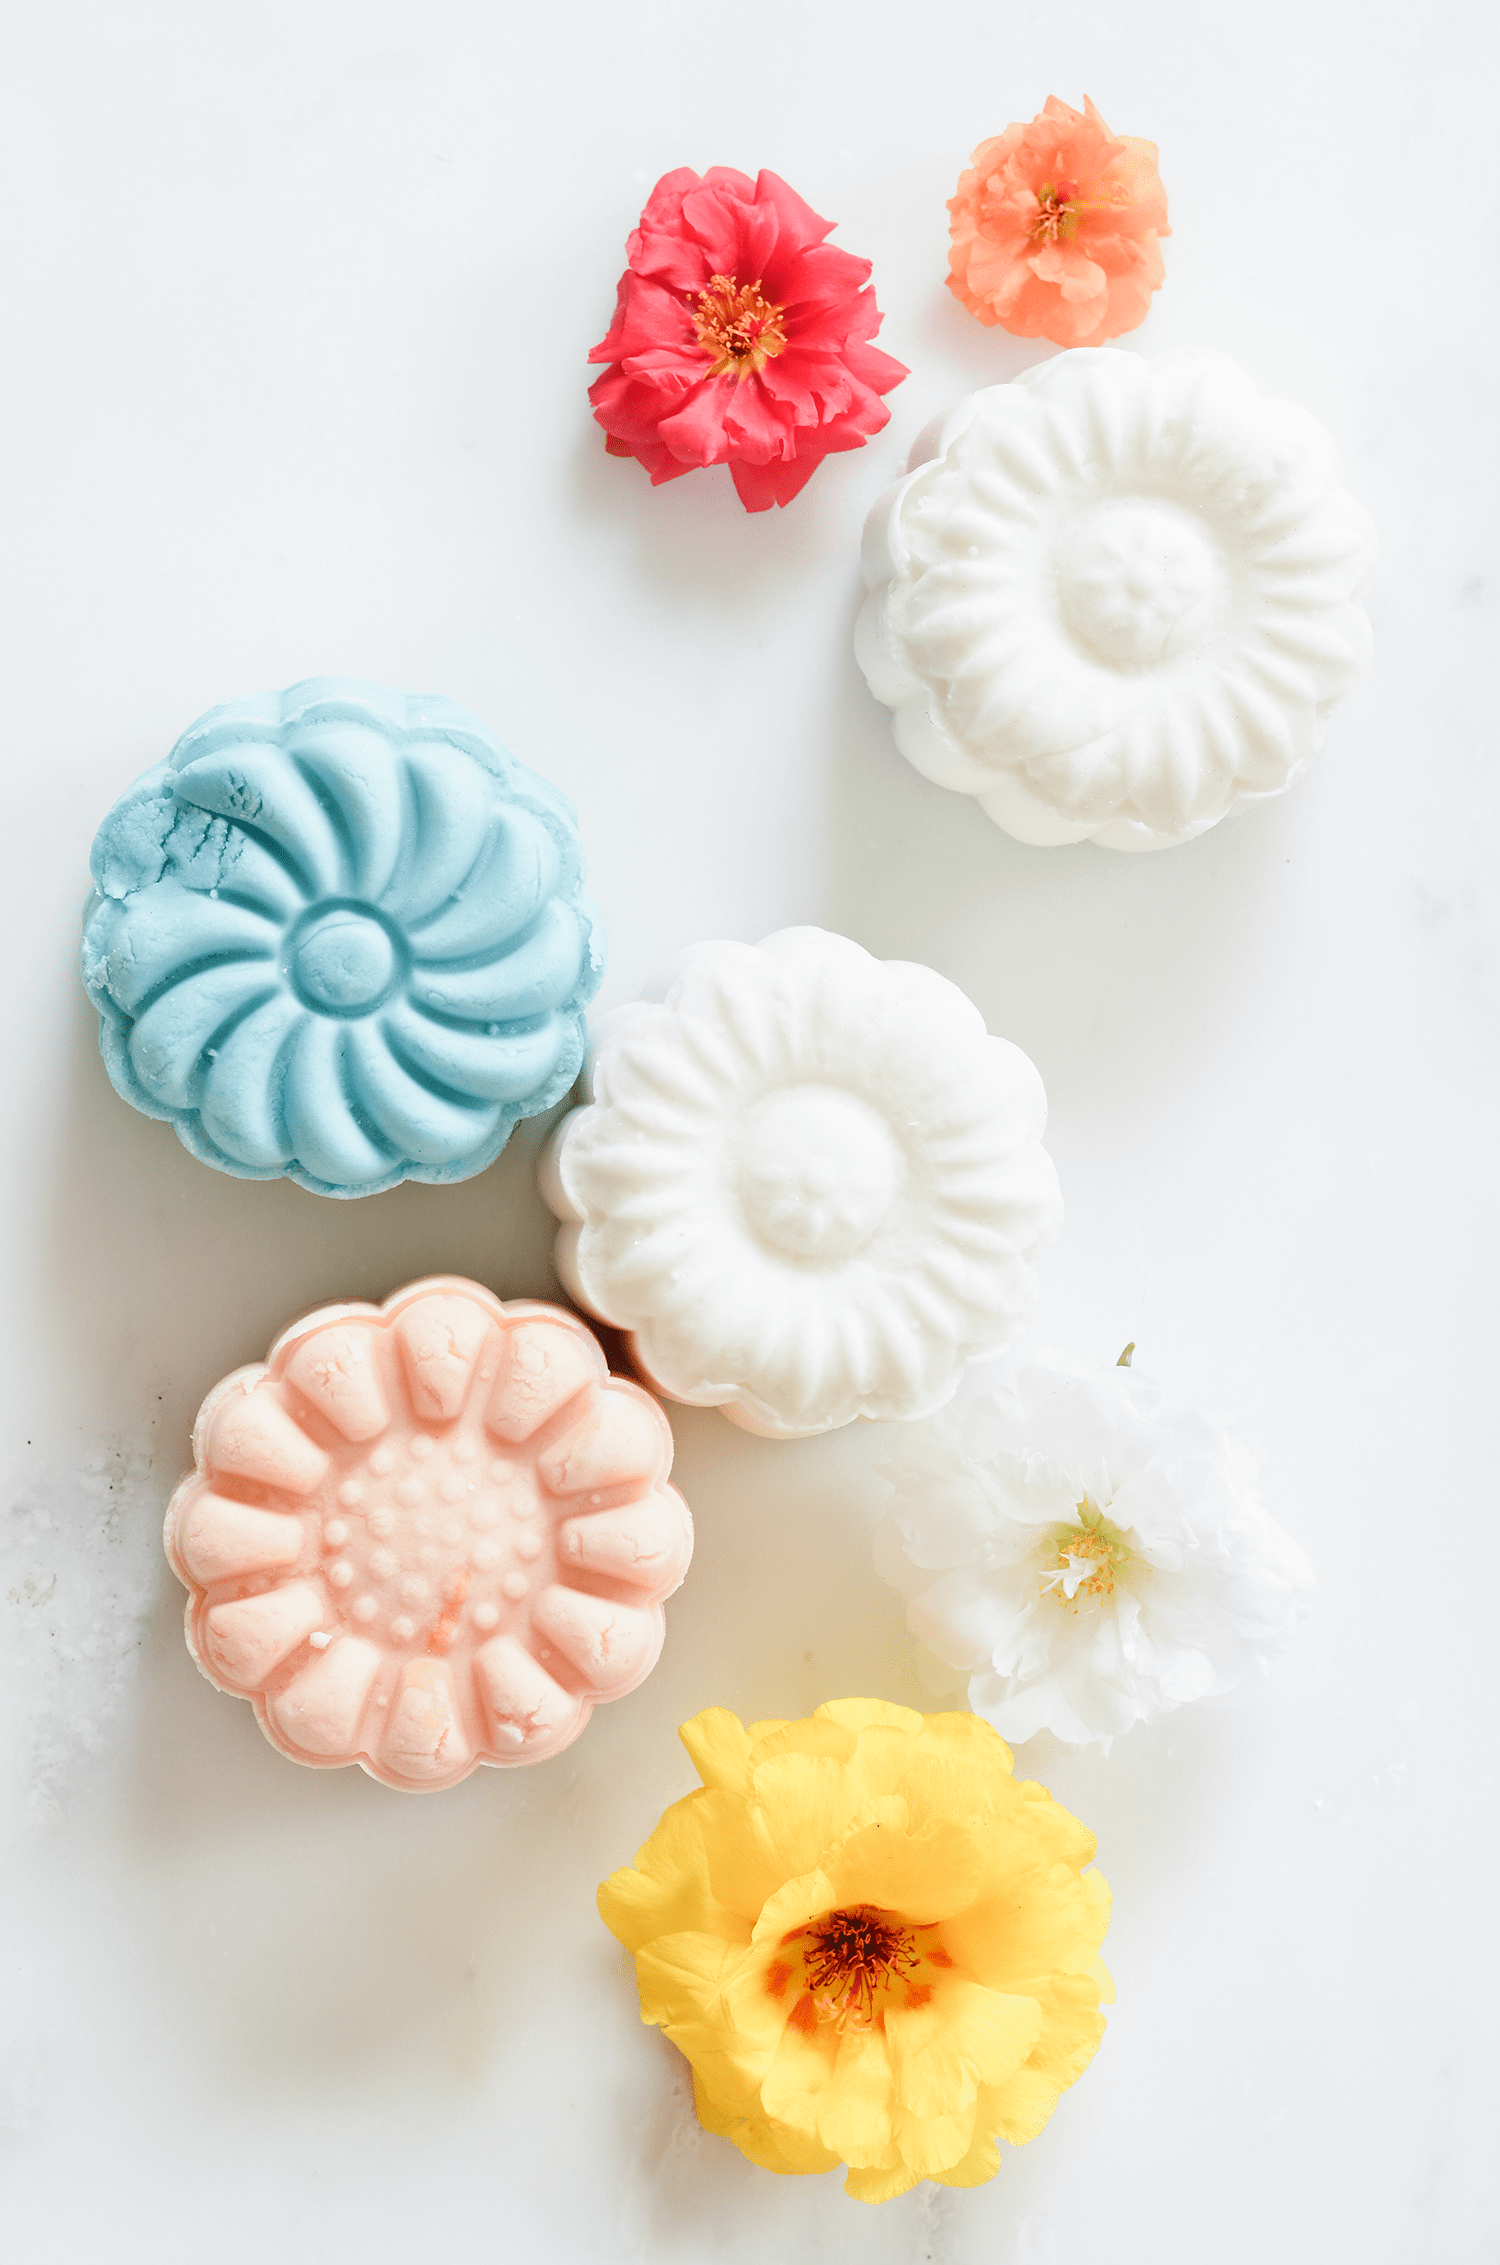
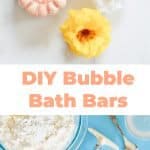
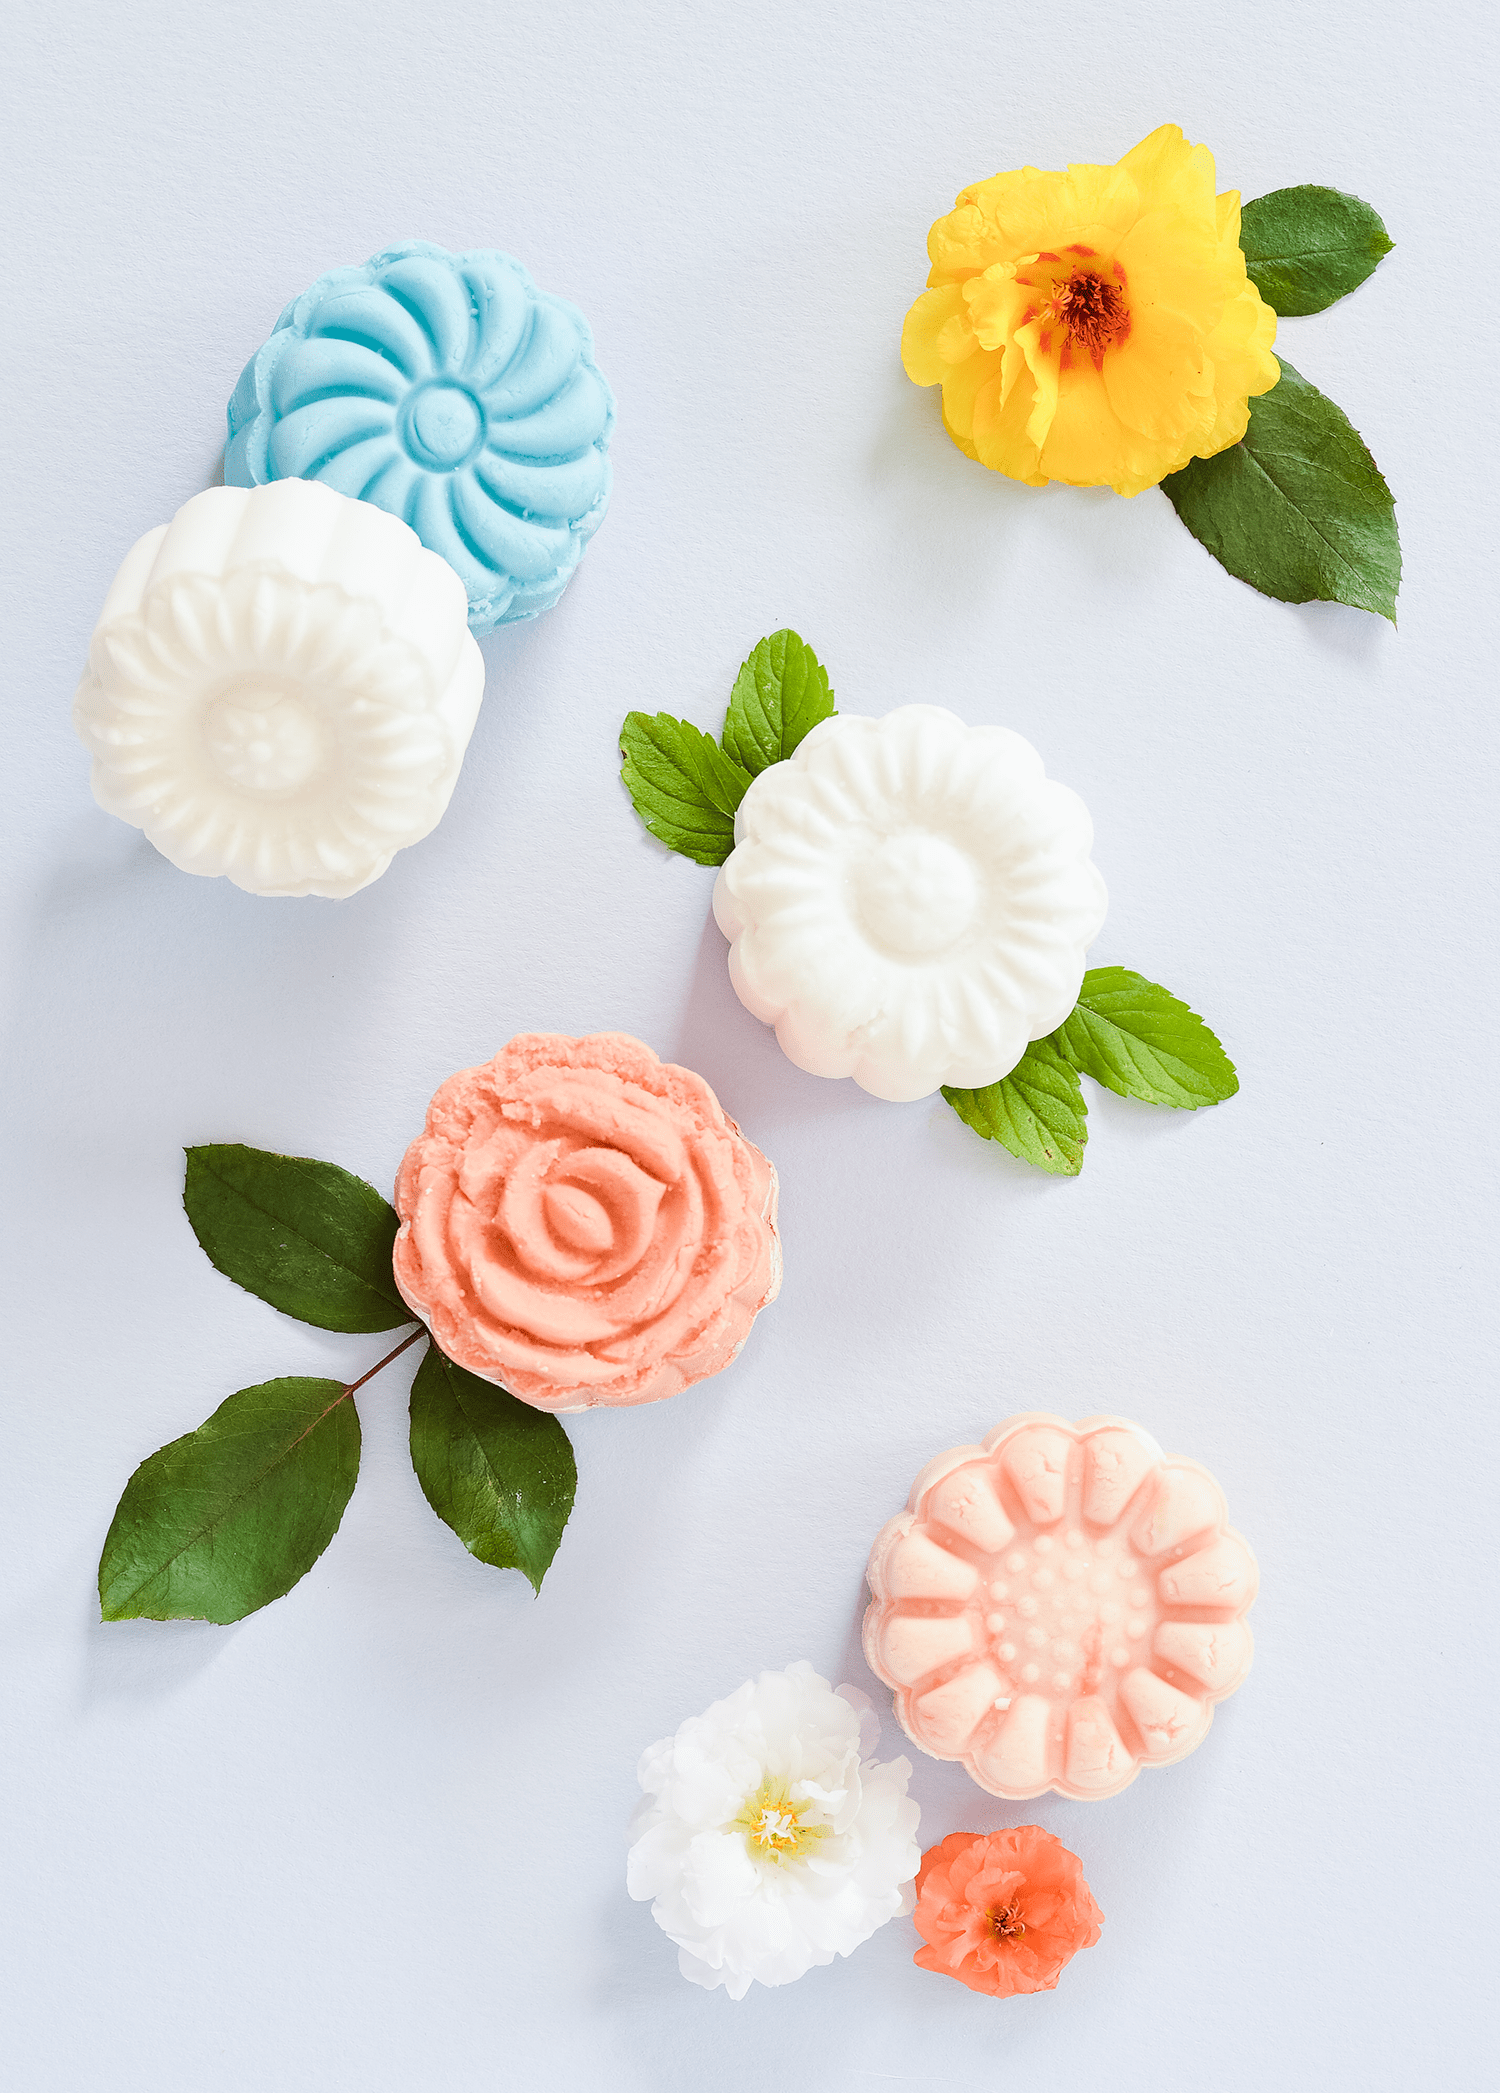 Adding color to your bubble bath bars is totally optional. I actually ended up liking the bars that I left white best of all. You can’t see it very well in the photos, but I added a tiny bit of cosmetic glitter to the white bars. They look so cute!
I used natural food dye (I like this one) to color my other bars, and they produced some really mellow, earthy tones. If you want a brighter, more rainbow-inspired color, you can use regular food dyes, soap dyes, or cosmetic mica colorants instead.
Most bubble baths are scented, so this recipe may already have a mild scent from that ingredient. If you want a stronger scent, try adding a few drops of your favorite skin-safe essential oil to this recipe. I added a little neroli essential oil to amp up the aroma of my bubble bars. They smell SO good.
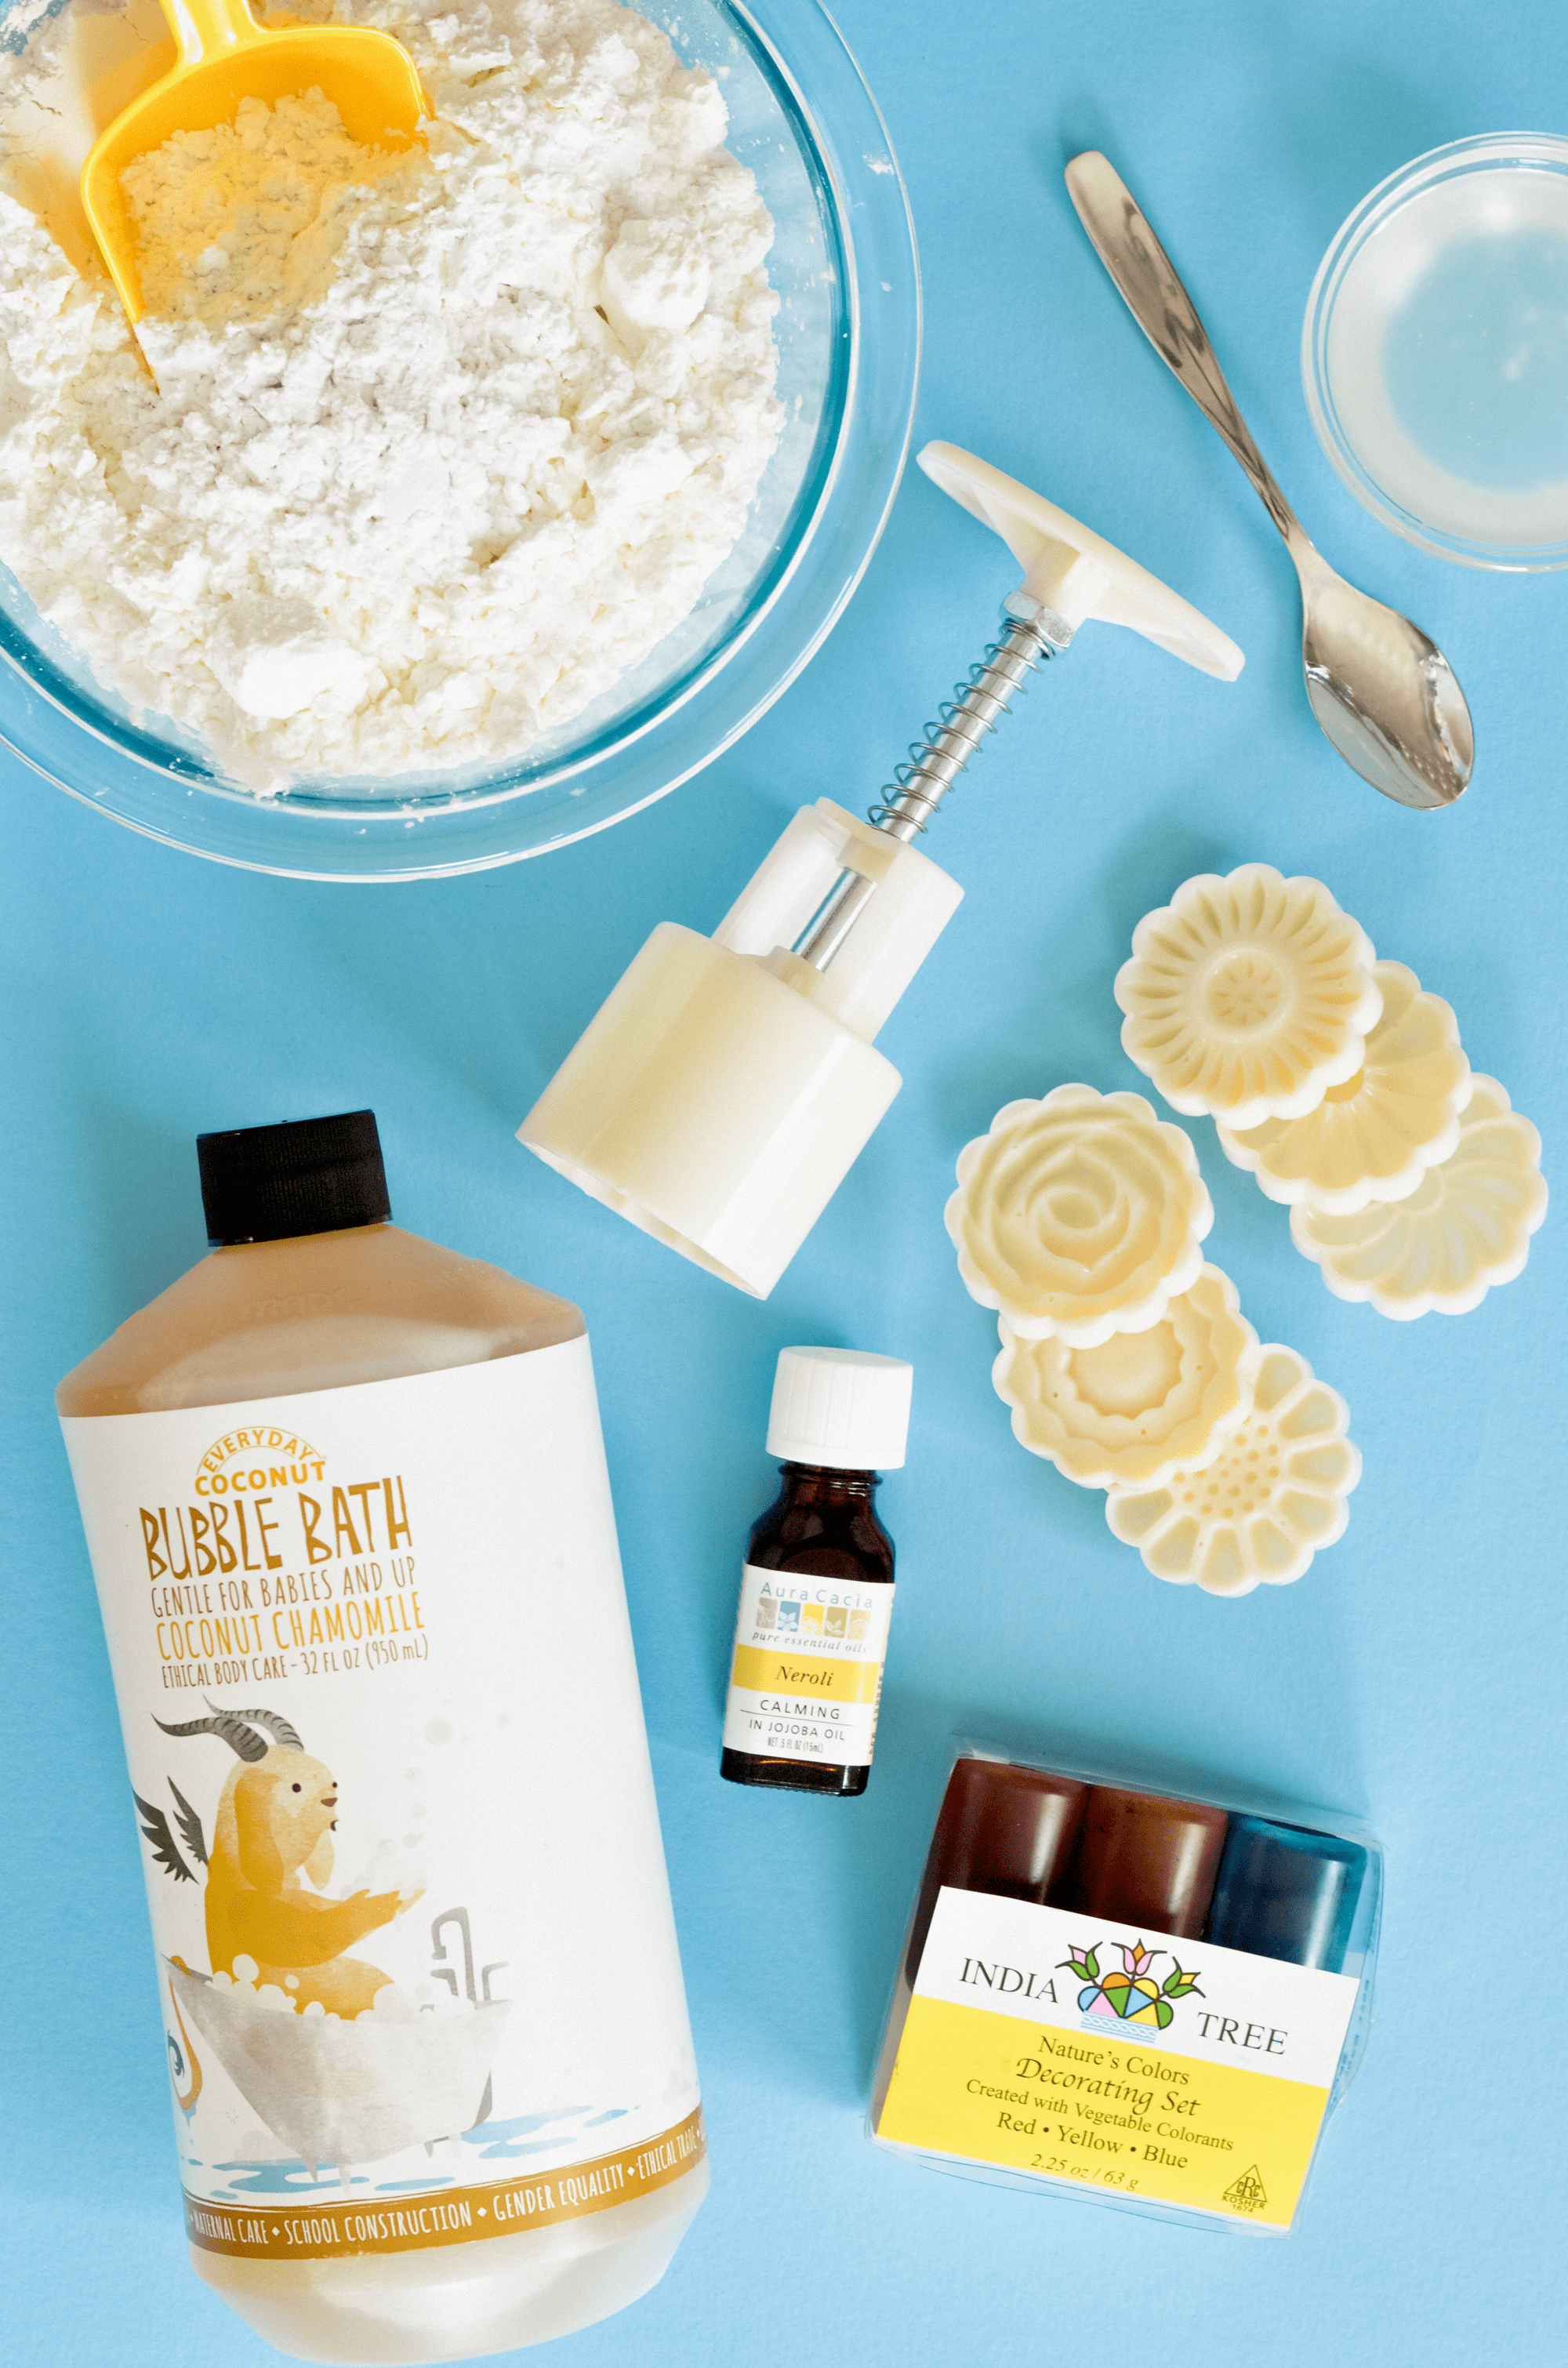 Supplies:
-1 ½ cups baking soda
-1/2 cup cornstarch
-1/2 cup arrowroot powder
-2 tablespoons cream of tartar
-3/4 cup liquid bubble bath (I used this one)
-2 tablespoons melted virgin coconut oil or shea butter
-2 tablespoons vegetable glycerin
-food or soap dye, as needed (optional)
-5-10 drops essential oil (optional)
-4 quart microwave safe bowl
–mooncake mold
-baking sheet lined with silicone mat or wax paper
–cello bags
 Step One: Whisk the dry ingredients together and break up as many clumps as possible. Add the liquid ingredients (except for the dye or essential oil) next.
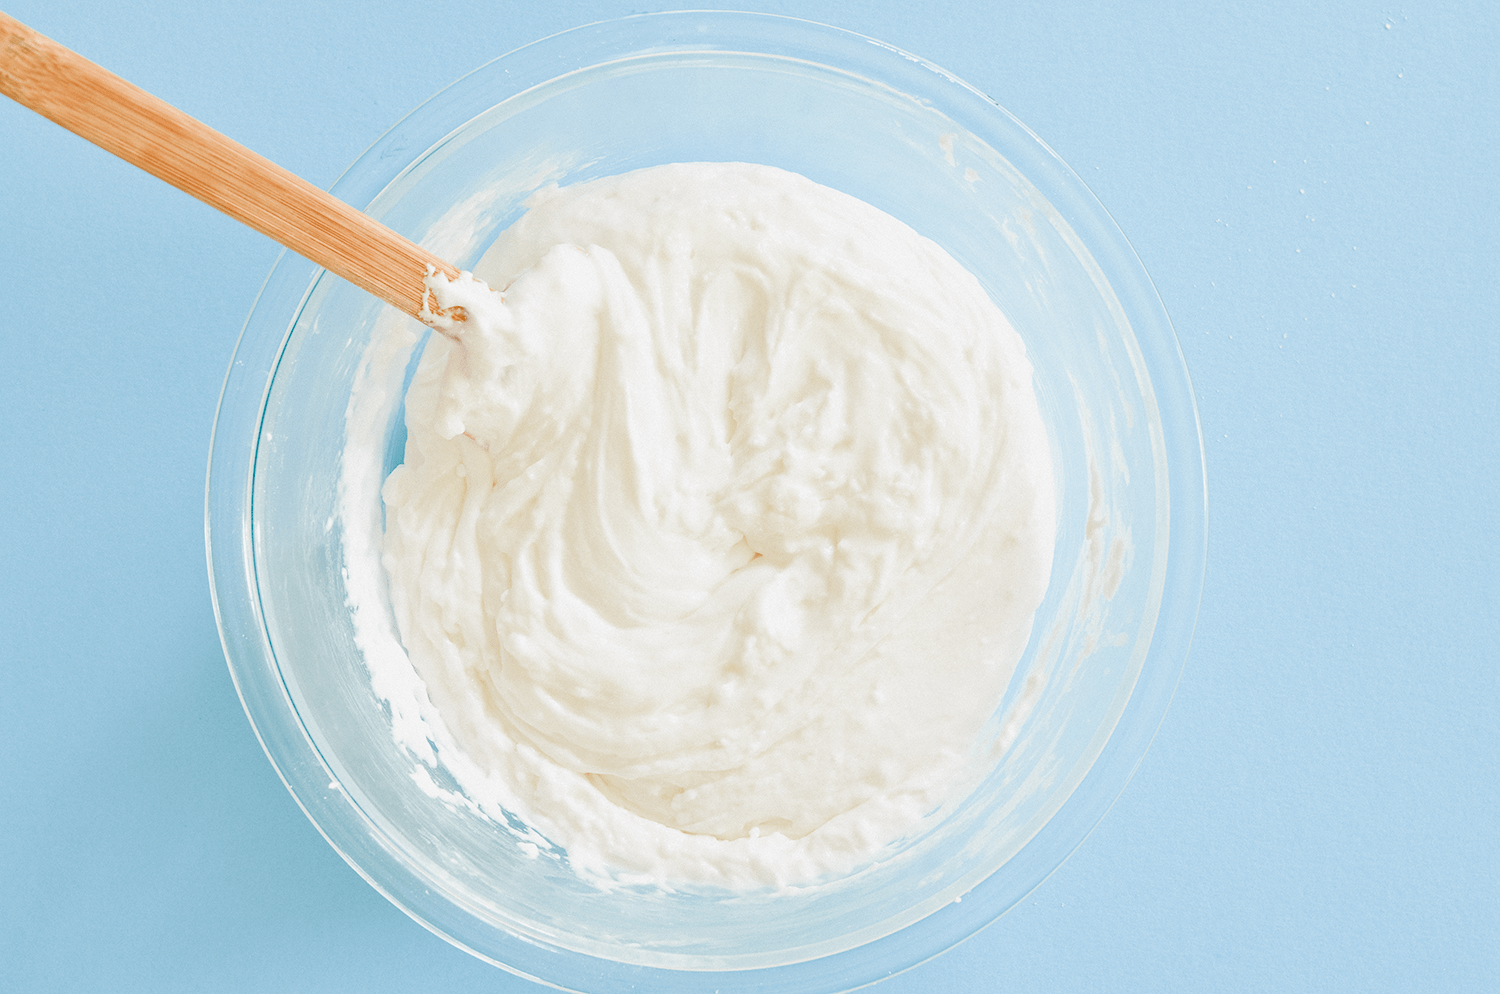 Step Two: Stir everything together, then pop it in the microwave for one minute. Watch your bowl to make sure it doesn’t bubble over the sides.
Stir the mixture well, and then repeat again and again until the mixture thickens up and starts to resemble dough. After five trips into the microwave, my dough looked like this. It was thickening up, but still more like batter than dough.
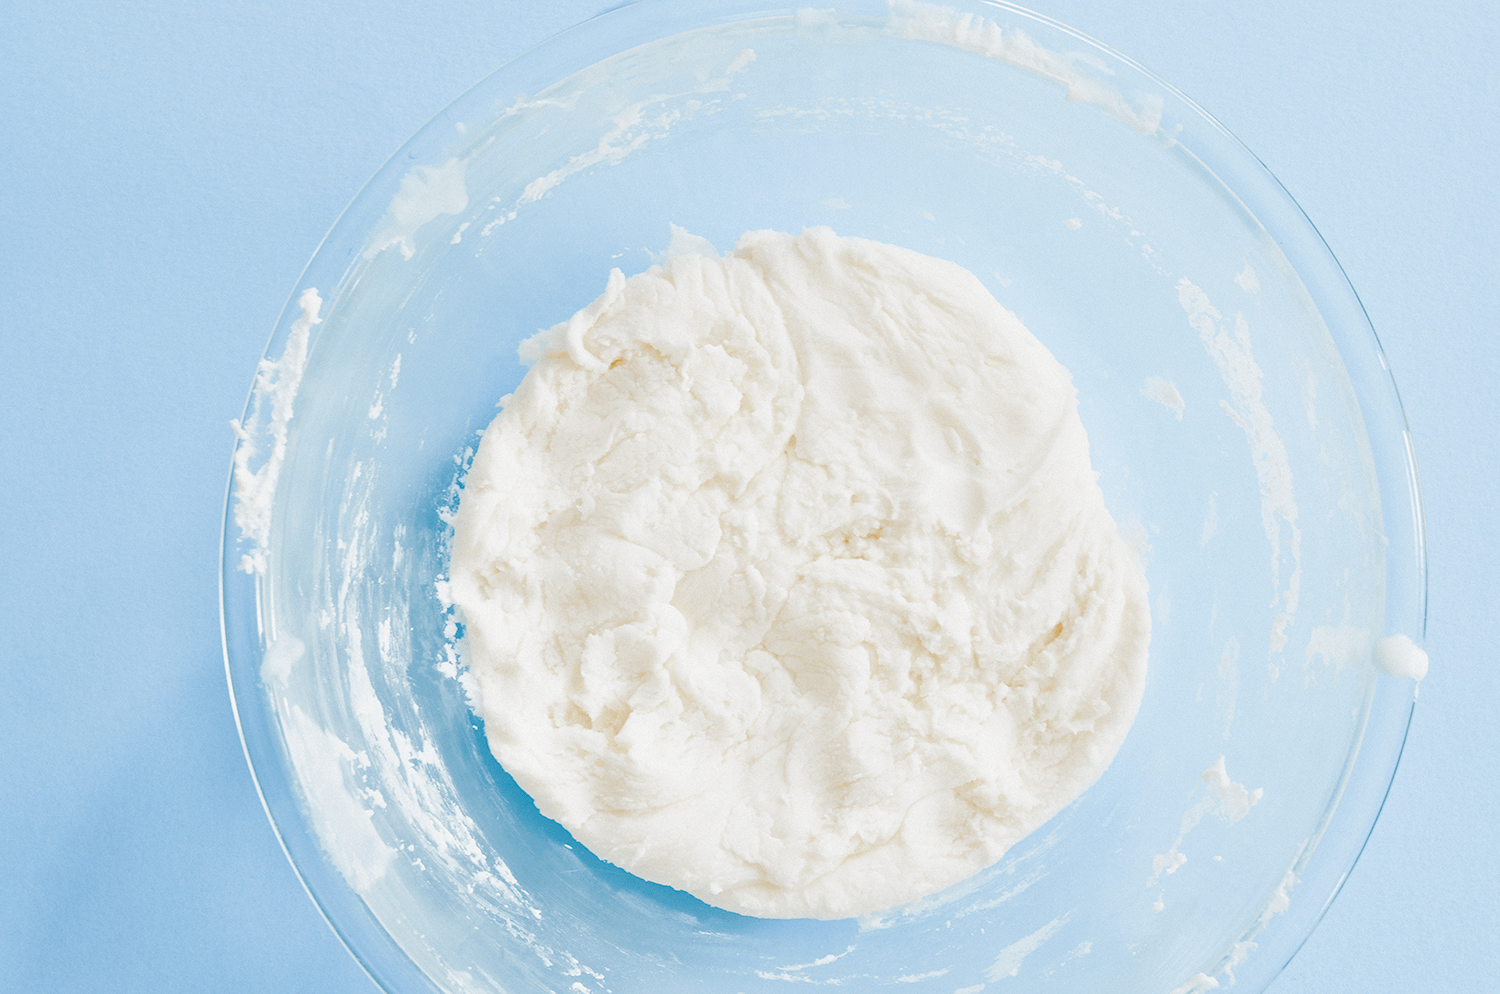 Step Three: Continue microwaving the dough, but reduce the time to 30 seconds for each round. Continue doing this until the dough becomes noticeably thicker and stops sticking to the sides as easily.
It will probably take another five to ten trips into the microwave to get to this point. Since microwaves vary in strength, you’ll have to just keep an eye on it as you go.
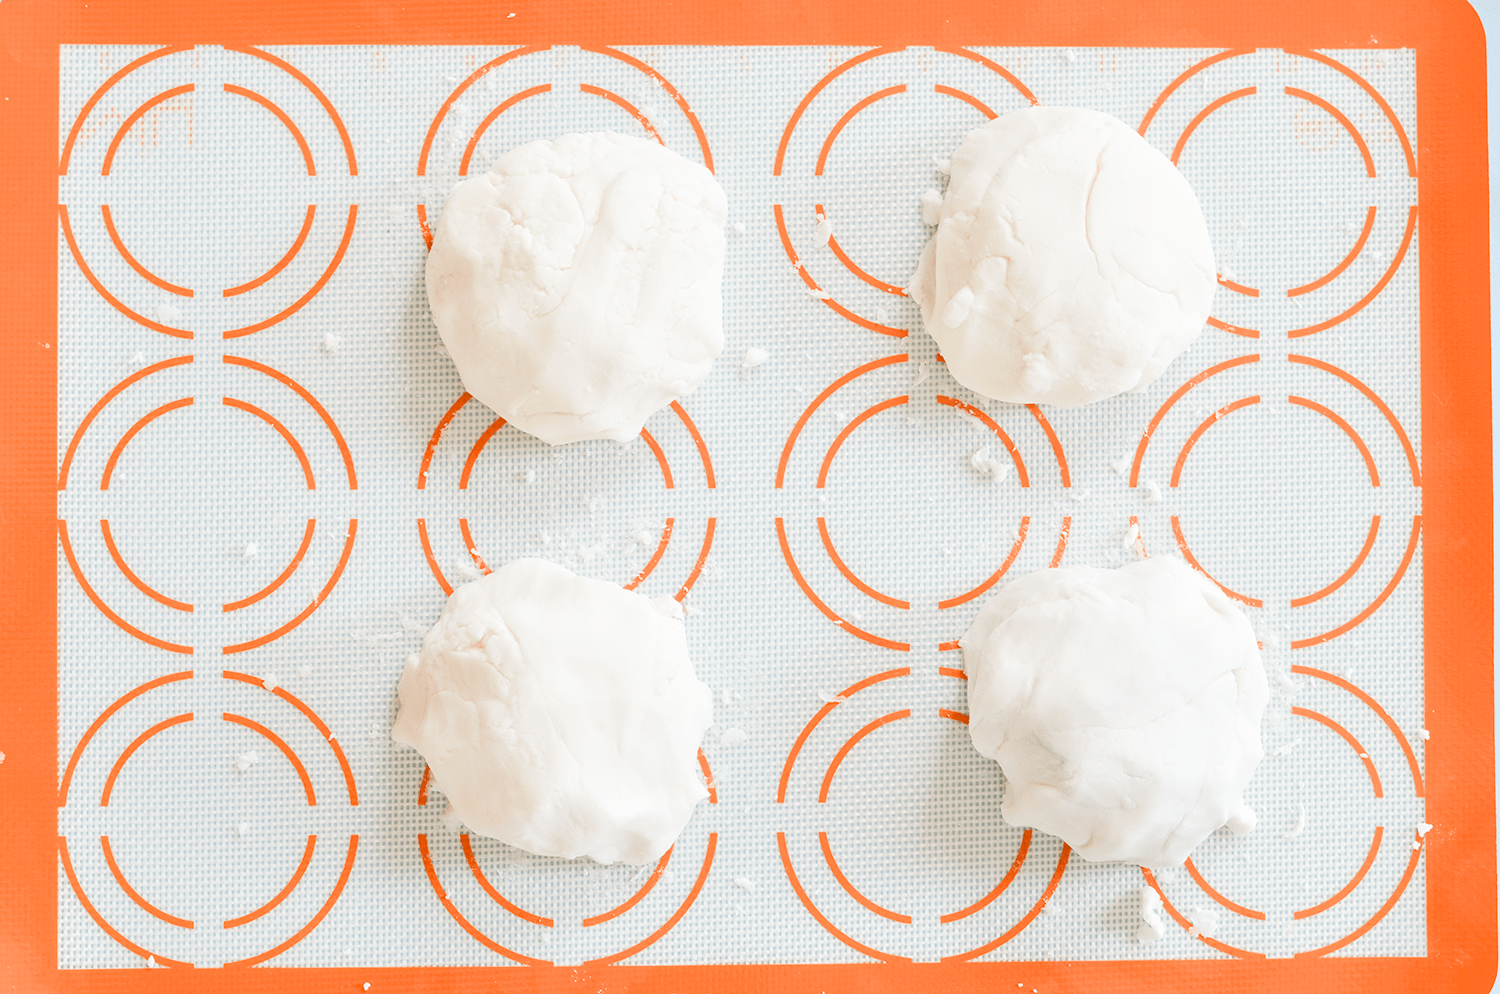 Step Four: Divide the dough into four parts and turn it out onto a baking sheet, preferably lined with silpat dusted with a little cornstarch. Sprinkle another pinch of cornstarch over each piece of dough, and then squish it flat to help it cool down.
 Step Five: Allow the dough to cool to room temperature, and then knead it until it forms a smooth dough. If the dough seems too sticky, you can add a little bit of extra cornstarch to dry it up.
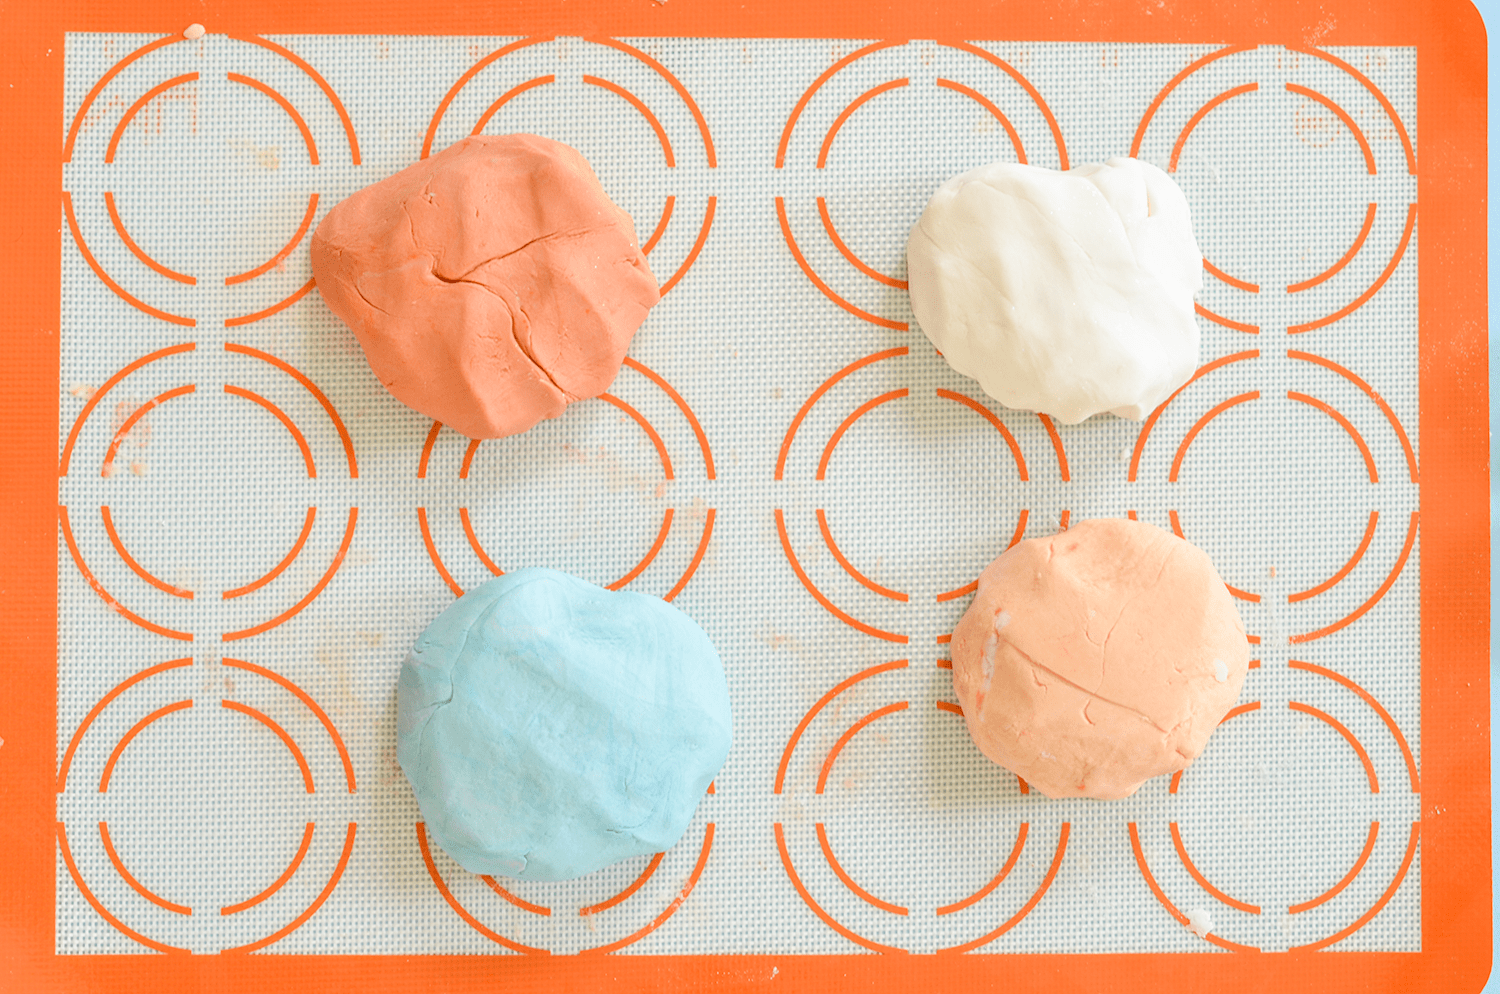
To add color or scent, press a dent into the middle of the dough with your finger, and then add a few drops of dye or essential oil (or a big fat pinch of glitter). If you are using natural dyes, make sure the dough is totally cool before you add them or they may morph or disappear! Fold the ingredients into the dough.
Then knead them until they’ve been well blended. I recommend wearing gloves for this step to avoid dyeing your hands or being over-exposed to the essential oil.
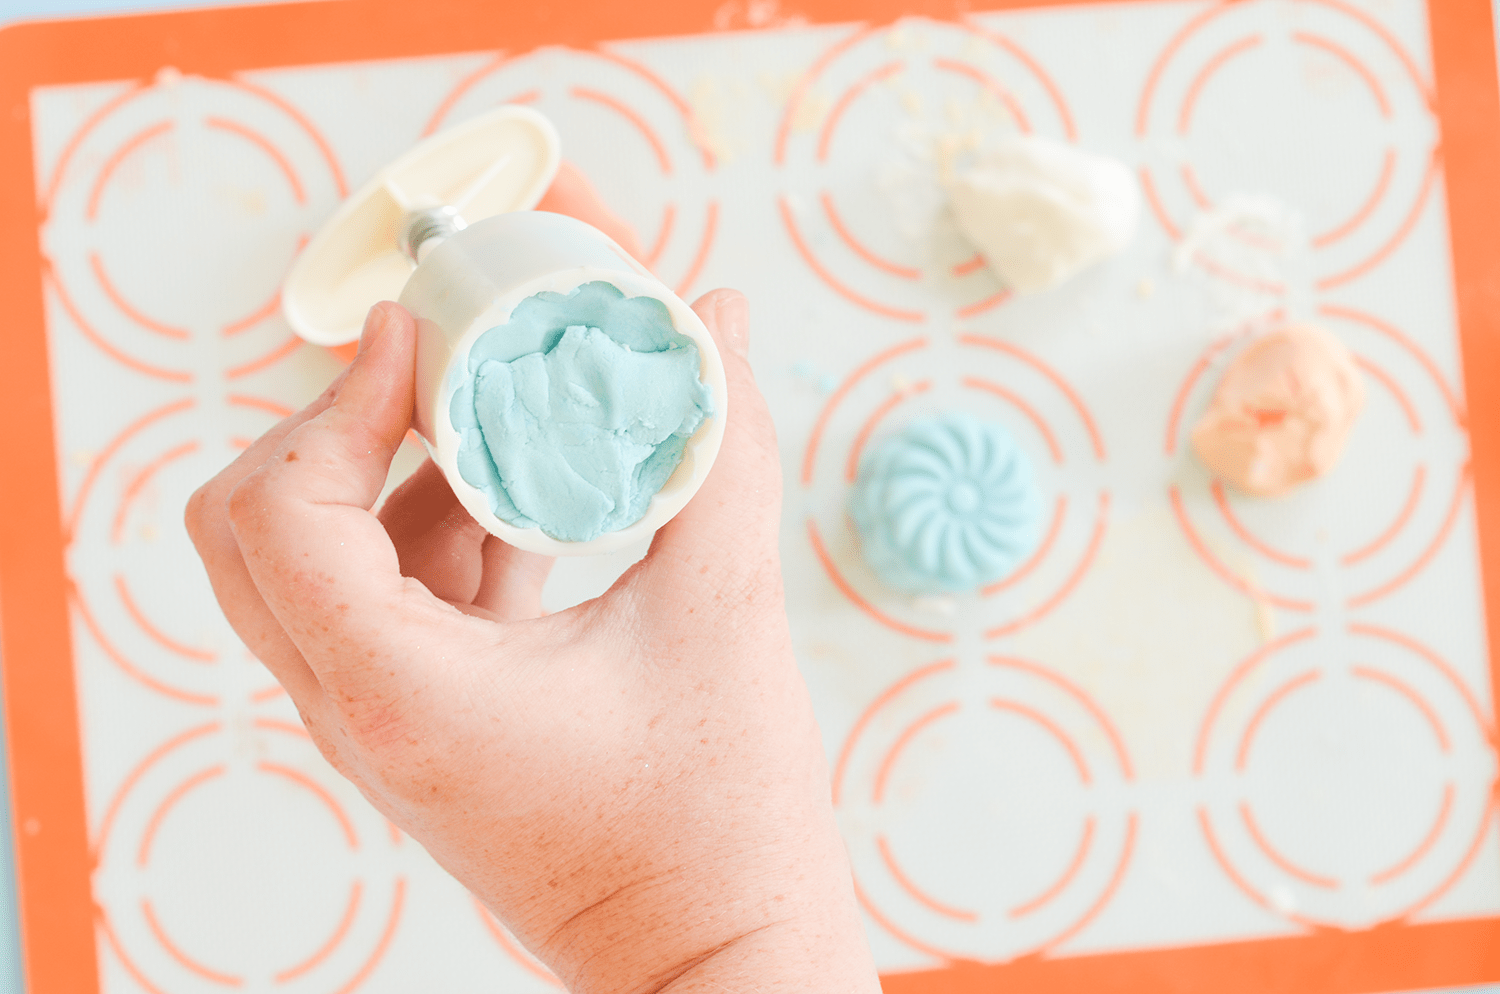 Step Six: Fit the mooncake mold with whichever stamp you like and click it over to secure it in place. Pack the mold with dough, and then press it down to pack it tightly. Push the bubble bath bars out of the mold and set them on your baking sheet to dry.
I lined my sheet with wax paper at this point because I wanted to free up my mat, but you can use either one for this step. If the bars are too sticky on the top or bottom, or are sticking in the mold, try dusting the dough with cornstarch before molding.
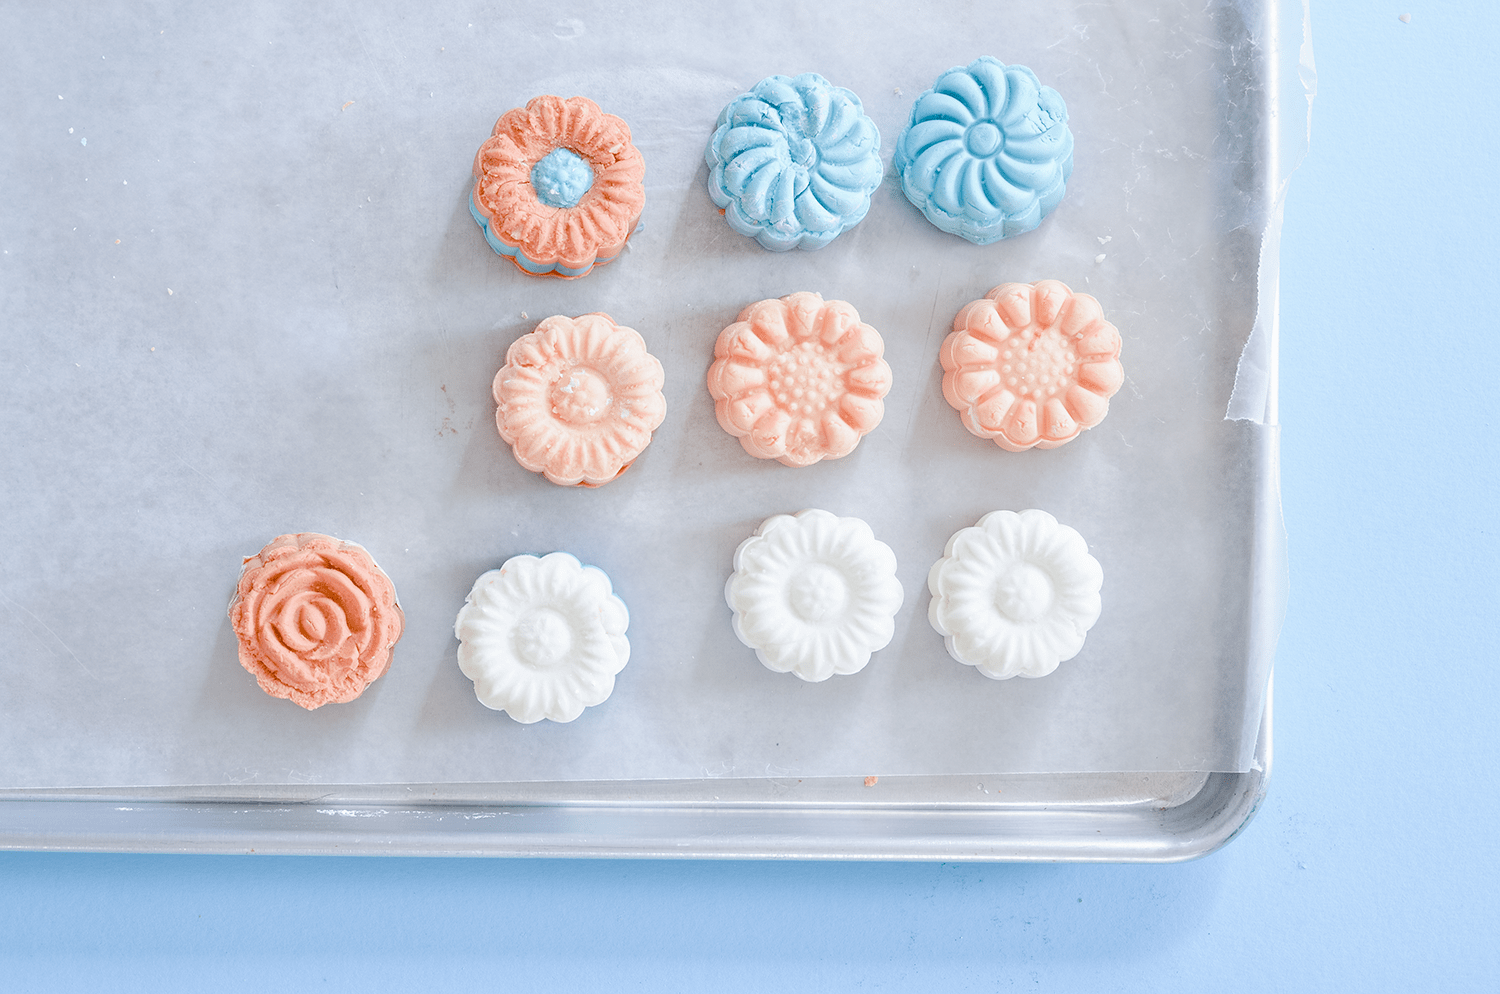 Step Seven: Allow the bars to cure in a cool, dry place for 24-72 hours. They should be nice and firm when they are ready to be packaged. Wrap them in cello bags to help keep them fresh.
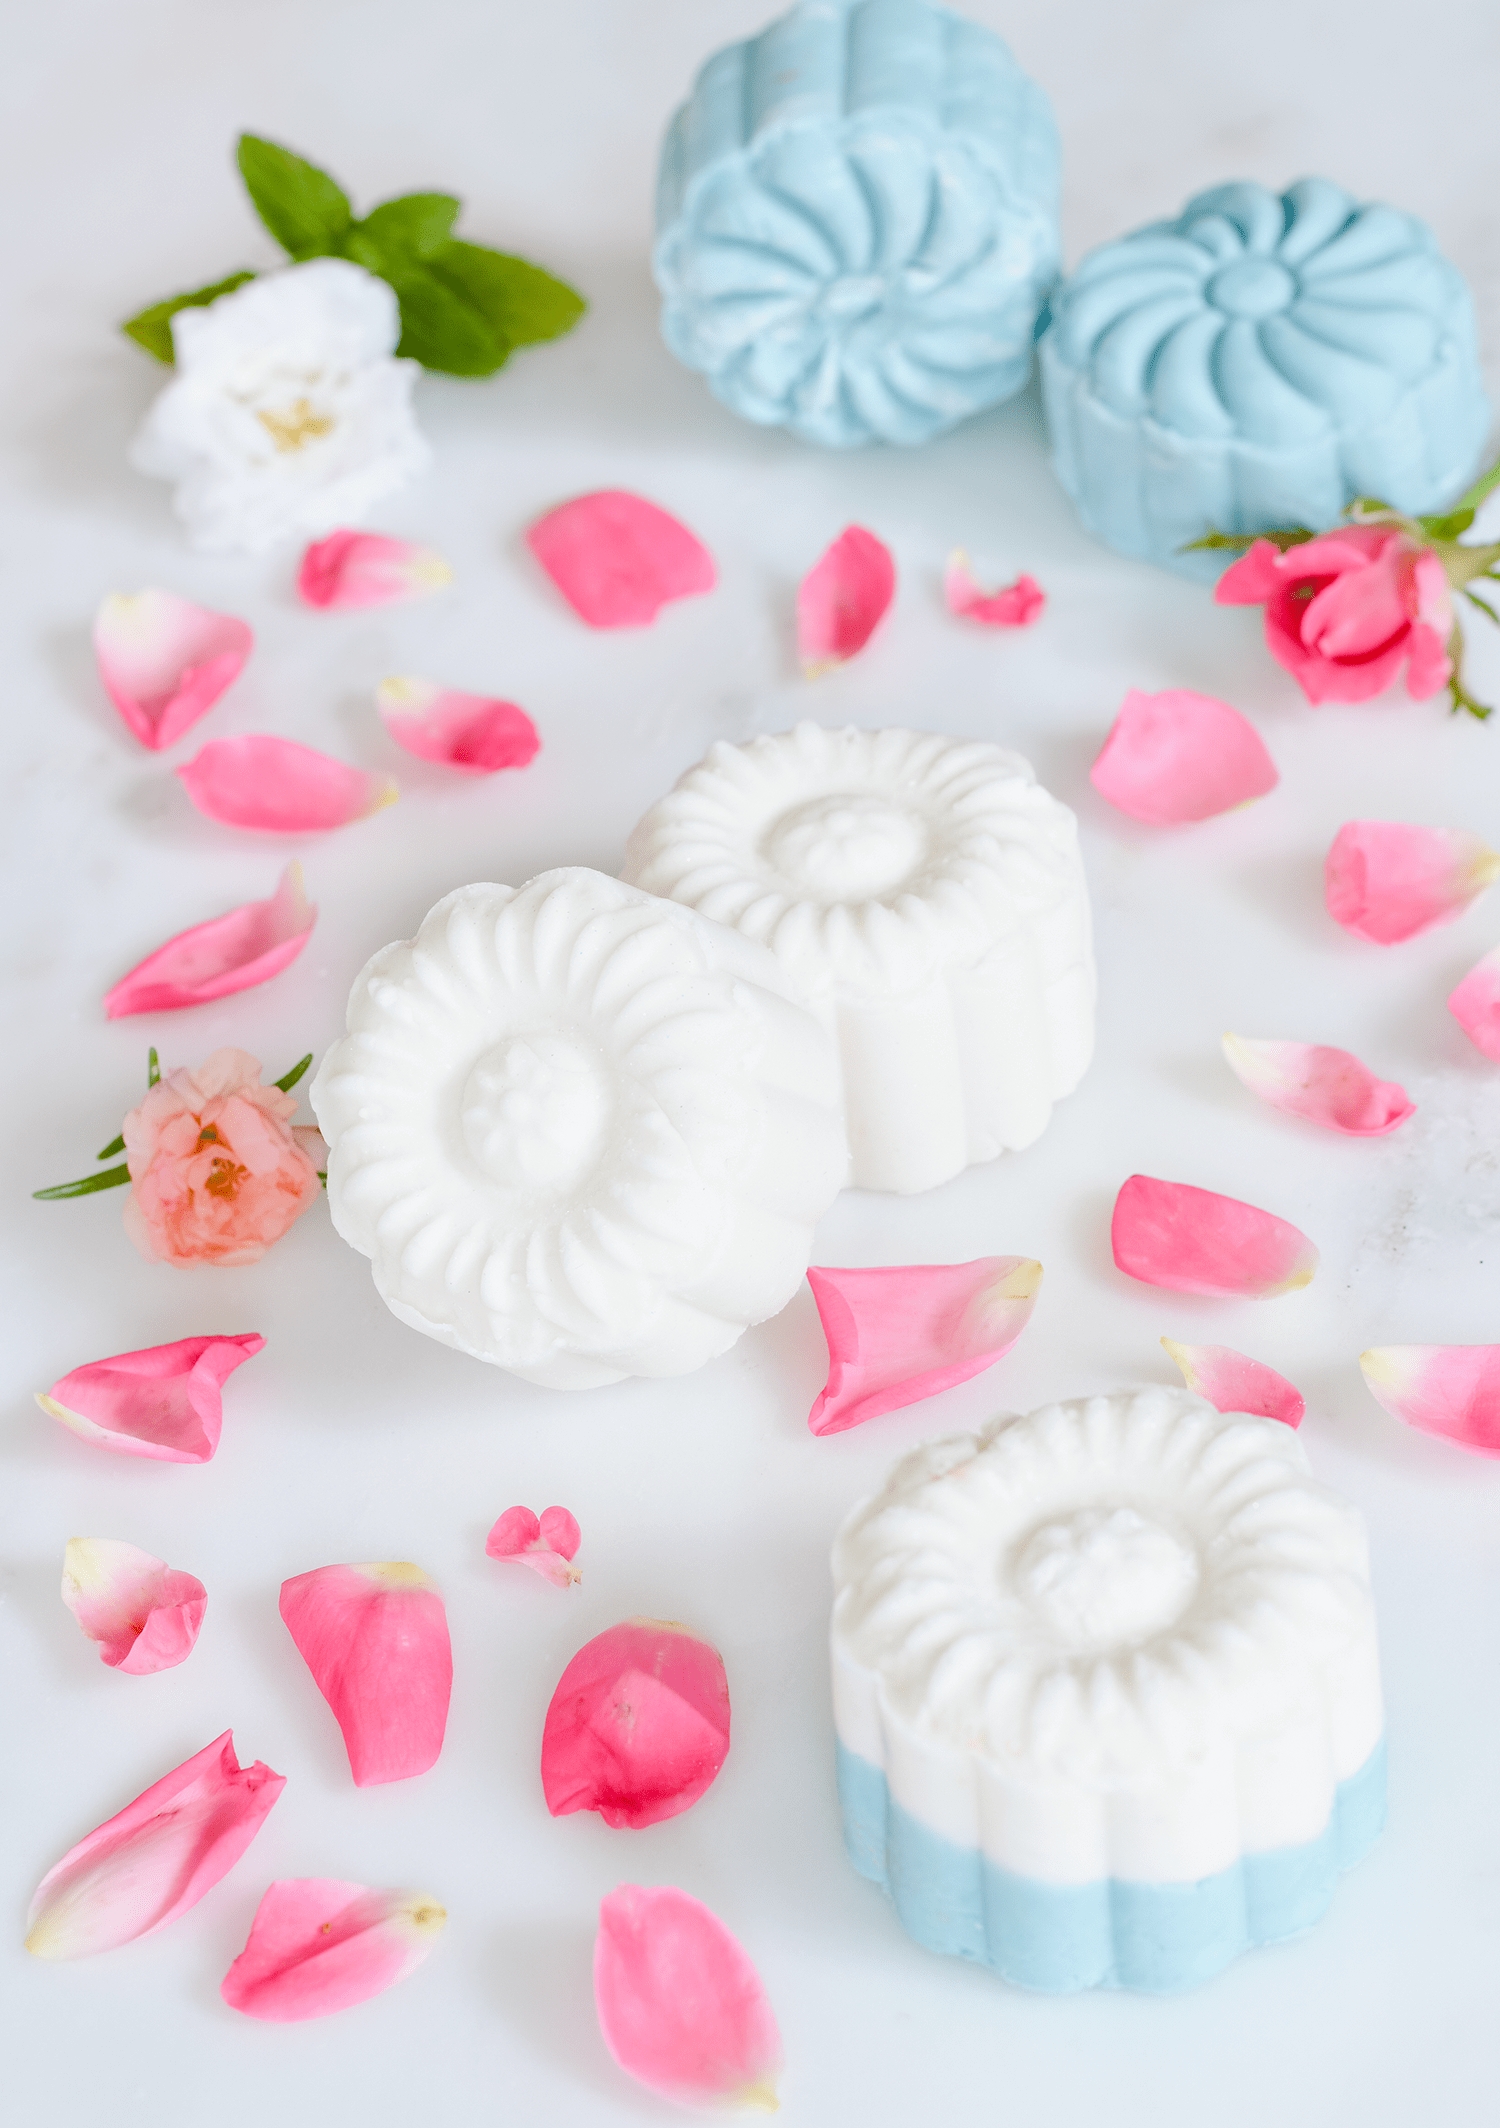
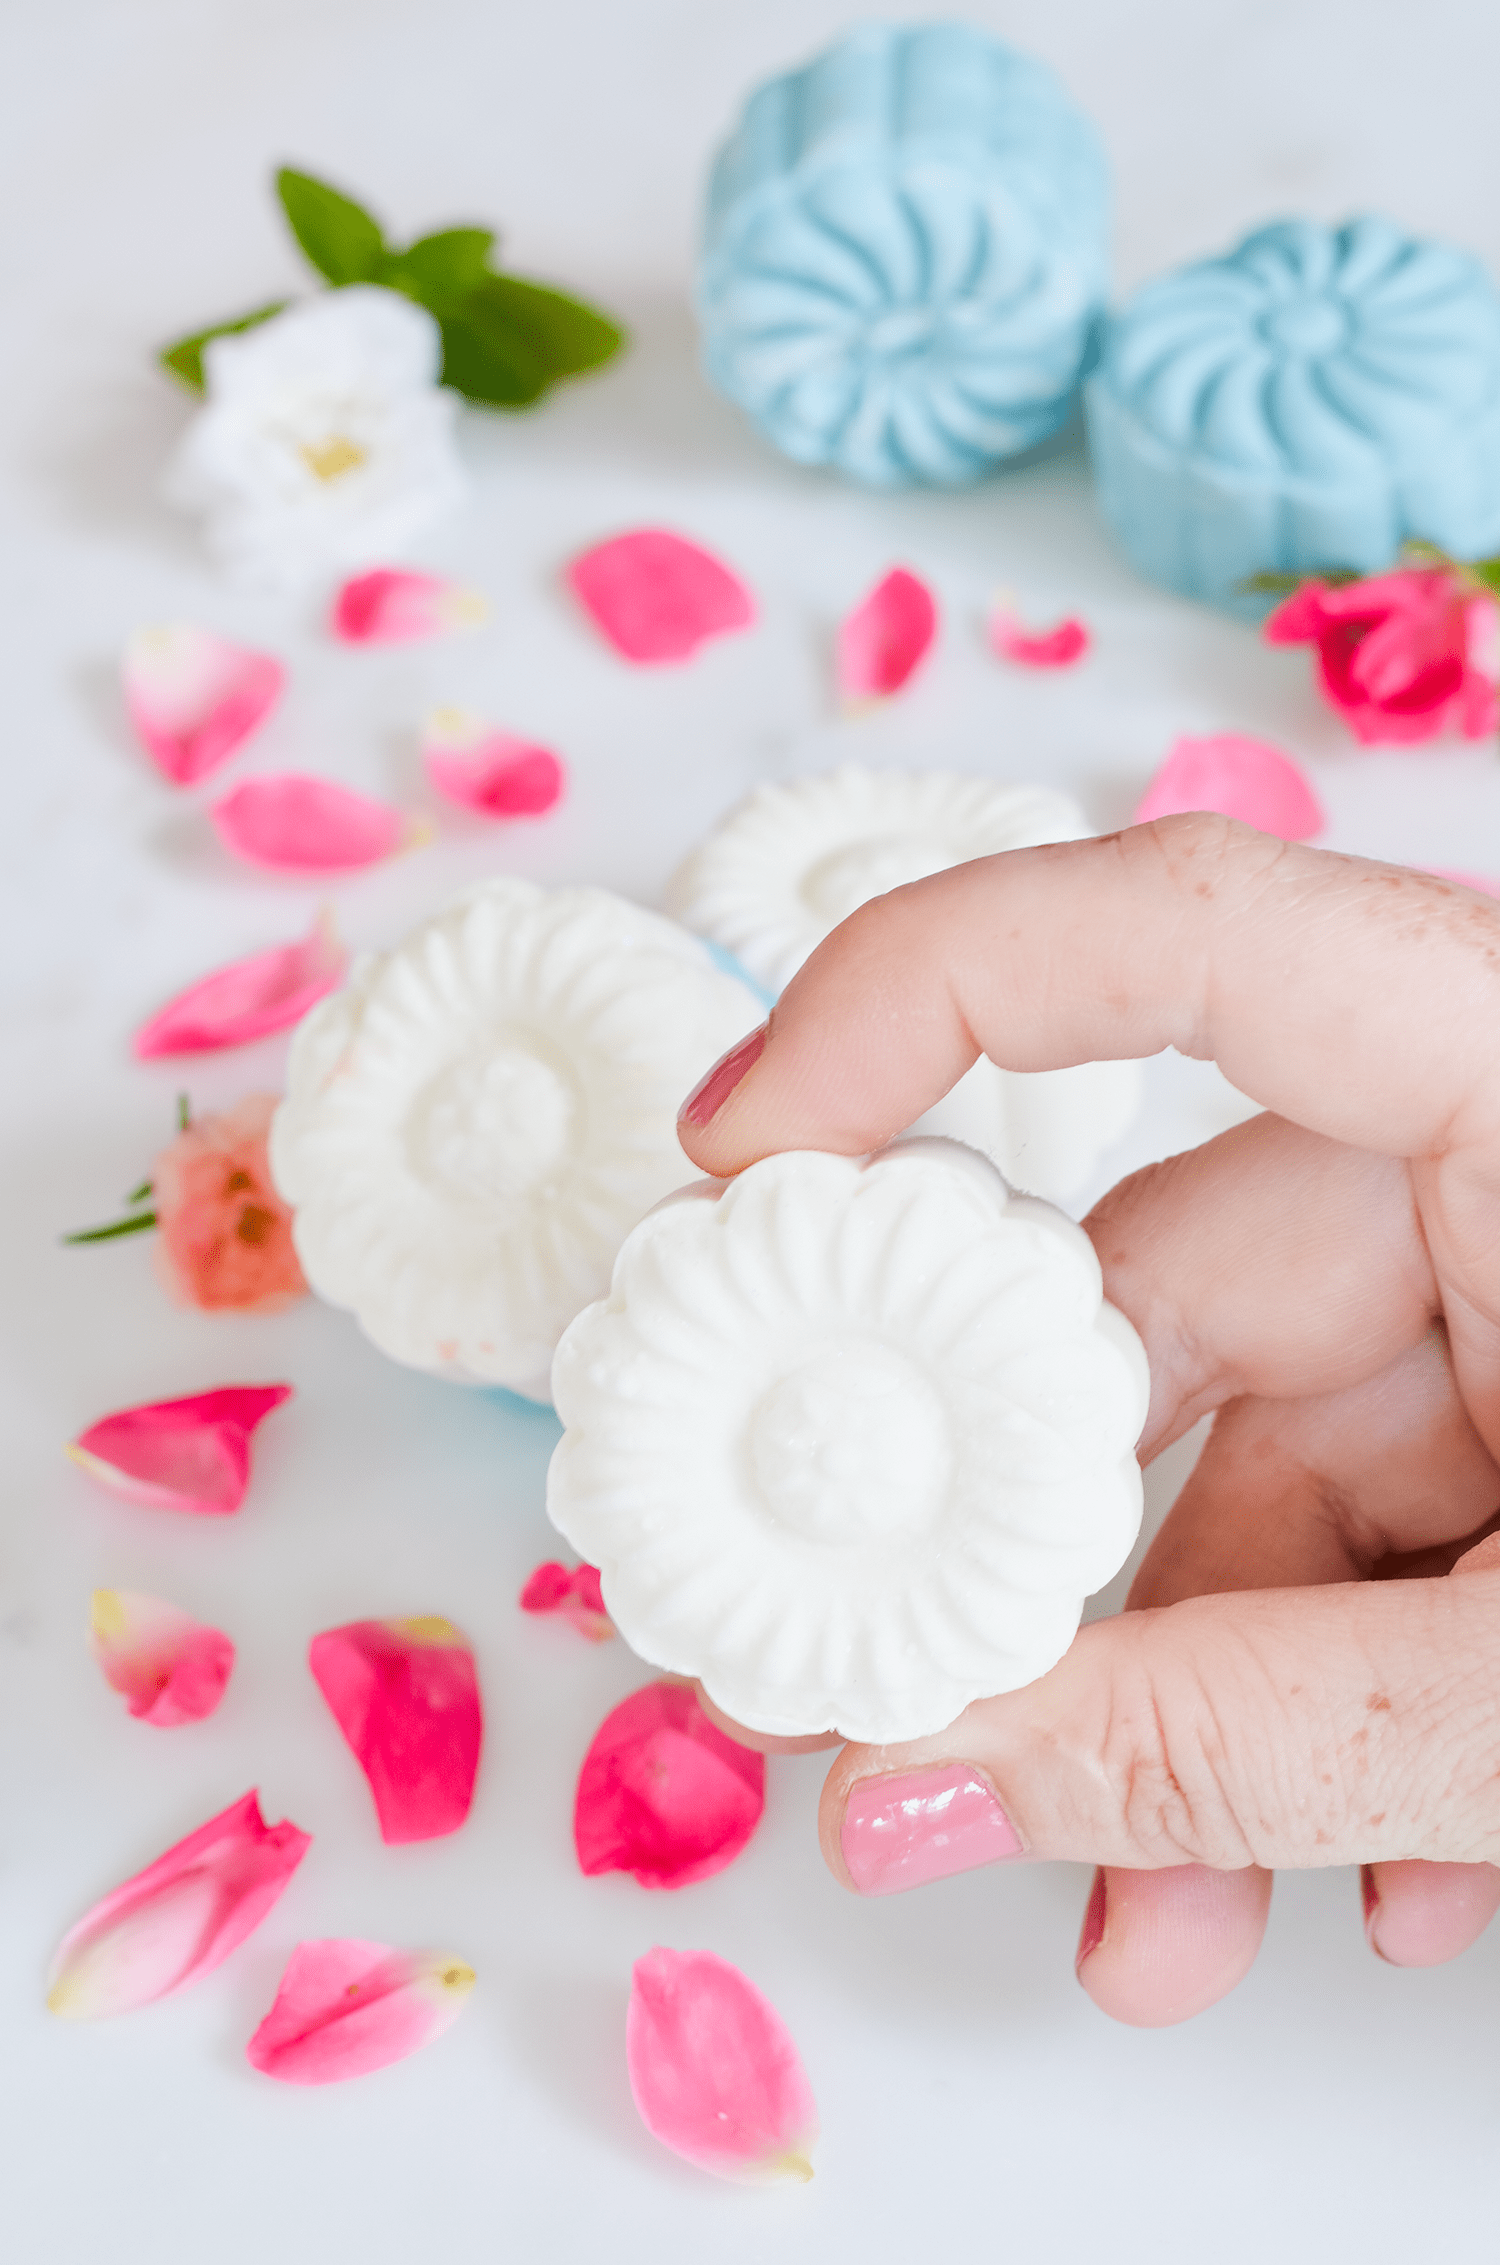
 To use, crumble the bar under running bath water. Fluffy suds should form as the bar dissolves. Bubble bath bars make excellent gifts and party favors.
Try making them in different shaped molds and multiple colors to mix things up. You can even top your bars with dried flowers or candy sprinkles to make them even more adorable. xo. Mary Helen
I don’t get it. Cornstarch and arrowroot are the same thing!
How many does this recipe make?
I’m sensitive to hi carb is there anything else I could sub?
Help! I tried this recipe yesterday, and I feel like it has way too much liquid in it for the amount of dry ingredients. My mixture ended up being more of a foaming, shaving-cream like texture…which was cool, but not what I was looking for. I didn’t have cream of tartar so I substituted it with citric acid. I added the liquid slowly so that it would not activate the baking soda or citric acid, but the mixture was a fluffy, doughy texture after adding just half the liquid. I’m not sure what went wrong.
Citric acid is not a substitute for cornstarch. The cornstarch is a thickener, and by not using it, your mixture ended up exactly how one would expect. Citric acid creates a fizz, and that’s why it’s in all the bath bomb recipes. As far as I know, there isn’t a place for citric acid in a bubble bar. Next time, if you don’t have cornstarch, sub with another thickener such as arrowroot starch or something starchy.
Would heating in a pot on the stove top work as well as microwaving?
Thanks
Trudy
Don’t have a microwave so I made them on the stovetop, worked really well! Need to mix constantly so it doesn’t stick to the bottom of the pot. Took about 15 min on low heat.
Hi I made these and they were very easy to make but I didn’t get much bubbles. The one I used wasn’t completely dry but not sure what happened any ideas?
Thanks for this recipe! I intend on making it for all the little girls in my world….and I got started, but in my haste to get it done in time, I accidentally put in CORNSTARCH instead of the Arrowroot powder – will this make a difference, do you think? I’d hate to waste the baking soda and cornstarch that I’ve mixed together already….
Hi Shelly! Cornstarch and arrowroot powder will behave very similarly in this recipe so it won’t affect the outcome of your bars. In fact, many bubble bar recipes use cornstarch instead of arrowroot. The only reason I chose to go with the latter is that some people find cornstarch to be disruptive to their intimate feminine flora.
AWESOME! Thank you! I was making it for a 6-year old, so I’ll make sure to let her mother know to listen/watch out for any irritants.
Thanks again! Hugs. 😀
Thanks for the recipe. They look beautiful. I’m about to make these however, I still would love to see a video of these little cuties in action to see what I am aiming for. Thanks again!
What a great recipe! I love how easy these bars look, and how simple the ingredient list is. In fact, I can’t see a single ingredient that I either don’t have in my store cupboard or can’t buy easily. Seems like a miracle, particularly with beauty products!
Great post
kisses
The Pink Pineapple
New post:http://thepinkpineappleblog.blogspot.com/
Great crafting idea!
? these look beyond amazing… they’re so cute and summery and adorable! I’ve been wanting to make bath bombs recently (and finally got some bath bomb moulds + essential oils for my birthday last month) but I might have to extend that into bubble bars as well… ?
Rebecca ♥
These are such a good idea – will definitely be trying these. You’ve made them look so pretty!
this is so cool and attractive too.
This is such a wonderful idea, and they look so cute!
https://www.makeandmess.com/
Ahhh, thank you so much for sharing this!! It’s made me want to spend all day being creative and having a bit of DIY time 🙂 I agree, bubble baths are the best!! I’m going to save this post and come back to it around Christmas time as I think it’s such a great present idea!
Have a lovely week 🙂
Chloe @ https://girllgonerogue.blogspot.co.uk/
These are so pretty!
I’m certain no one here is as old as I am. When making gifts for adult kiddies, they are usually underwhelmed, except when I made them soap. They love it. Even my stepson. Can’t wait to try these. They look lovely.
How fun! I just hosted a girls spa night at my home. These would have made perfect little gifts for them to take home!
This is so cool. I’d make them as a gift for friends.