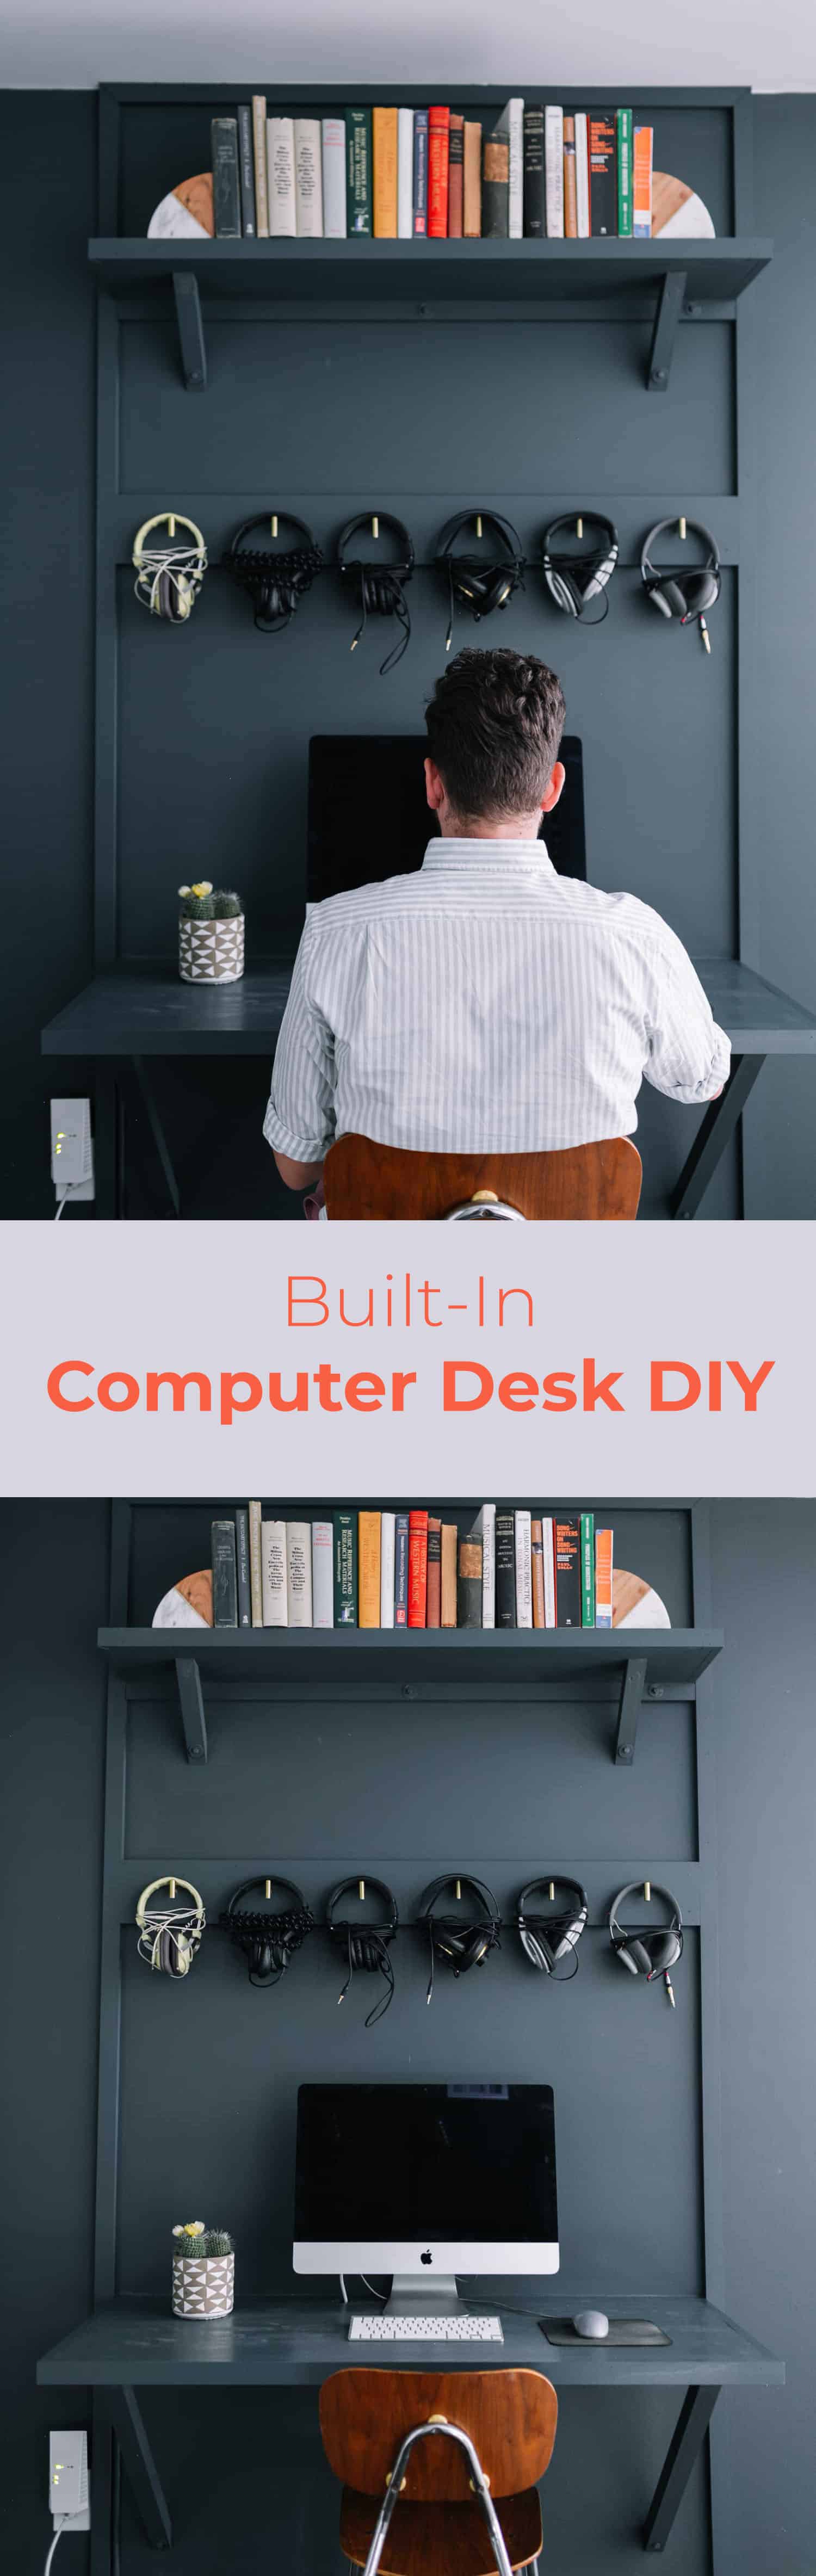
 This is one of those projects that was born out of necessity! But I am so glad, because it’s an awesome and very useful project that I am sure many of you will make!!!
So, in the past six months, Jeremy significantly rearranged his studio. He did it for 100% practical, functional reasons, so I couldn’t really be mad at him for messing up my original design (… or could I? lol). Anyway! I recover quickly … so I promised him I would help him to continue tweaking it until it LOOKED nice and functioned.
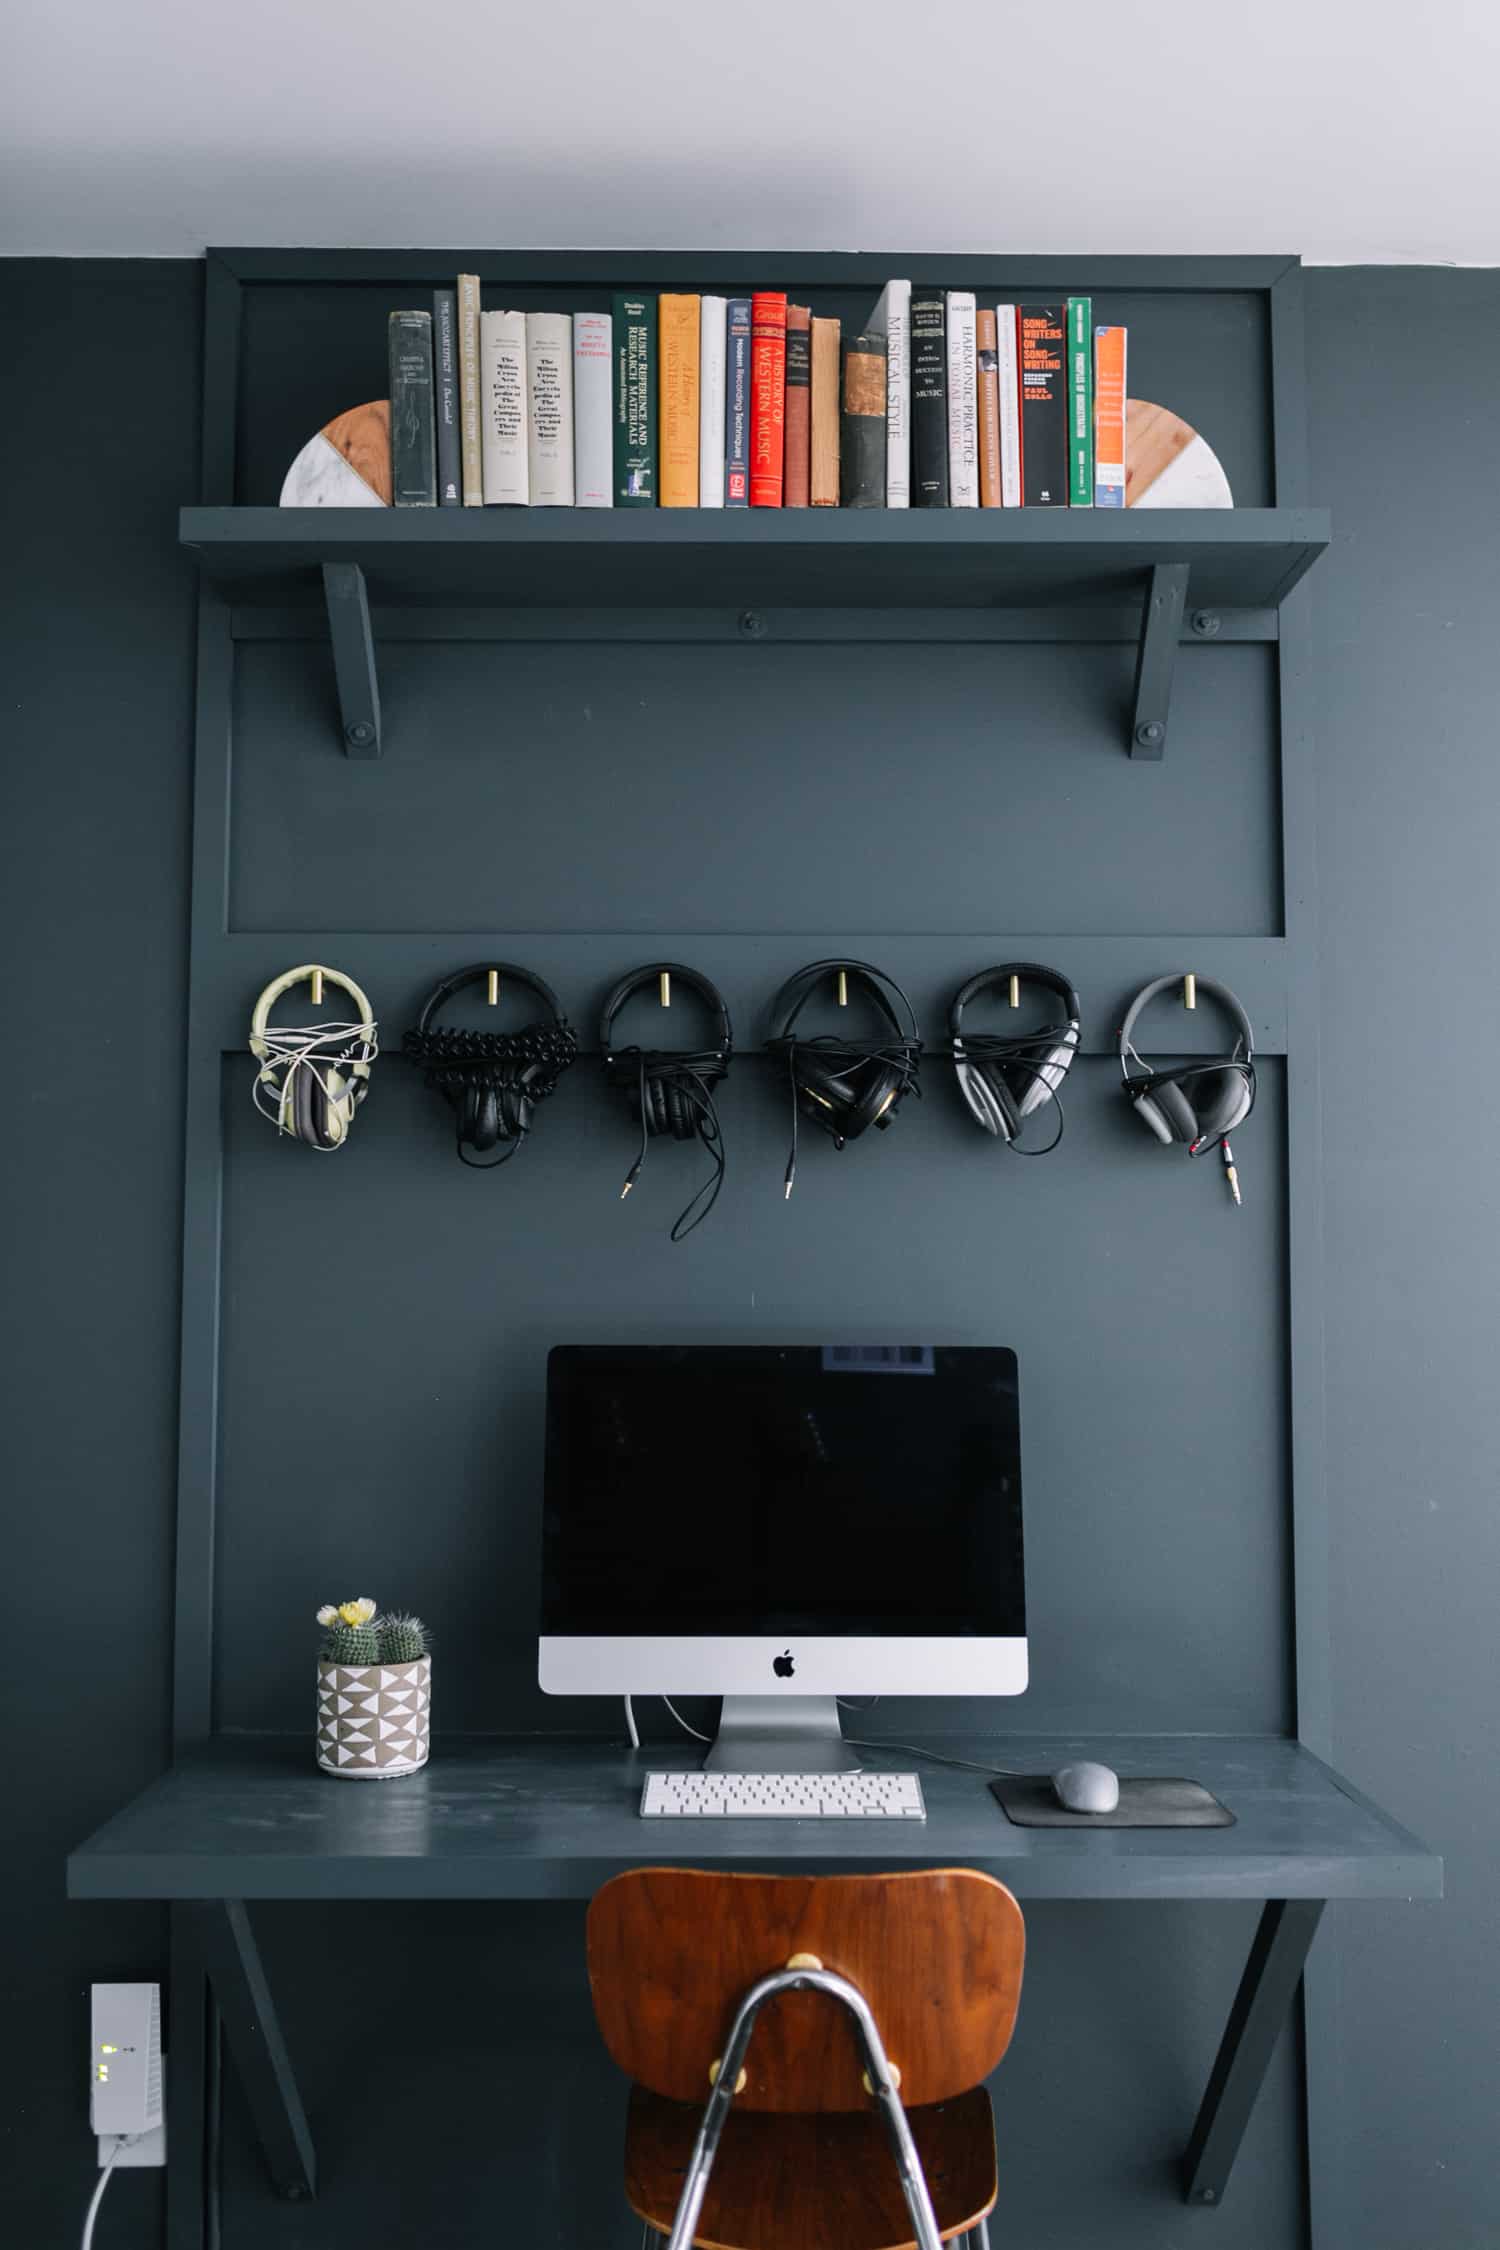
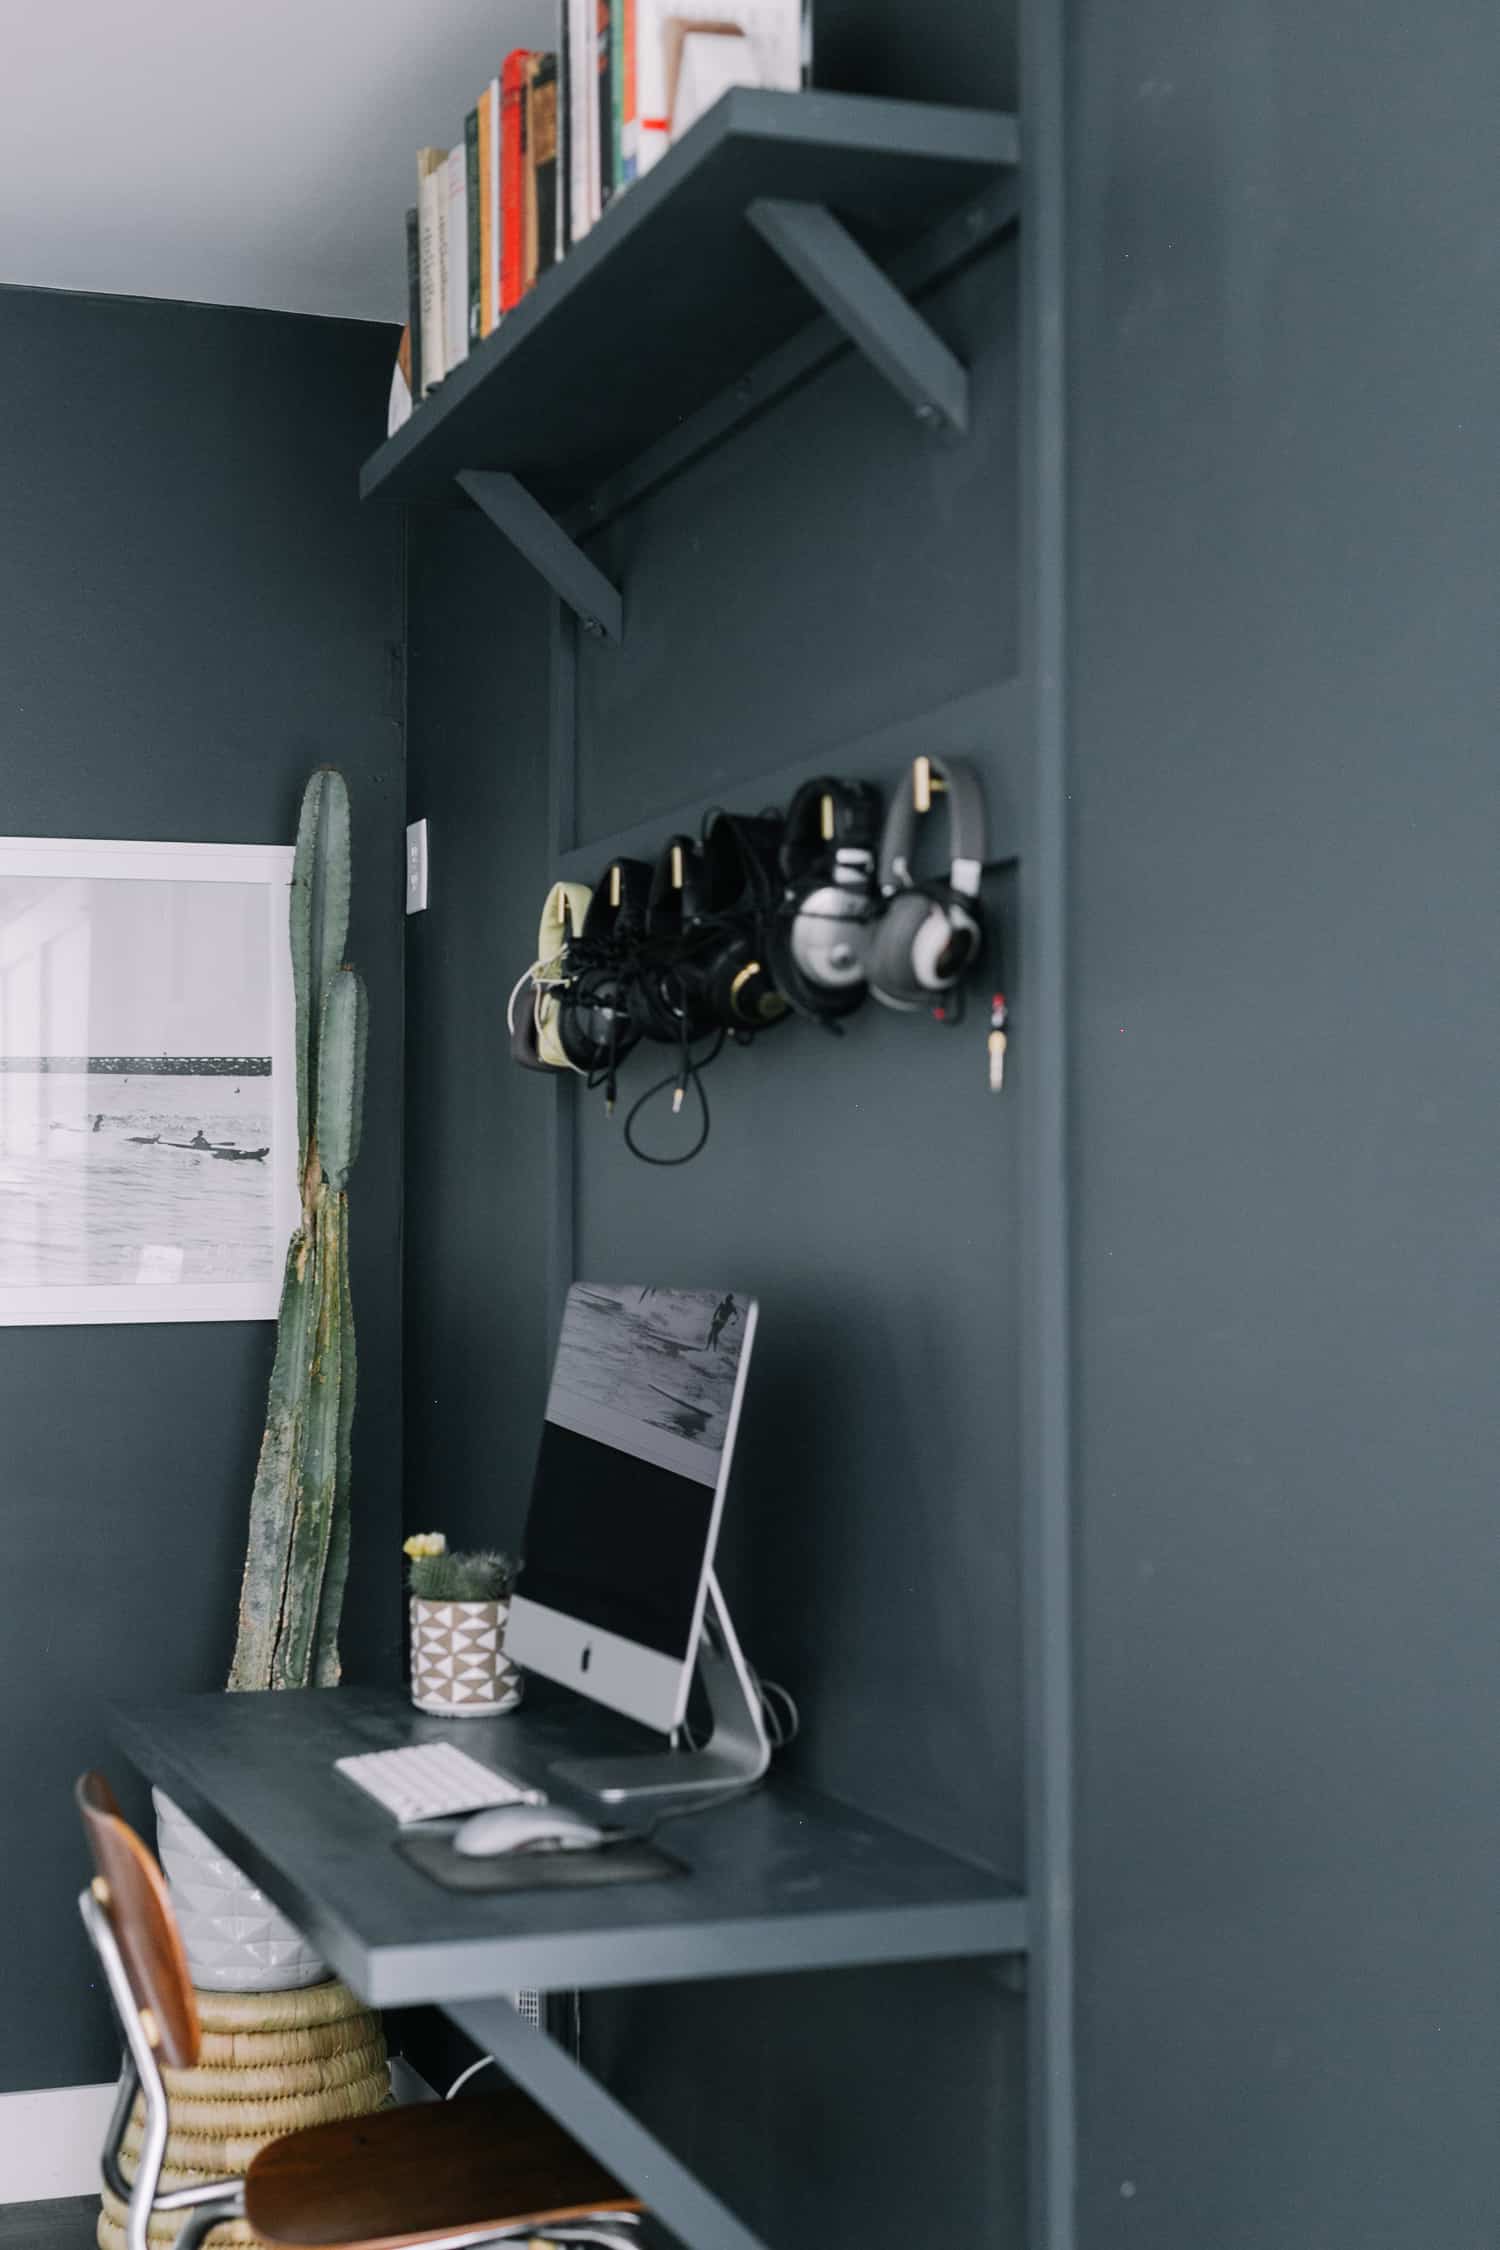
He had been using his desktop Mac on his round table (which was not intended to become a desk) and there wasn’t “visual space” to add another component to this already busy room. So I devised a plan to add a desk TO the wall that was only as big as he needed (so pretty small) and blended seamlessly with the wall, so it didn’t demand too much attention. I am SO pleased with the result.
Here’s one more photo before we jump into Collin’s DIY.
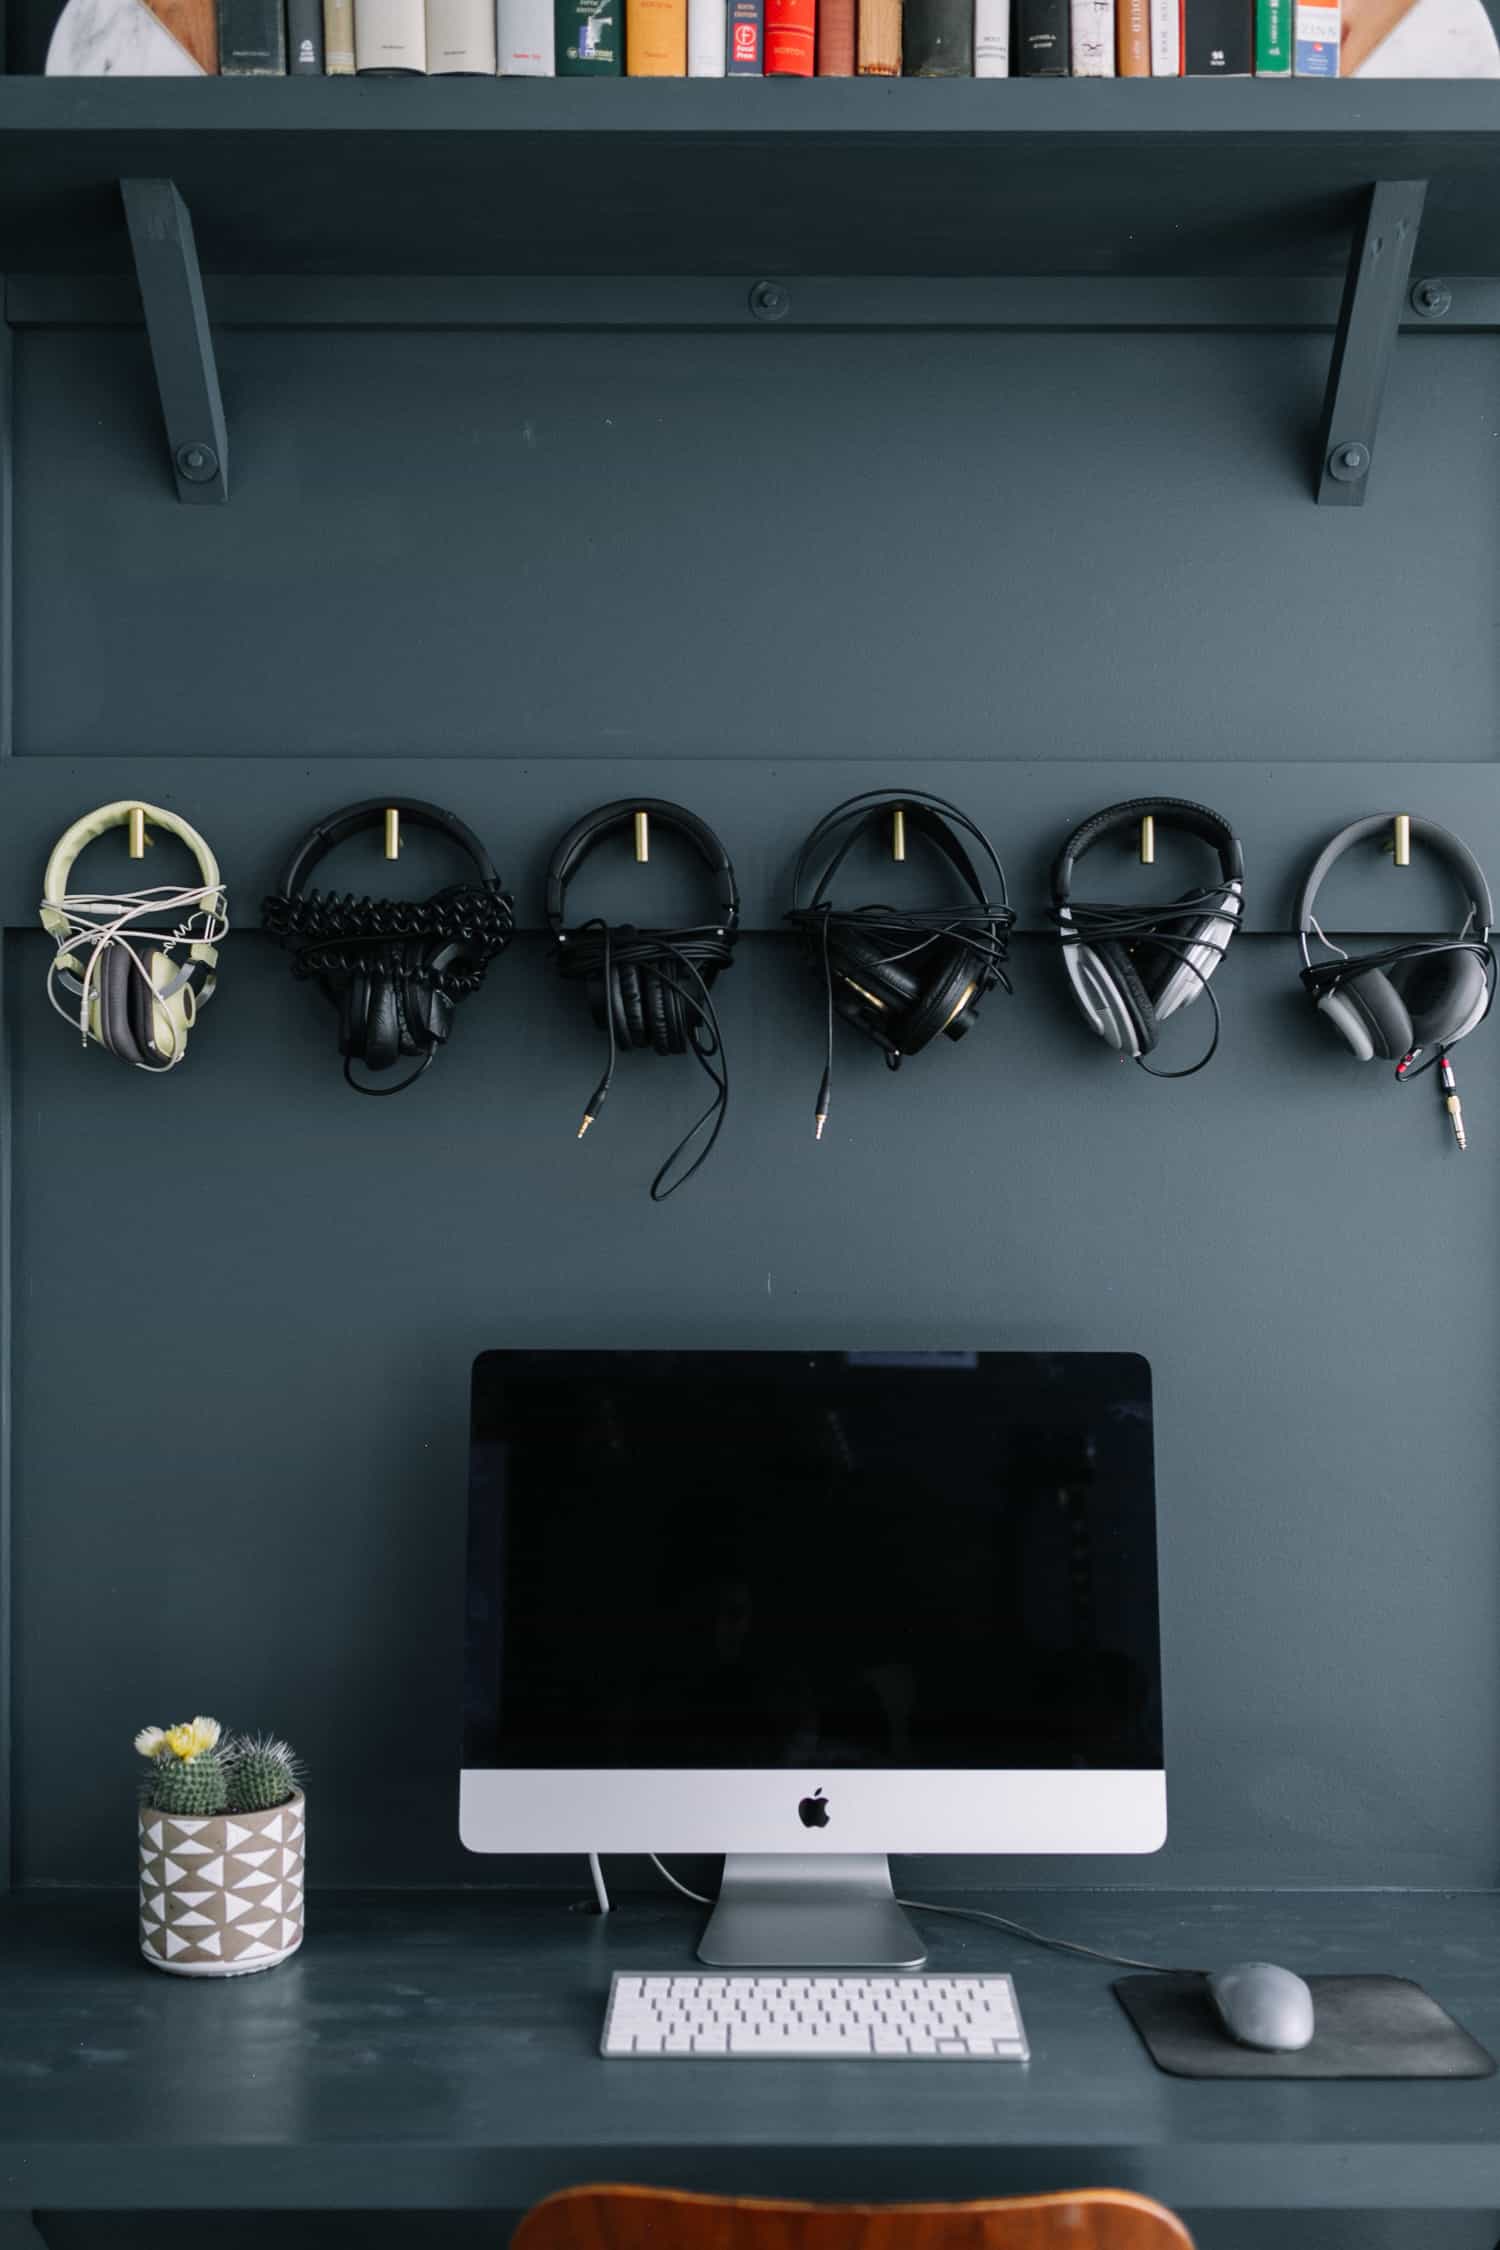
 From this angle, you can really see how this desk adds and functions in Jeremy’s studio. It’s a computer desk and I added the headphone hooks and single bookshelf to make it feel more a part of the studio.
Supplies:
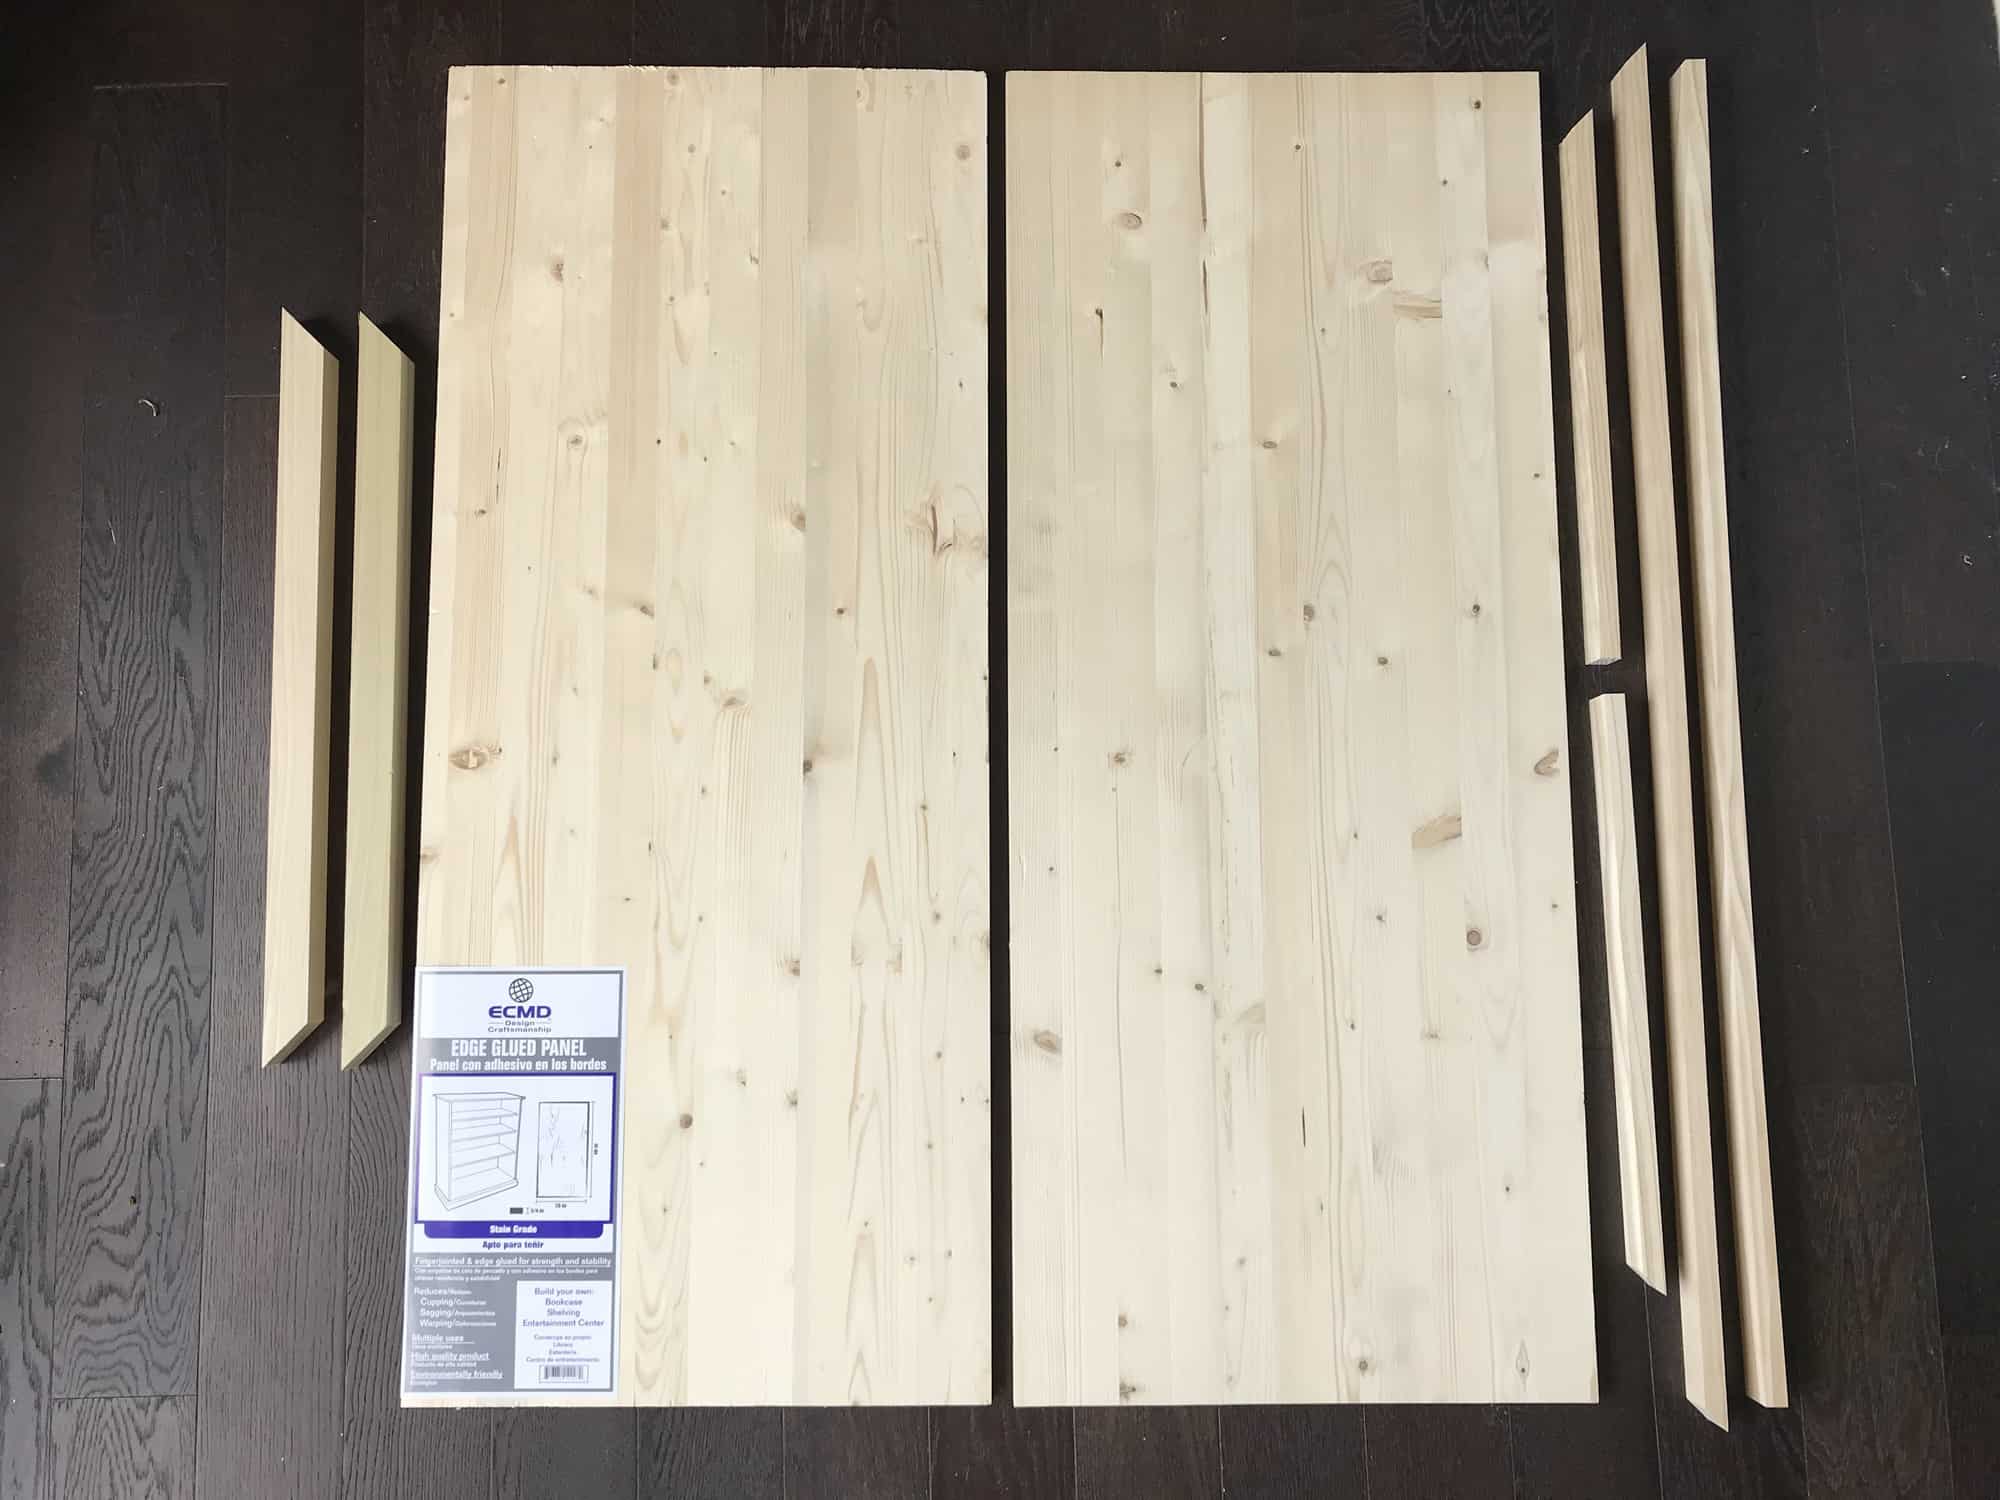
-two 20″ x 4′ x 3/4″ edge glued desk boards
-two 9 1/4″ x 4′ x 3/4″ shelf boards
-one 4′ x 5 1/2″ x 3/4″ hook board
-three 1 1/2″ x 1 1/2″ x 3′ square support boards
-six 1 1/2″ x 3/4″ x 8′ trim boards
-six hooks to hang headphones/cables (we used these handle pulls)
-wood putty
-caulk
-sandpaper
-paint
Tools:
-miter saw
-measuring tape
-nail gun (optional)
-hammer and nails (if not using nail gun)
-drill
-wood screws
–drywall anchors
-1/2″ drill bit
–countersink drill bit
-washers
-wood glue
-level
 Start by taping off the space on your wall to help you get a good visual for the project, this will also help you decide the height of the desk, shelf, and hook board. The height of your walls will also determine how you space out each piece. We always tape out every shelving project on the wall before making final measurements and purchasing supplies.
The walls in the this space are 8′ which is an average height, so chances are your house has the same! The desk height is 29″ which is also a average height, but you can make it higher or shorter depending on your preference! This project could easily be a standing desk if that’s what you prefer. The hook board and shelf i just eyeballed based on what looked most aesthetically pleasing, and you can make them whatever height works best for your space.
 Take your two 2′ x 4′ x 3/4″ edge glued boards and glue them together, one on top of the other and add a few nails with your nail gun for extra stability and also so you don’t have to wait for the glue to dry, the pieces will stay together for the next steps.
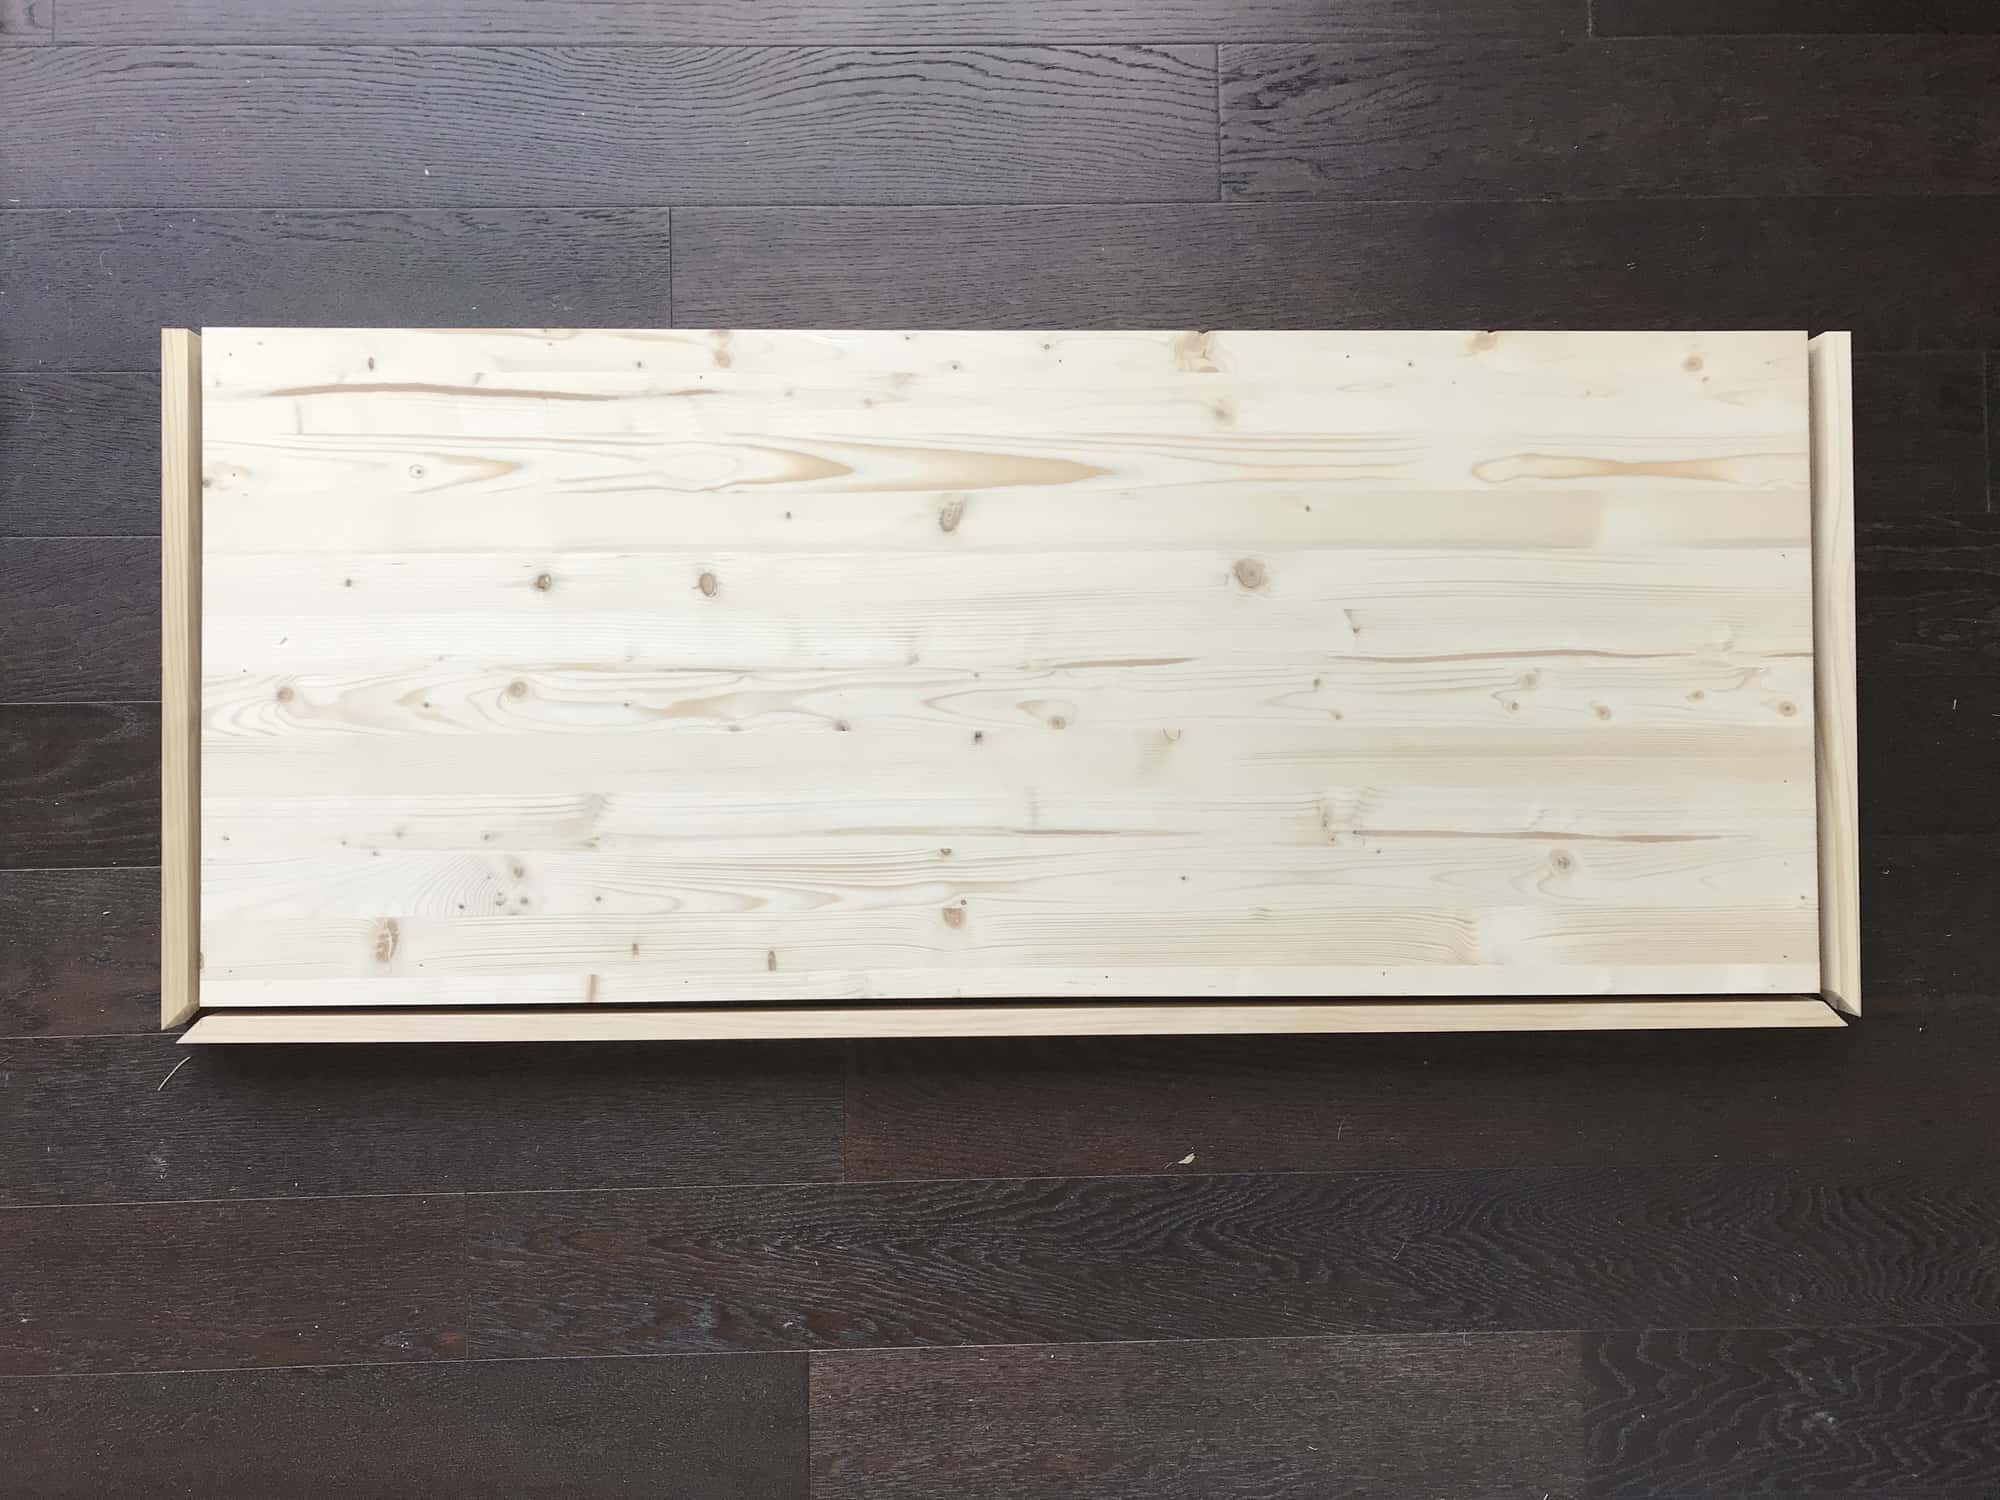 Next, cut your 1 1/2″ x 3/4″ x 8′ trim boards. Since your desk is 20″ deep, your two edge pieces of trim will need to be 20 and 3/4″. This is because we have to account for the overhang that occurs since we are cutting one end of each piece at a 45-degree angle. Similarly because the desk is 48″ in length, the front trim piece will need to be cut at 49 and 1/2″ with each end cut at a 45-degree angle to match up with the end pieces as shown in the picture above. Secure each piece with wood glue and a few nails with your nail gun.
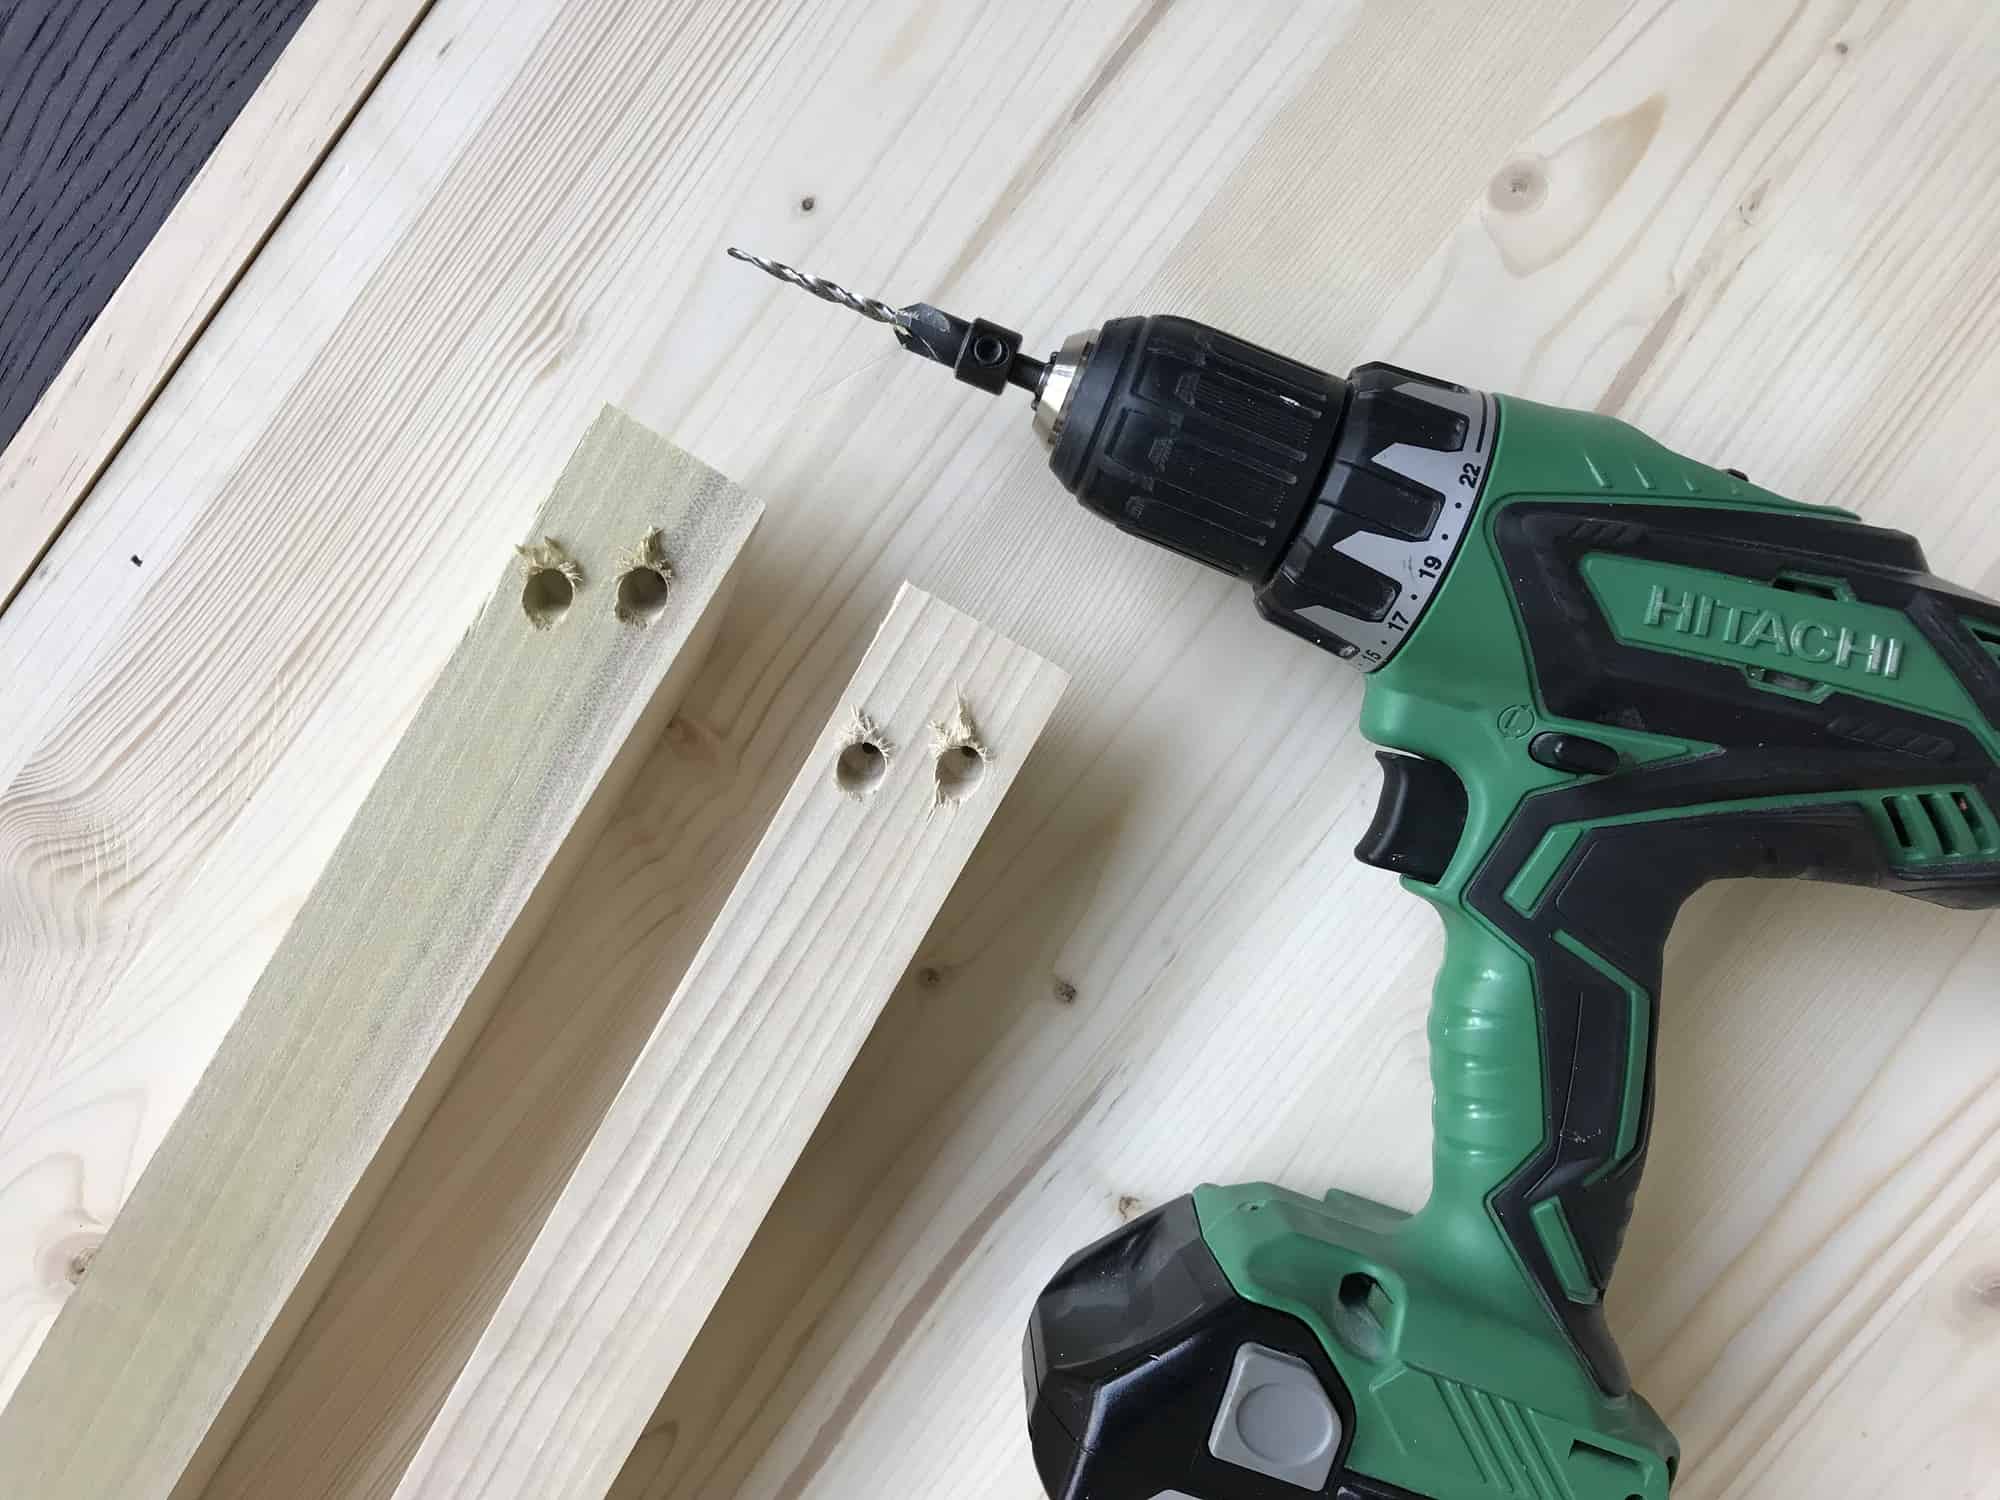 Take your 1 1/2″ x 1 1/2″ x 3′ square support boards and cut them at 18″ with each end cut at 45-degree angles. Next, take your countersink drill bit and drill two holes on one end of each board and on the other ends just one hole. The reason for using the countersink drill bit is to pre-drill the holes for your screws, which you always want to do to avoid splitting the wood, and also so the head of the screw can be hidden with wood putty later.
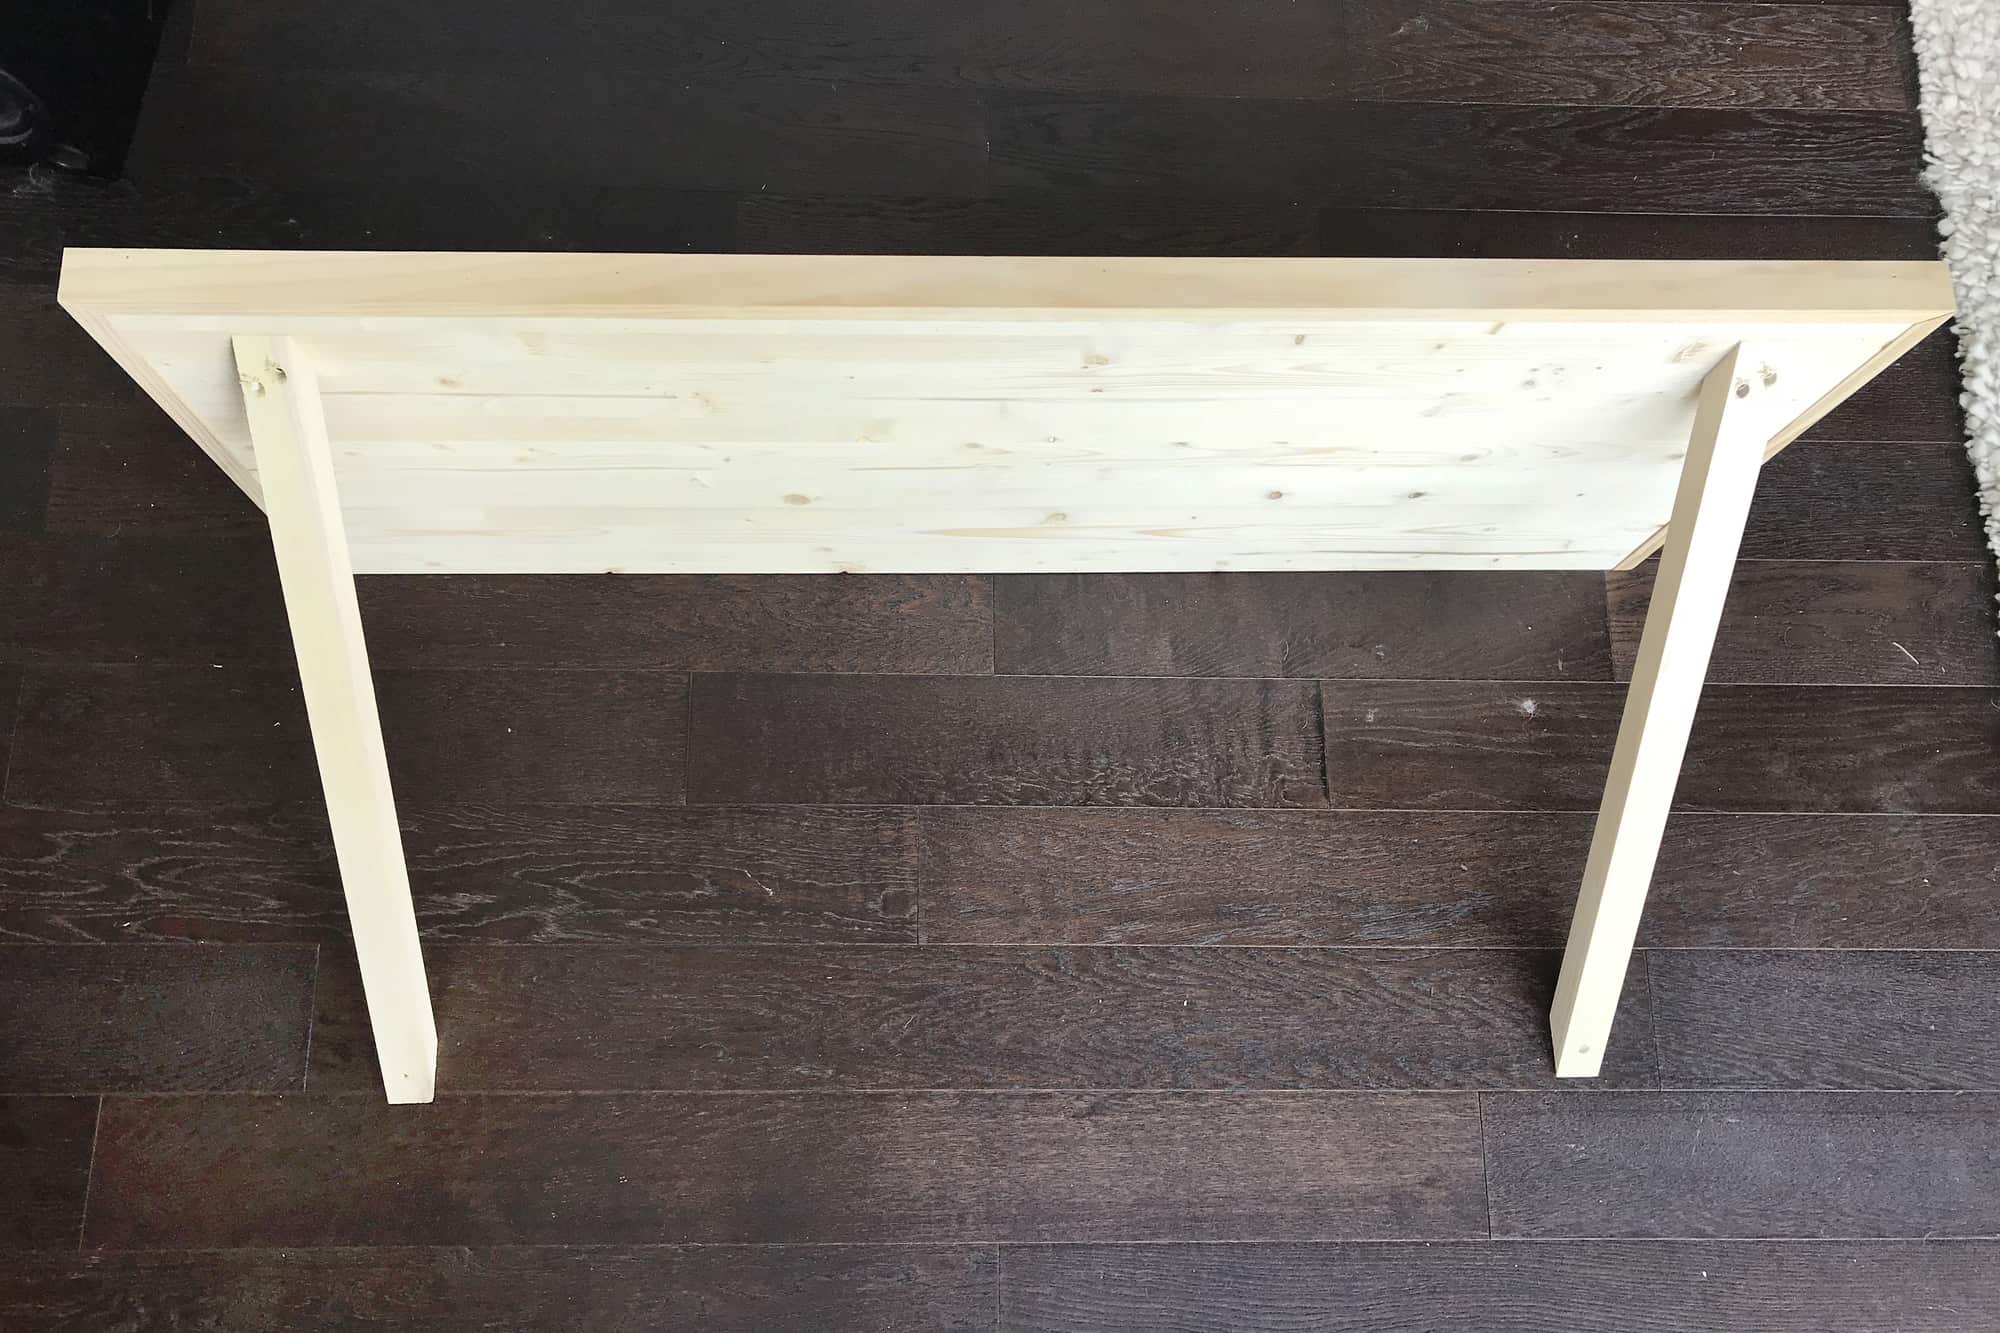 Take your desk and on the bottom side mark where your support boards are going to attach, which is about 3″ from each edge. Lean the desk up against a wall or something similar so it is perfectly upright and secure the support pieces with the appropriate length screws so when it’s done it looks like the picture shown above.
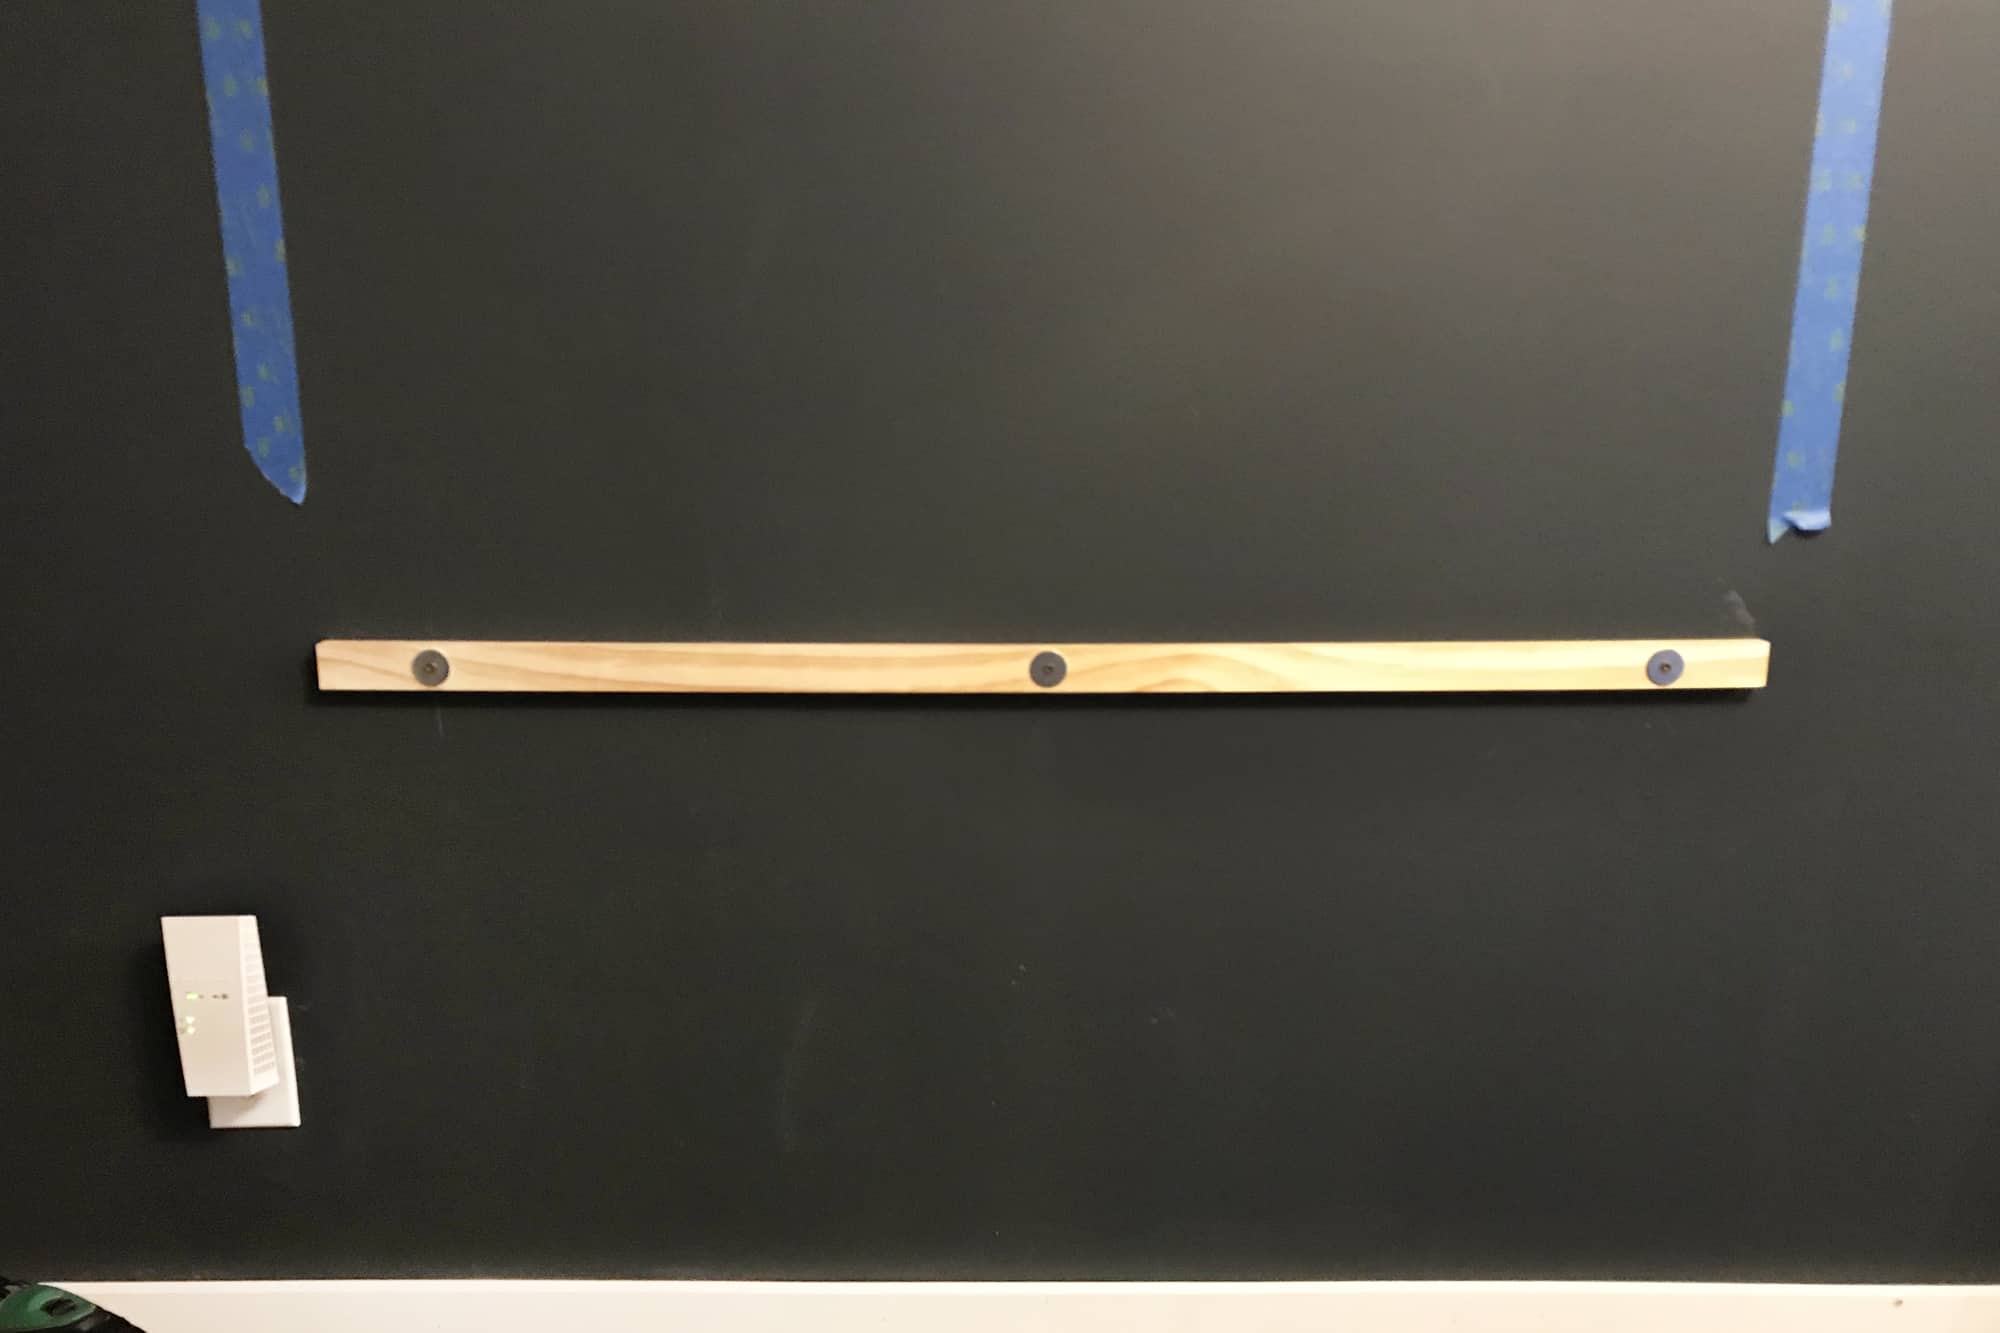 Cut one of your 1 1/2″ x 3/4″ x 8′ trim boards at 20″ and drill 3 holes in it, one in the middle and one on each end. Hold the board up to the wall at 29″ high with a level and mark each hole on the wall with a pen or pencil. Using your 1/2″ drill bit, drill 3 holes where you marked on the wall and insert the drywall anchor in each hole, follow the drywall anchor instructions very carefully to make sure you are using them properly! Once the anchors are in, take the bolts that are supplied with the anchors and put them through the 3 holes in the board while adding a washer for each bolt and fasten the board to the wall.
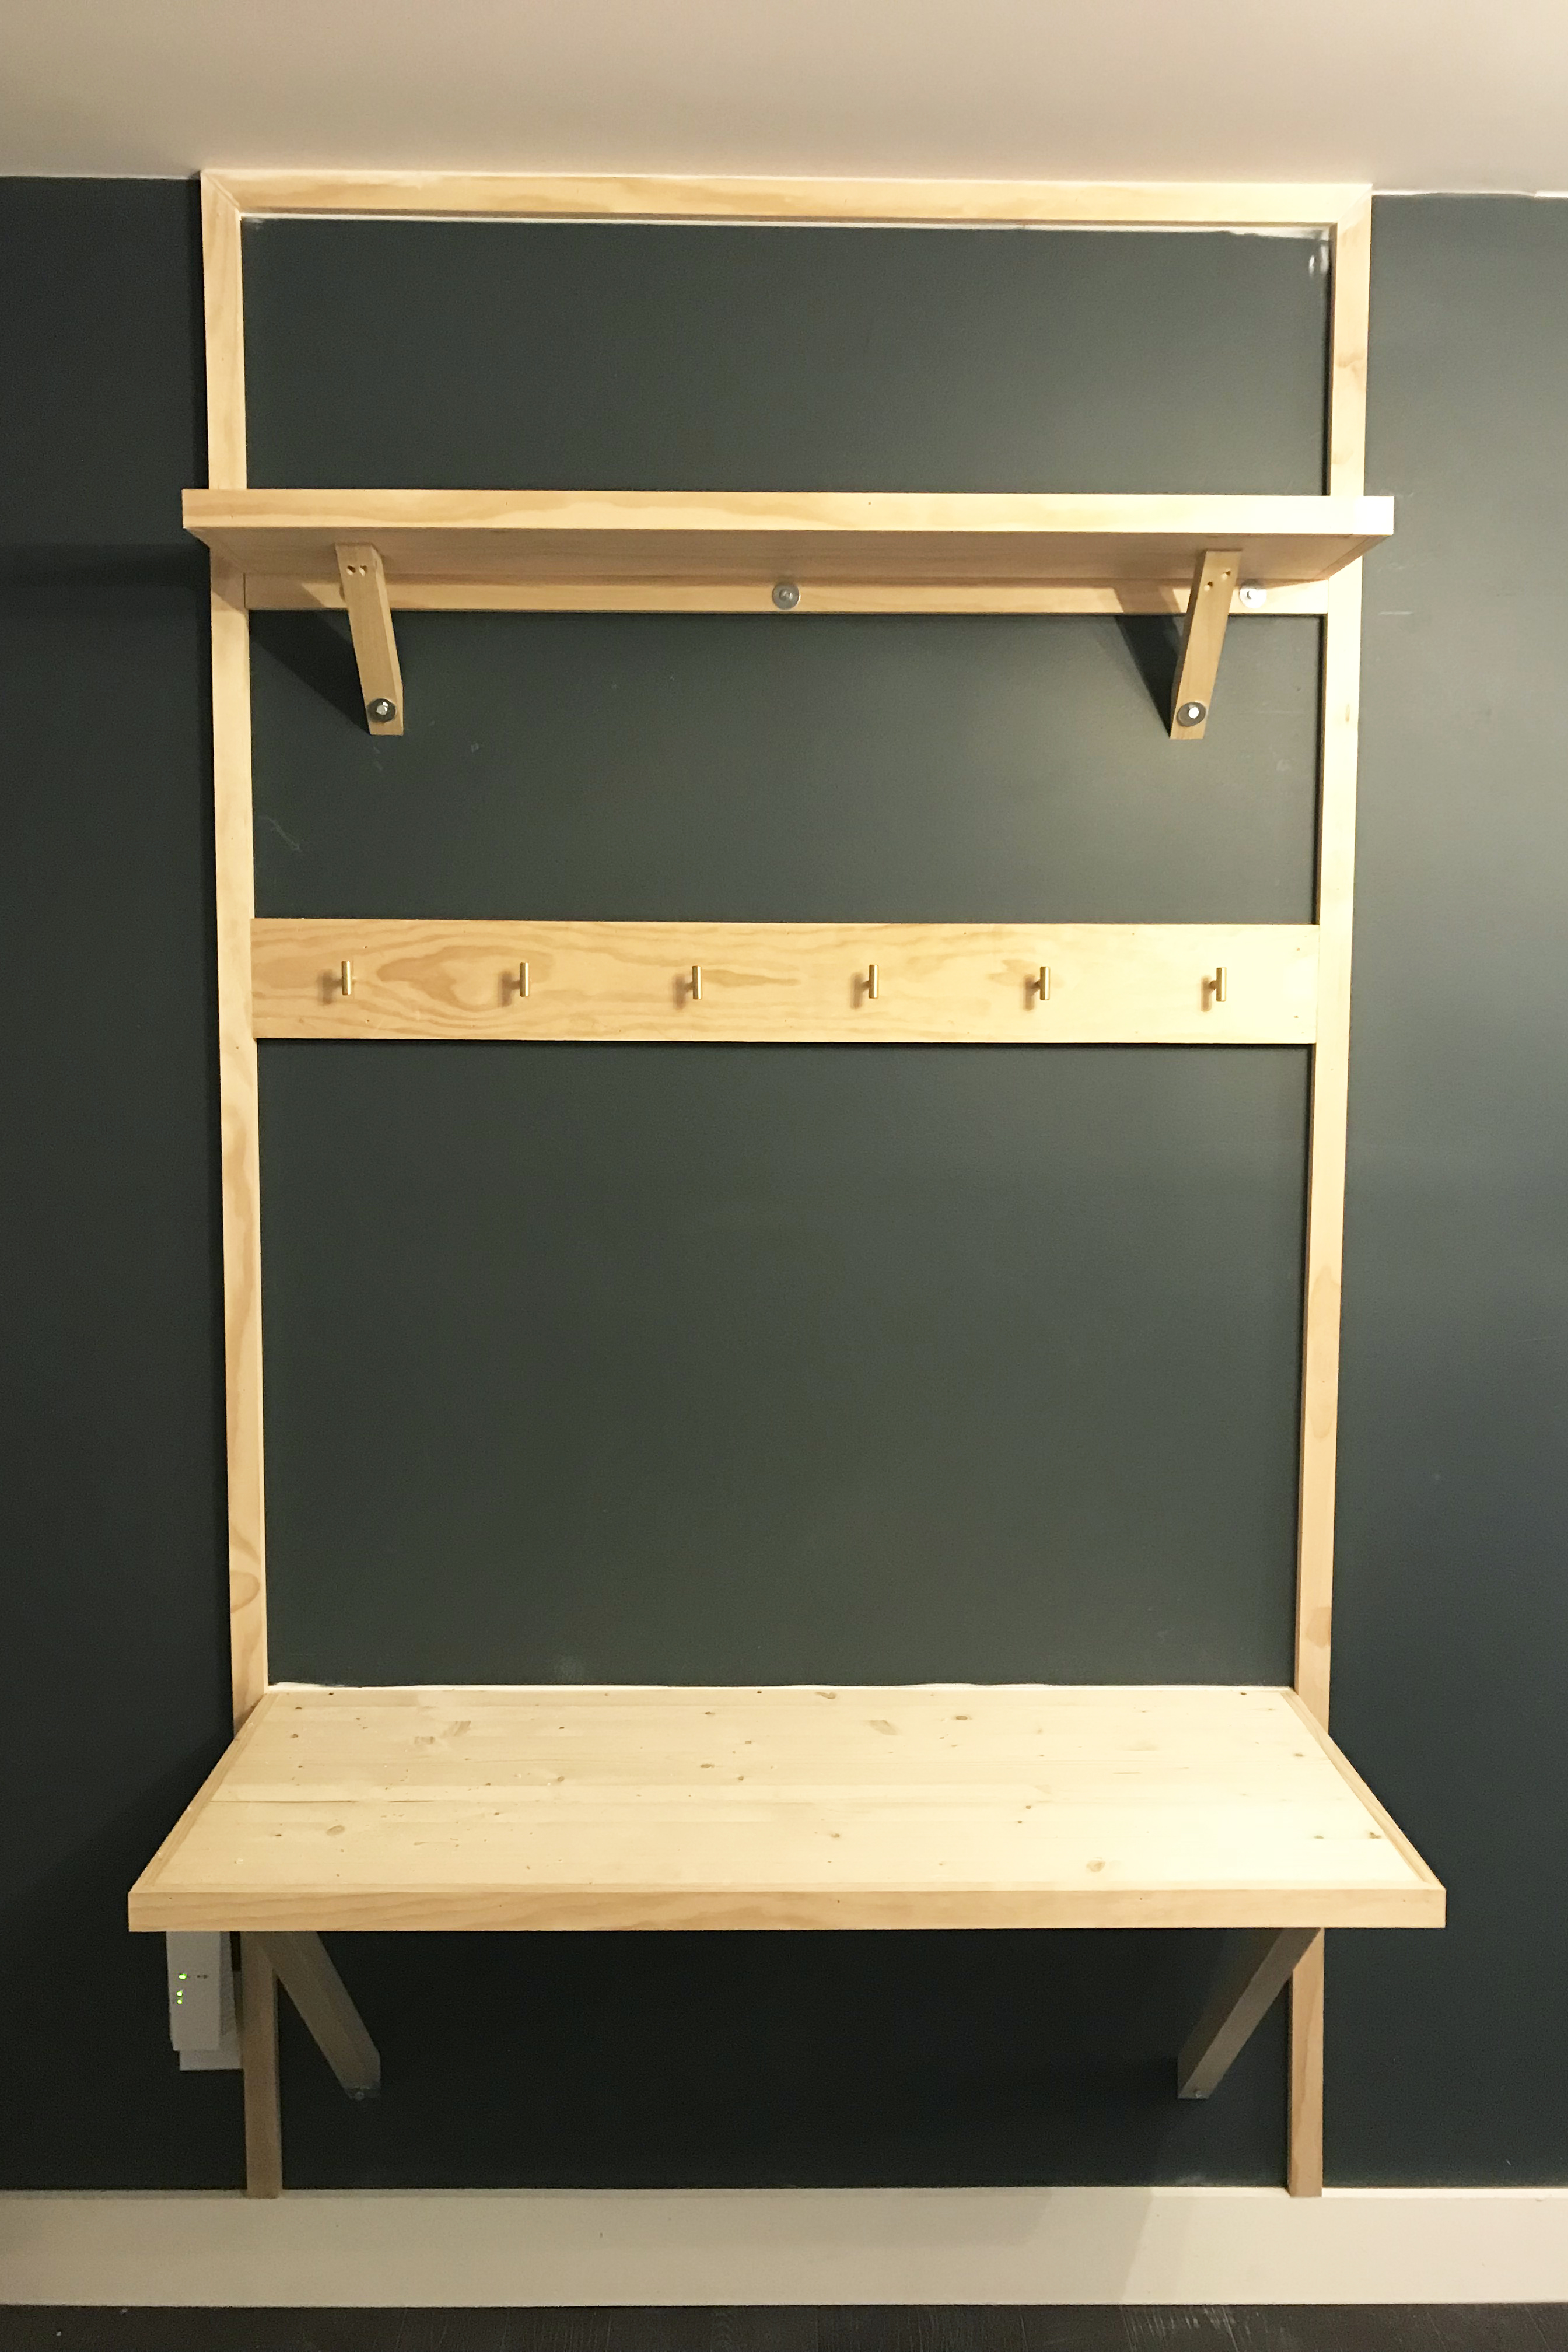 Set the edge of the desk on the board mounted to the wall and place a level on the desk. Once level, stick a pen or pencil through the holes on the bottom end of each of the square support boards (this is a lot easier with two people, one to hold the desk in place and one to mark the holes). Once the holes are marked on the wall, set the desk aside and put two drywall anchors in each spot you marked.
Now place the edge of the desk back on the board on the wall and shoot a few nails into the back of the desk, into the support board mounted to the wall, and then put a bolt and washer through the bottom end of each support boards and into the anchors. Lastly, I would add 3-4 screws into the back end of the top of the desk so that they go through the desk and into the support board. Now the desk should be extremely secure and hold a decent amount of weight! (The computer is pictured here because i was making sure the height of the desk felt right!)
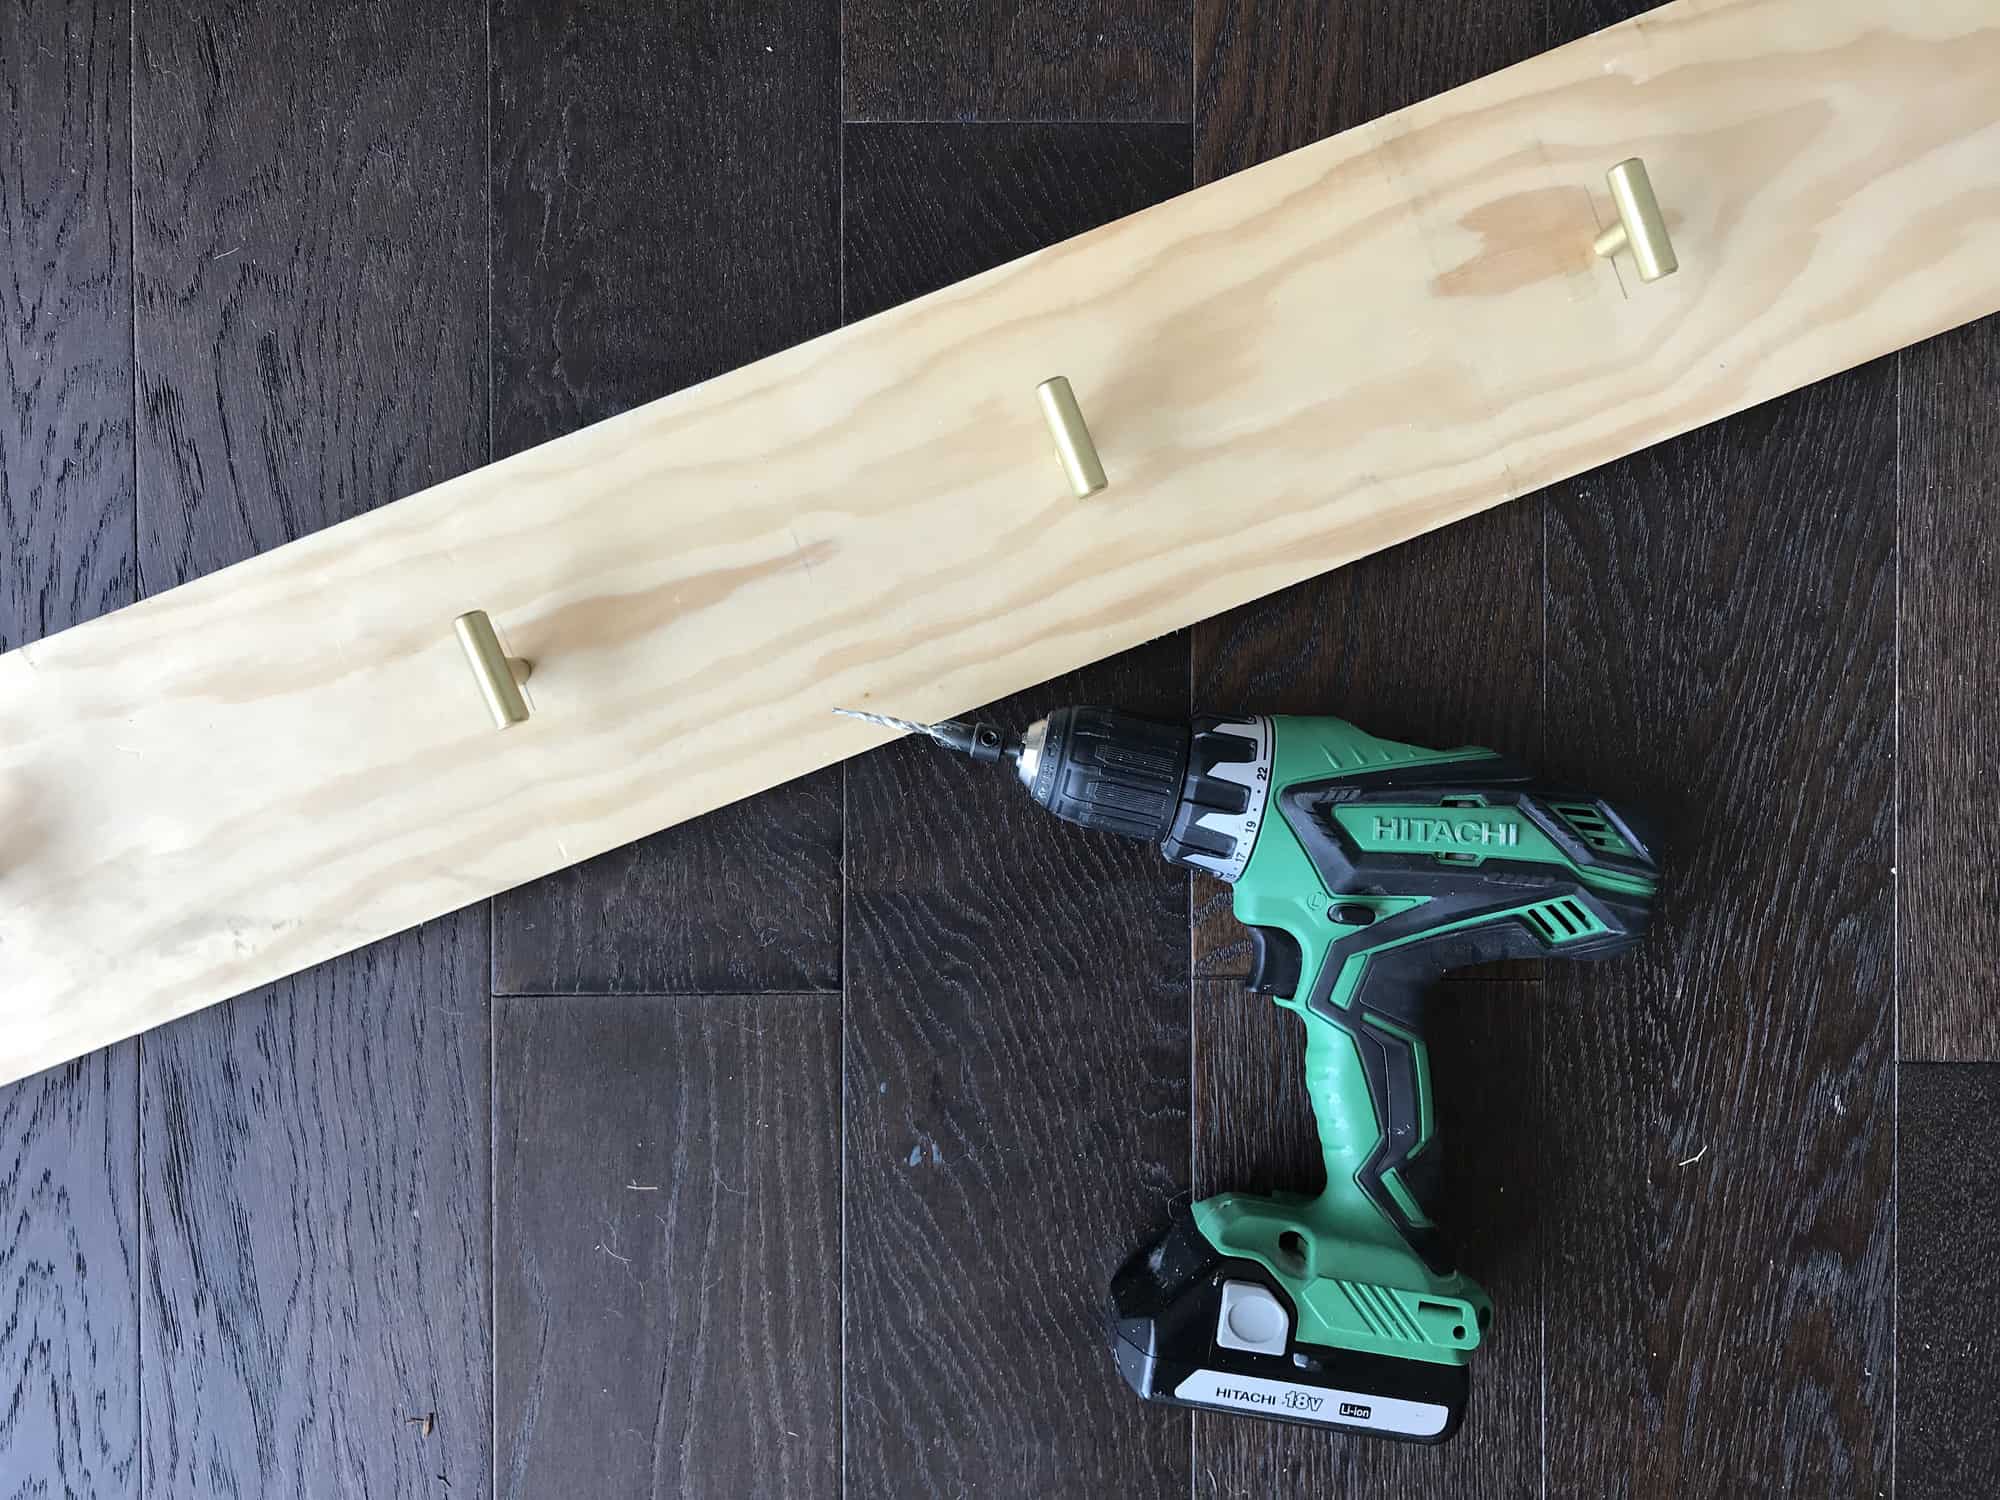 For the hook board, take your 4′ x 5 1/2″ x 3/4″ board and mark with pen or pencil 6 spaces on the back side of the board evenly spaced and pre-drill your holes with the countersink drill bit. Put the screws supplied with the hooks through the back of the board and screw into each hook. Choose how high you want it on the wall and secure it with your nail gun, making sure each edge is perfectly in line with the edges of the desk.
 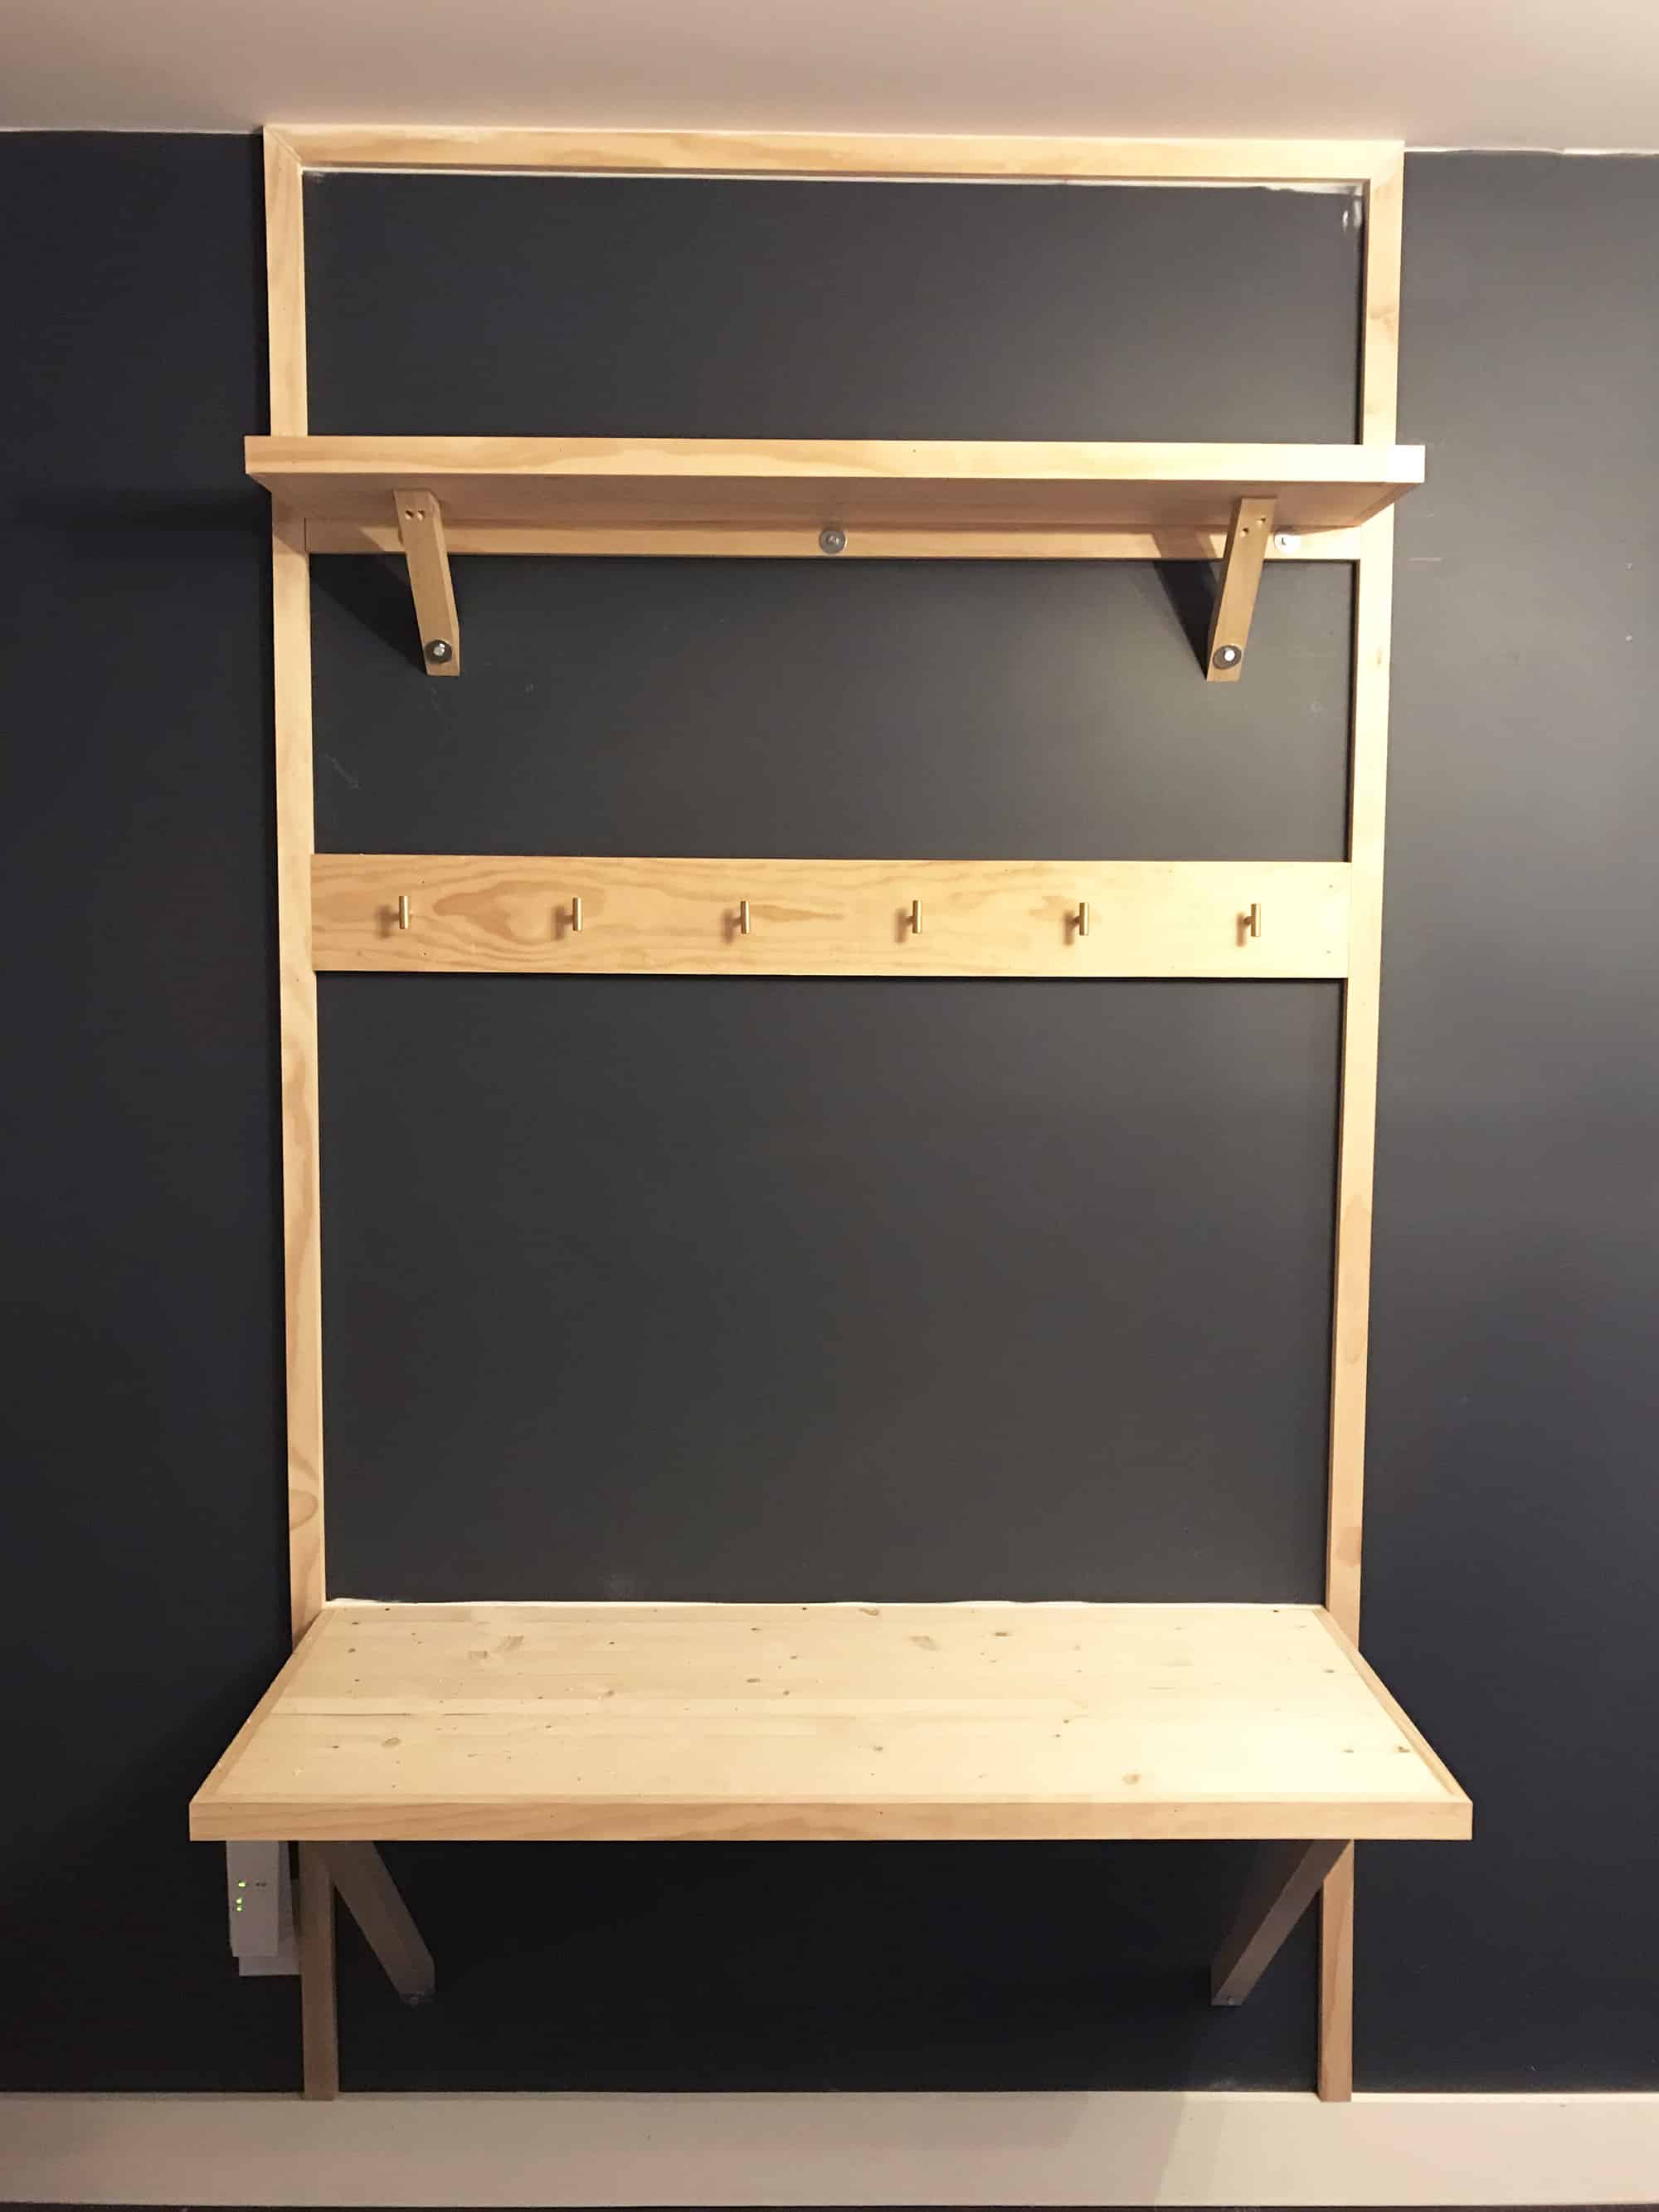 For the shelf, you are going to repeat the process exactly the same as the desk—the only difference being you are going to use the two 9 1/4″ x 4′ x 3/4″ boards for the actual shelf and your two trim pieces on each side of the shelf will be cut at 10″. The front trim piece will be the same as your desk (20 and 3/4″) since they are the same length and your 1 1/2″ x 1 1/2″ x 3′ square support boards will be cut to 7″. When securing the shelf to the wall, make sure it is perfectly in line with both the hook board and the desk. Once your shelf is done, you’re going to trim out the wall around the desk. Measure from the ceiling to the floor (or to the top of your floor trim) and cut two pieces of your 1 1/2″ x 3/4″ x 8 trim boards with one end flat and the other end at a 45-degree angle on each board.
With a level, hold each piece up to the edge of the desk and nail it to the wall with your nail gun. Once the two long side pieces are up, measure the distance in between the two at the top and cut another piece of trim with 45-degree angles on each end. Place the board in between the two side pieces and nail it to the wall. Now that the building portion is done, caulk any cracks that you think need it and wood putty the screw holes in the square support boards. Once dry, give the whole project a light sanding, and you’re ready to paint!

 What do you think?? We’d LOVE to see photos if you use this DIY in your own home. Also, would you guys be interested in seeing the rest of Jeremy’s studio?
xx! Elsie
Credits//Author: Elsie Larson and Collin DuPree. Photography: Amber Ulmer. Photos edited with A Color Story Desktop.
What was used for soundproofing the studio?
Would love to see the rest of his studio! My husband built a studio in our house, too and we were definitely inspired by what you and Jeremy have done. : )
I would love to see the rest of the studio or any room. I love room/house tours, they’re inspiring.
What paint color is that?
I’m wondering what color you used here? It’s gorgeous!
This desk is amazing! I need to make one for our home!
Paige
http://thehappyflammily.com
You have awesome collection, I loved it! I think I should set up my work room alike.
http://essaysauthor.com
Wow, this is absolutely stylish, I would love to have such a desk!
https://www.makeandmess.com/
Love this! I know someone looking for something similar for a desk and I will have to totally suggest this! I’m probably one of the only ones who would love a post about storing instruments and equipment. lol
Between my sister and I we have several large and small instruments as well as, microphones, sheet music, etc. and not a lot of places to put them where they would look aesthetically pleasing. I’m having a hard time mixing convenience with visually pleasing space. For some reason I hit a wall on my Ideas with that. Either way, I love the studio pictures and hopefully it can spark some ideas for me. The space is really beautiful and classy!
This is absolutely an ingenious idea. Looks fantastic. Keeping it all the same colour blends well. The headphone hooks I am definitely copying they never stop being tangled up and left everywhere in my son’s room and then it’s my fault he doesn’t know where they are! This way it’s clear where they are.. I’d love to see the rest of the room.
Love this! Show us his studio!!!! 🙂
Here you go! 🙂
https://abeautifulmess.com/2016/09/jeremys-studio.html
Wish I’d seen this DIY before I got a computer desk not long ago! This is so much cheaper than my store-bought one and looks much nicer too!
Charmaine Ng | Architecture & Lifestyle Blog
http://charmainenyw.com