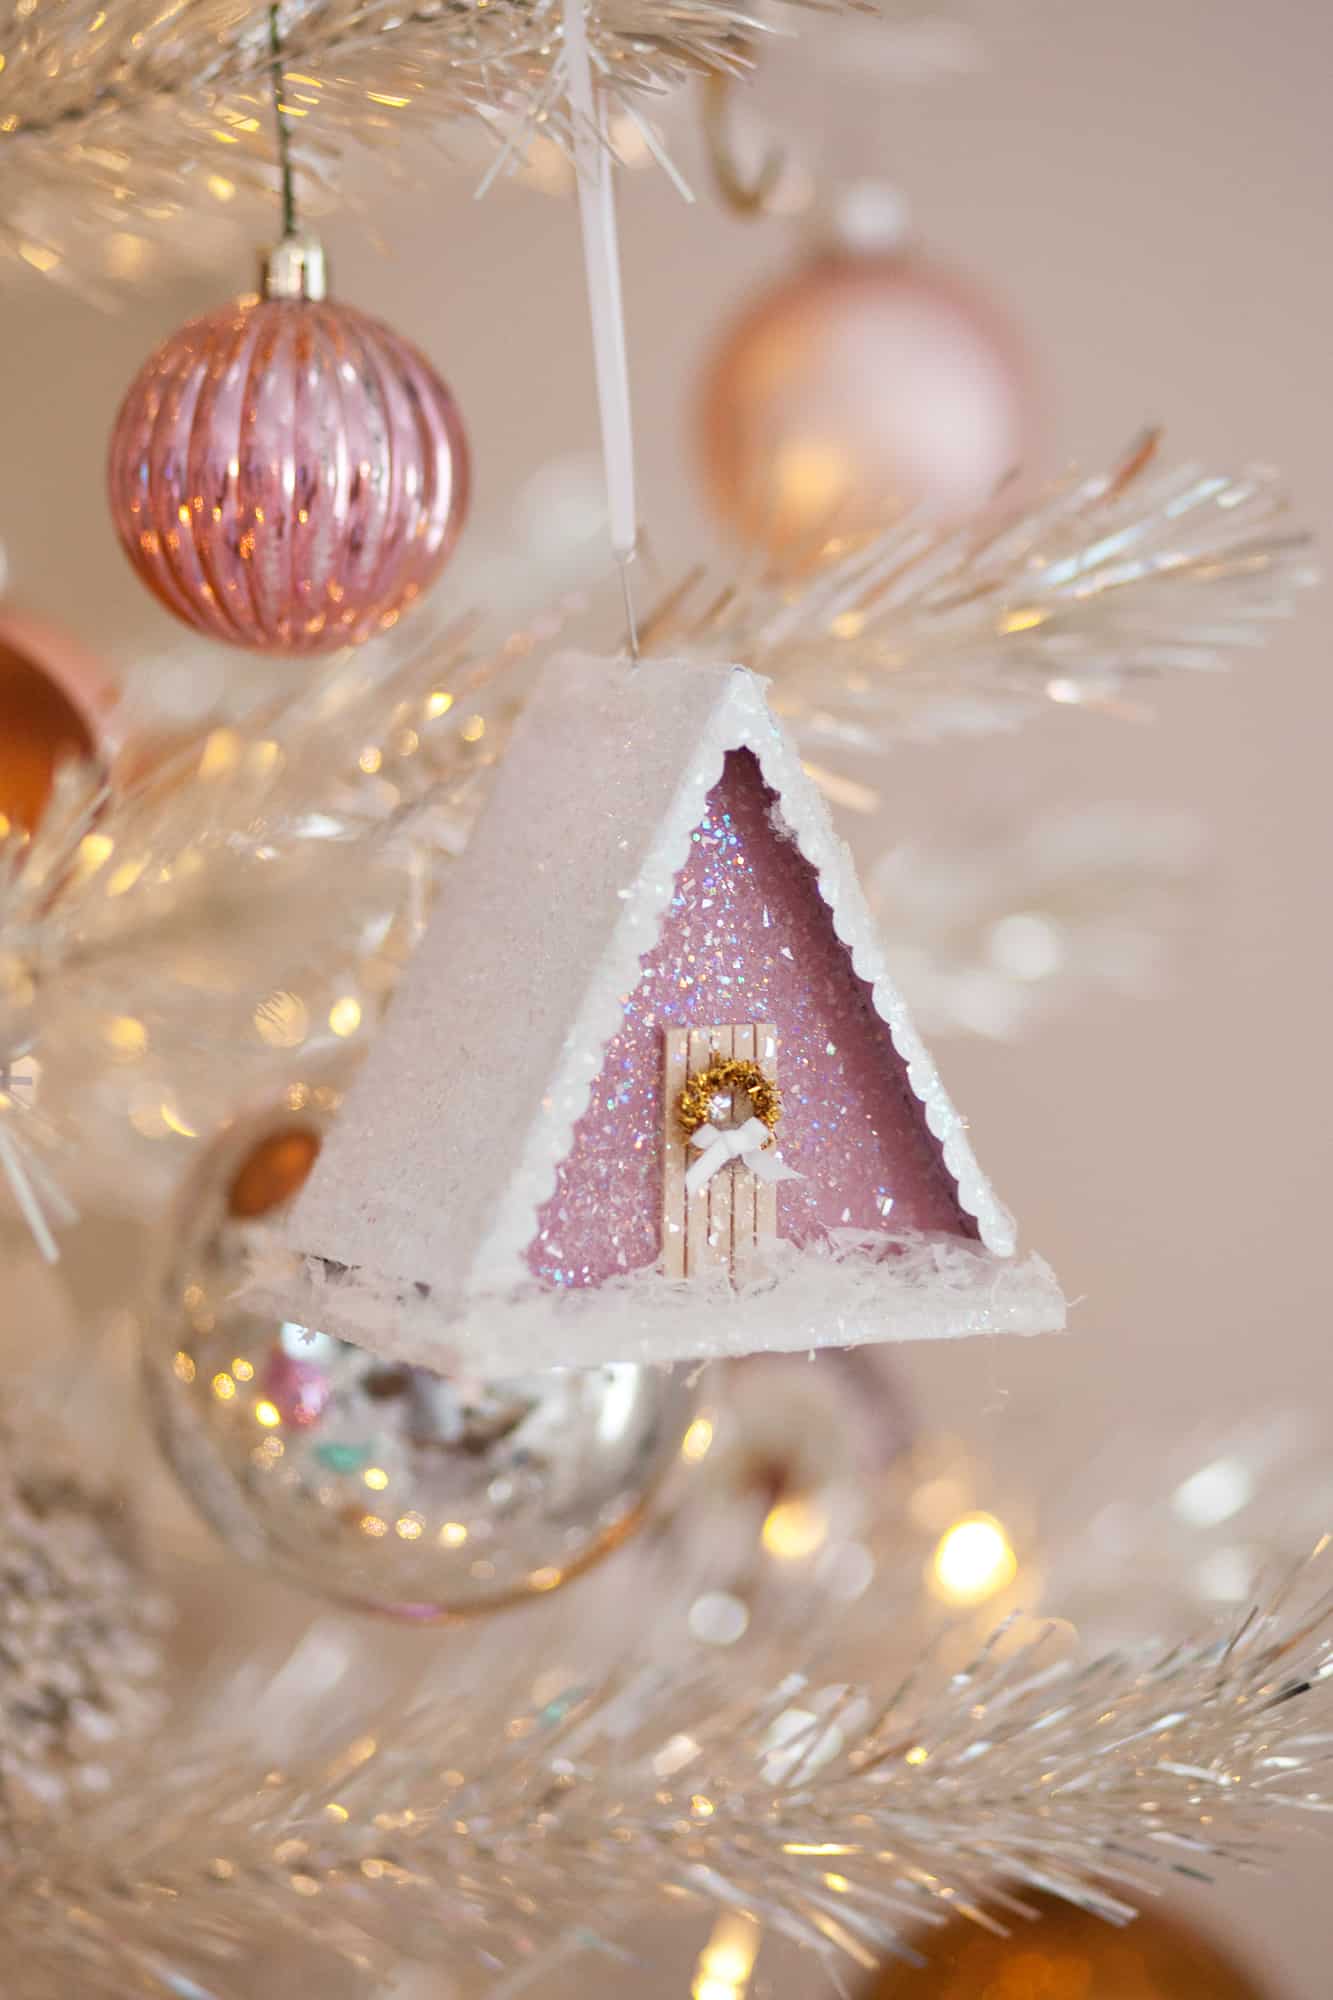
 I’ve been dreaming of owning my very own a-frame cabin for cozy winter getaways. (Haven’t we all?!) While actual real estate endeavors aren’t in my near future, miniature versions of my dreams have always been satisfying substitutes! This cute little a-frame cabin ornament is inspired by my love for vintage putz houses, plus my recent affinity for cardboard crafting.
Before I dispose of food boxes from my pantry, I’ll usually consider if I can up-cycle it into a fun craft with the kids—or just for myself! This cabin was made from a single box of crackers, and I’ve put a few other empty boxes aside to do this project for a ladies’ craft night this week. The additional supplies are minimal, and probably things you already have on hand if you’re into that crafty life.
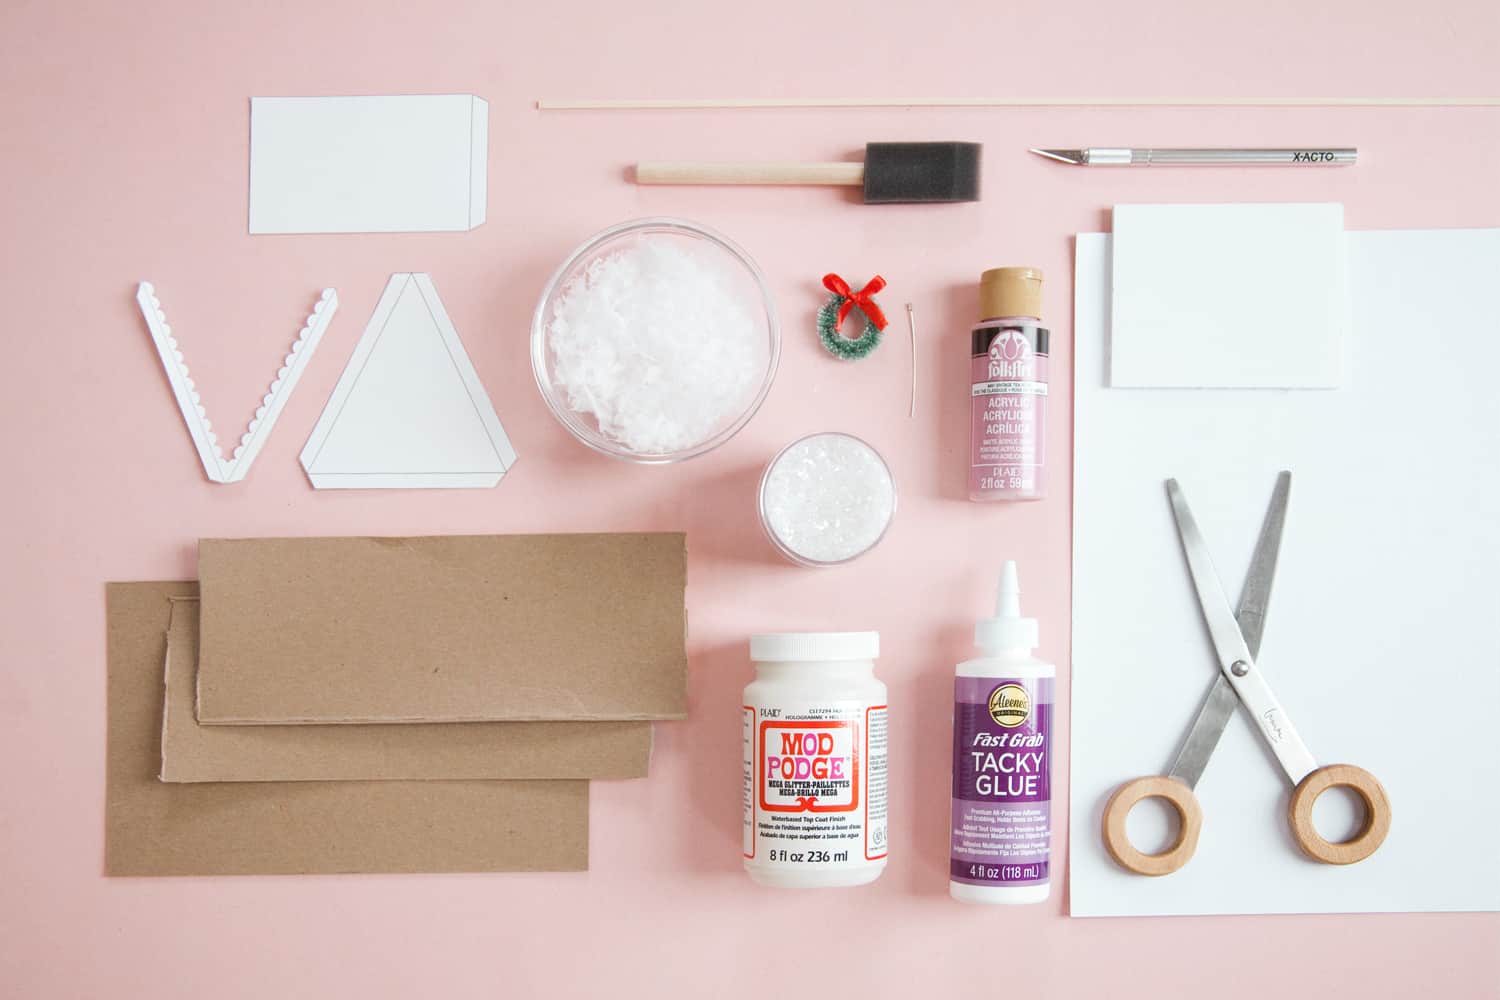 Materials:
–Cabin template
-3 1/4″ x 4″ piece of white foam board
-1 piece of white cardstock
-Thin cardboard from empty food box such as pasta or crackers
-1/8″ wide strip of balsa wood
-Mini wreath or a pipe cleaner + narrow ribbon
-Mod Podge (the white glitter version is perfect for this!)
-Fast Grab Tacky Glue
-Crystal glitter
–Fake snow (optional)
-Eye pin and/or narrow ribbon (for hanging ornament)
-Acrylic paint
Tools:
-Paintbrush
-Scissors
-Pencil
-Craft blade
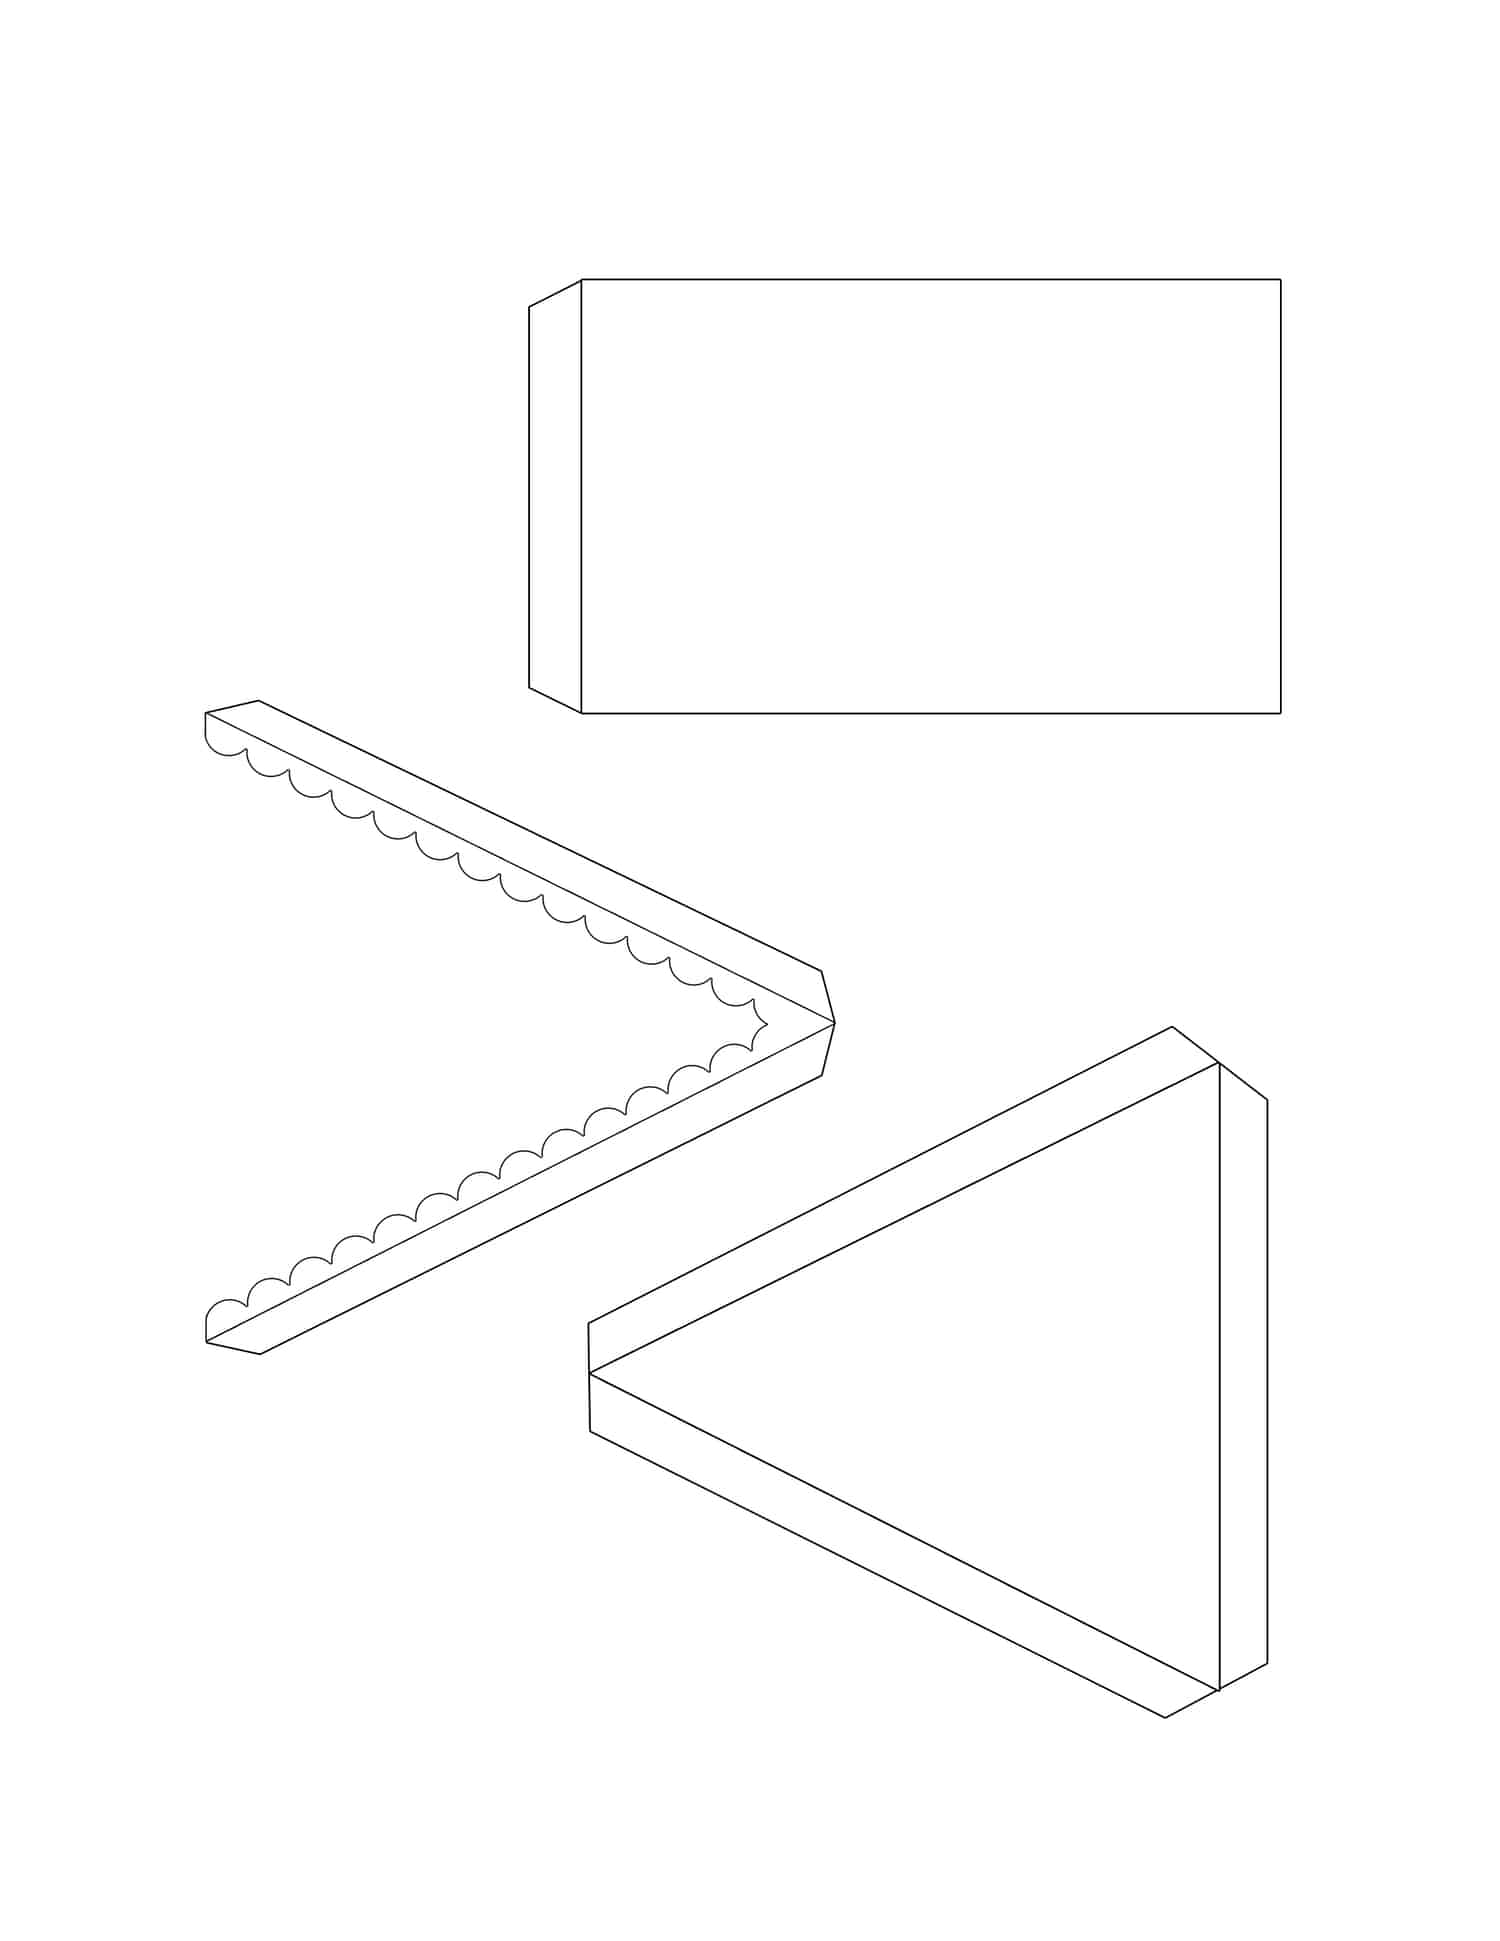
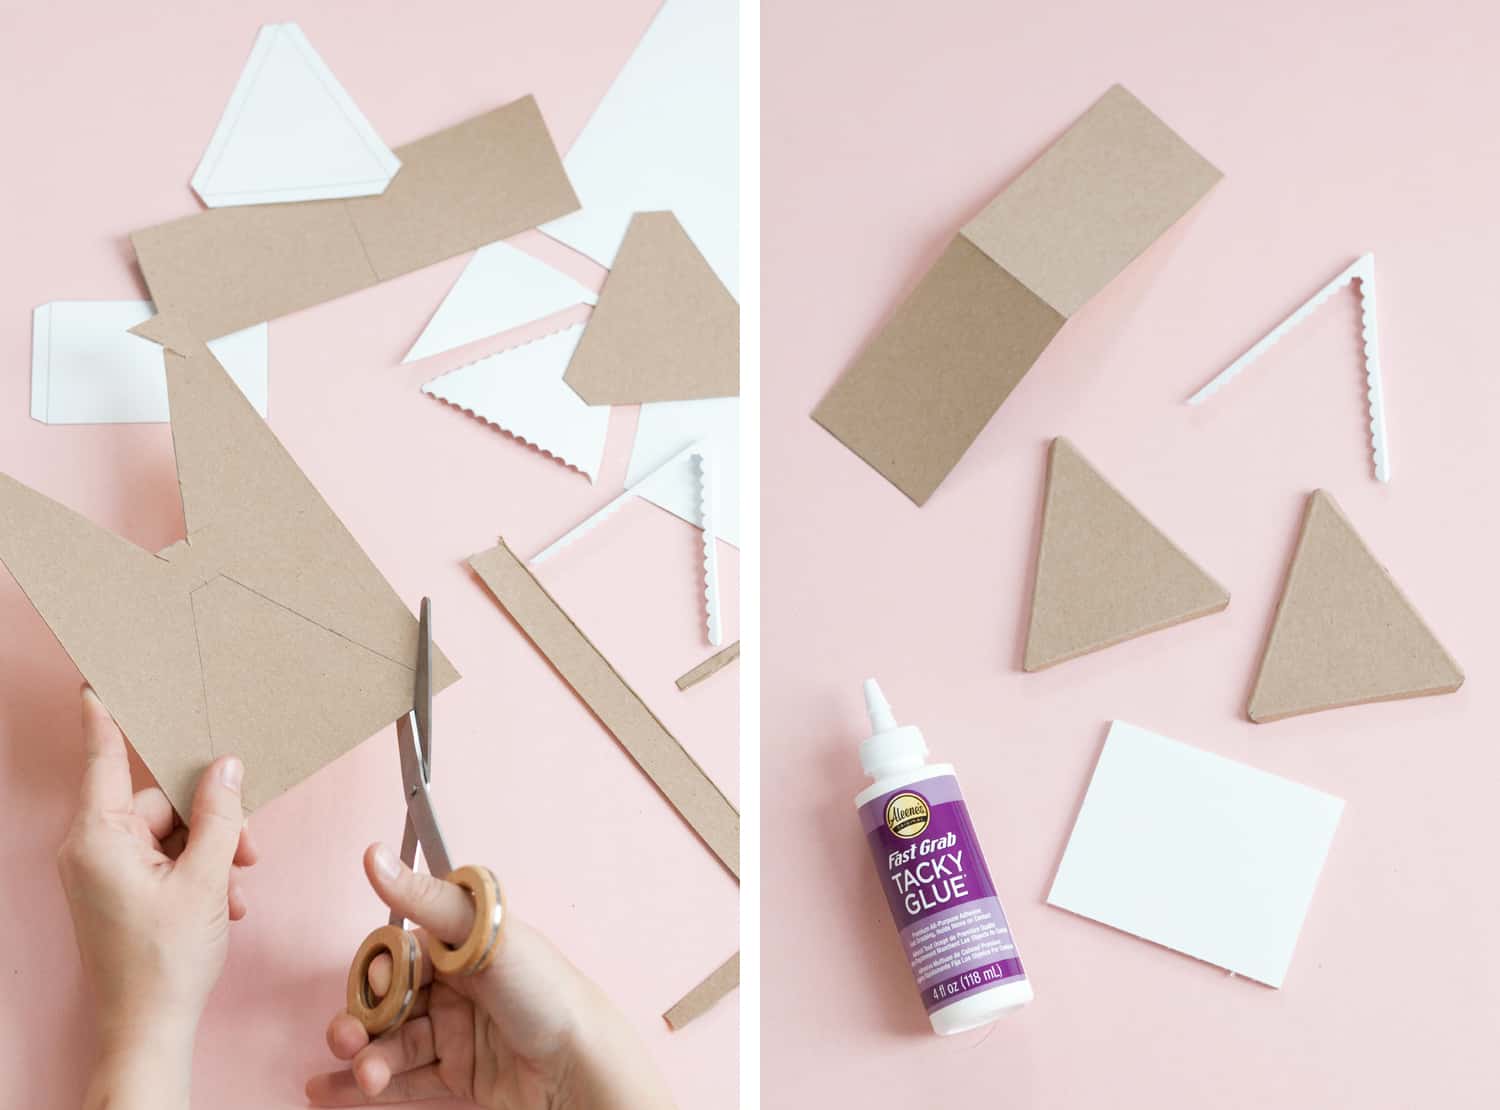 Step One: Print and cut out the cabin template. Click here for the ornament size template, and click here for a larger template that works better for a tabletop decoration.
Trace two of the triangle templates onto your cardboard. Cut out two of the rectangles to glue together for the roof, or if your piece of cardboard is long enough, just double the length of the rectangle template and fold the piece in half to form the pitched roof. Then do the same with the roof template on a piece of white card stock. You’ll also need two of the gingerbread trim traced onto white card stock.
Use scissors to cut out all of the shapes mentioned above. You’ll have more pieces than is shown above right—in total you should have two roof pieces (one in cardboard and one in card stock), two cardboard triangles, two card stock gingerbread trims, and one piece of 3 1/4″ x 4″ foam board.
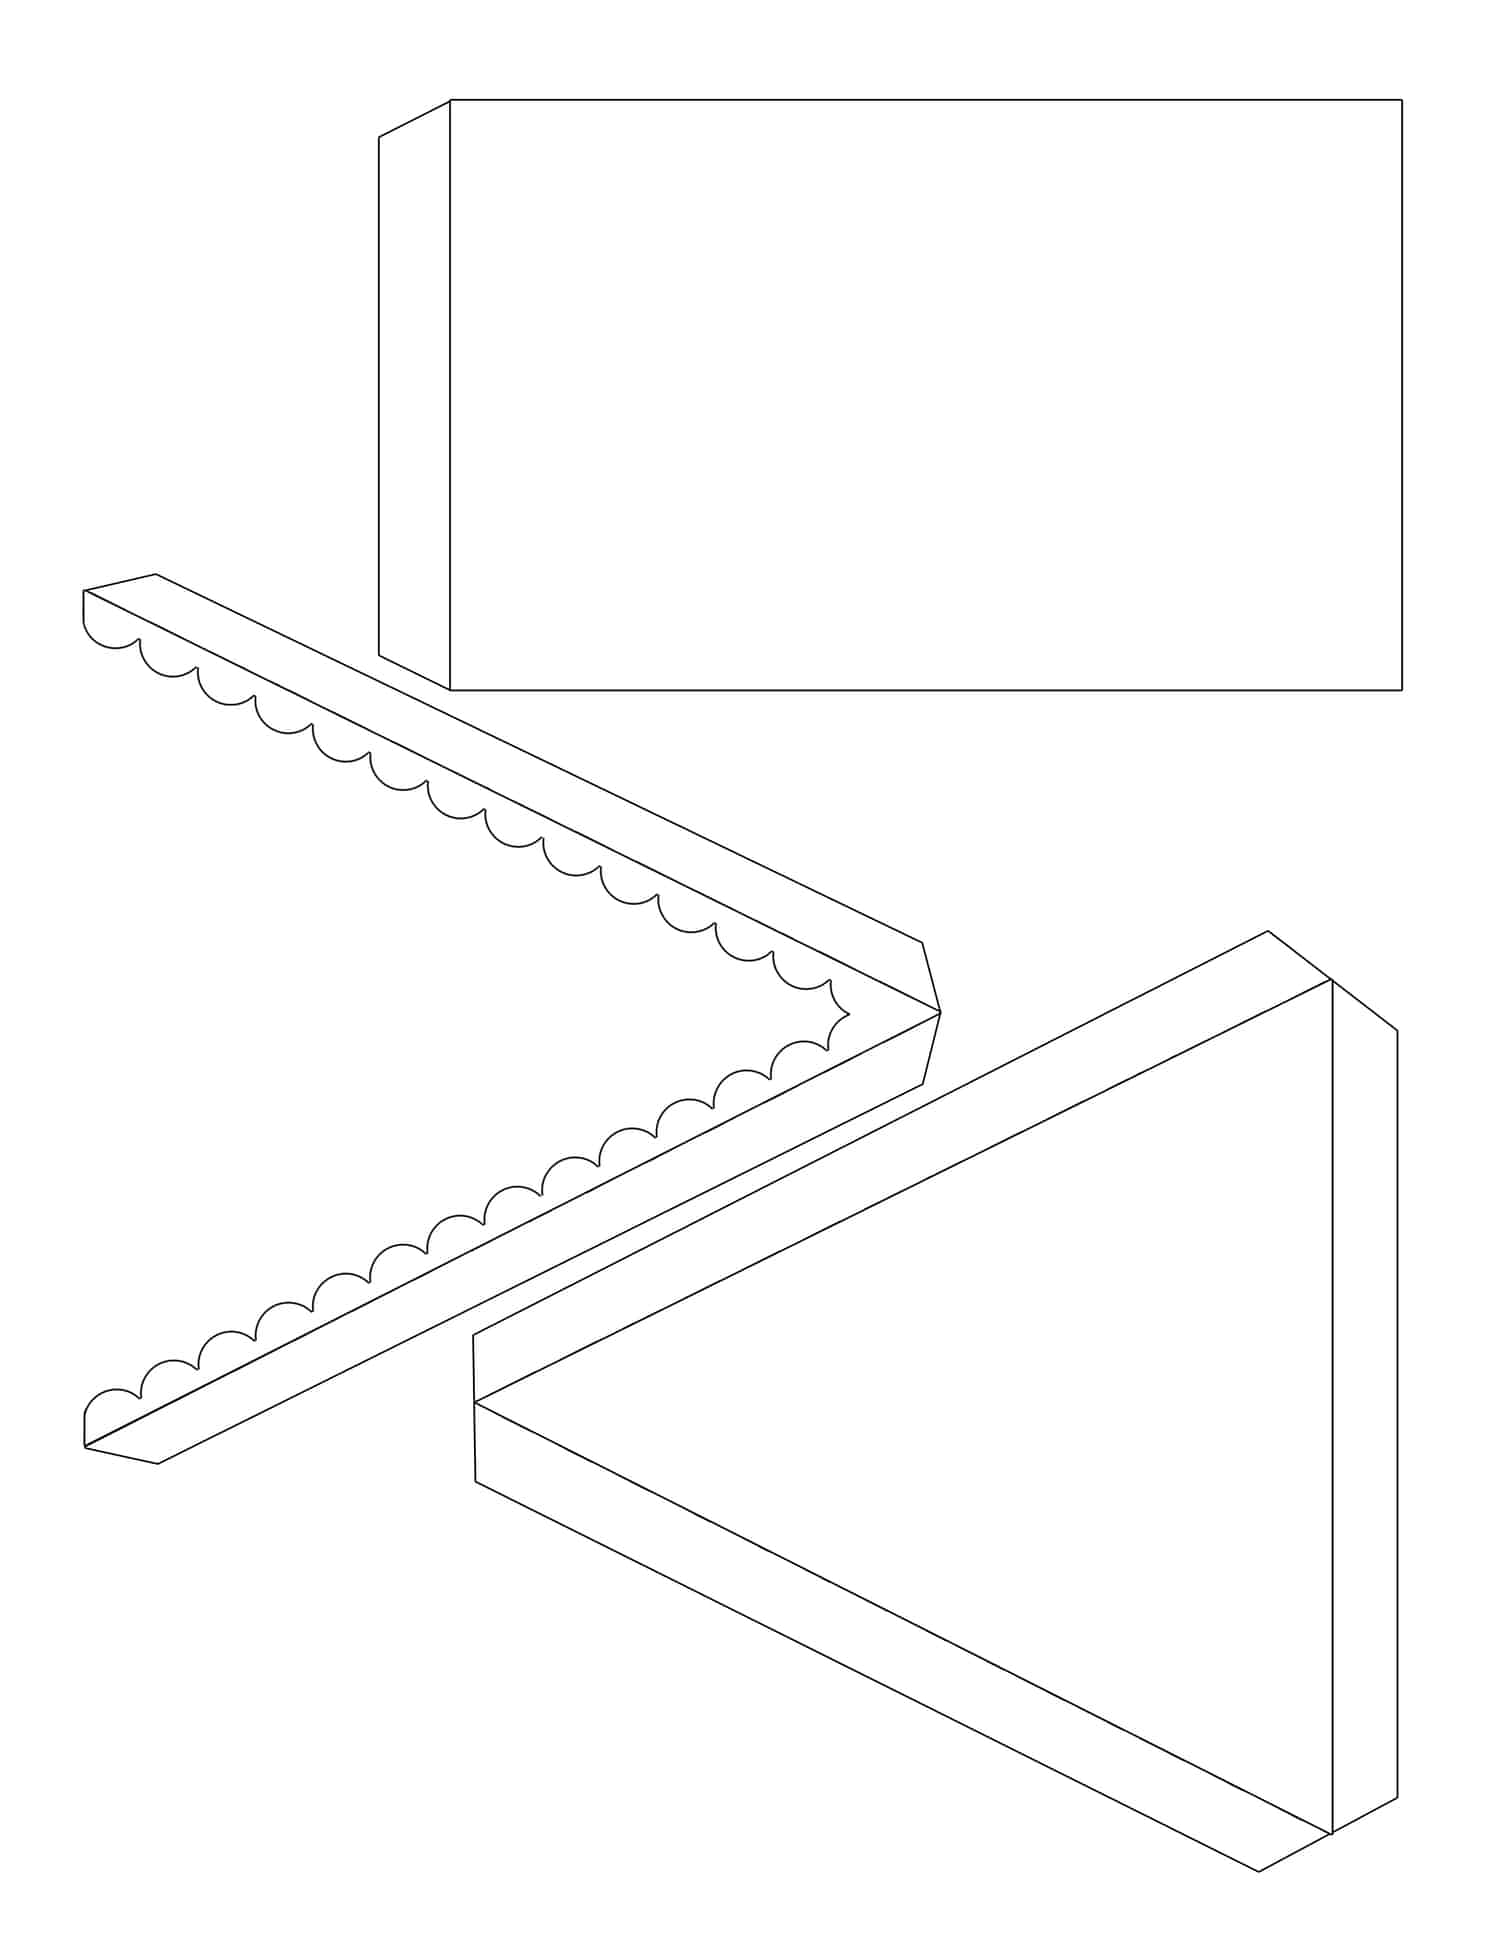
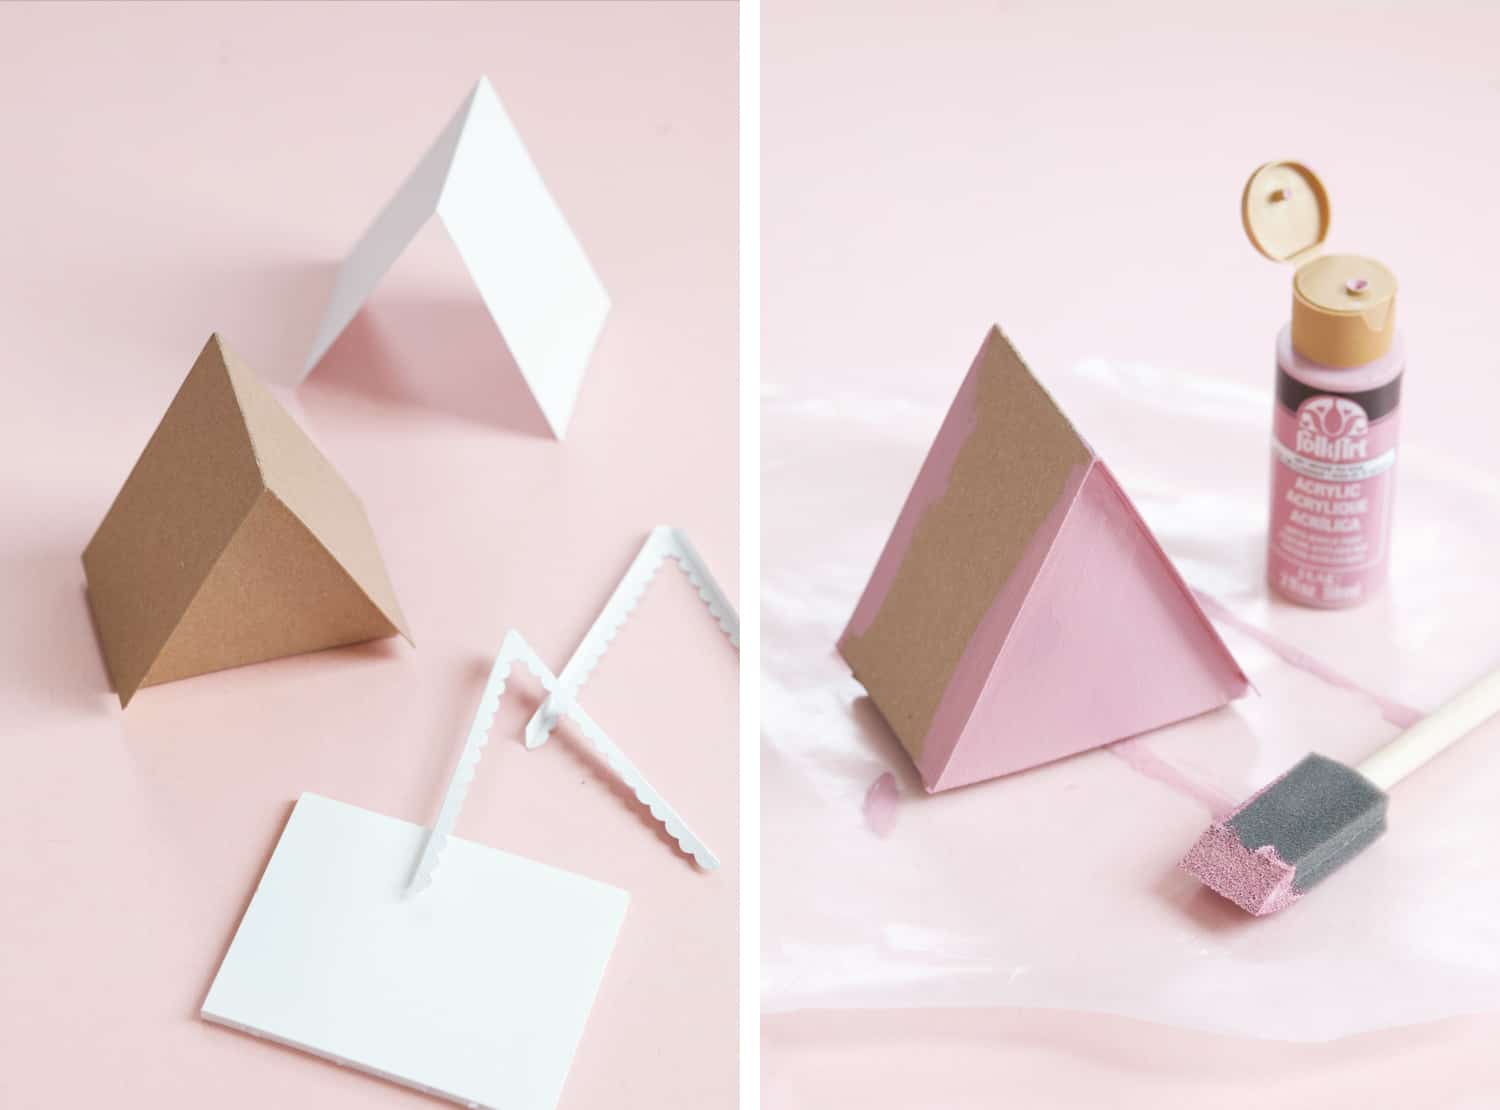 Step Two: Bend down the flaps of the triangles and gingerbread trim. Then glue the cardboard pieces together as shown above. Don’t glue any of the white pieces together yet.
Step Three: Paint the triangle faces of your cabin the color of your choice. It will probably take two coats of paint to cover the cardboard, but acrylic craft paint dries super fast, so this is a speedy process.
 Step Four: After your paint has dried, glue the gingerbread pieces onto each side of the roof, then cover the roof with the white piece of card stock as shown above.
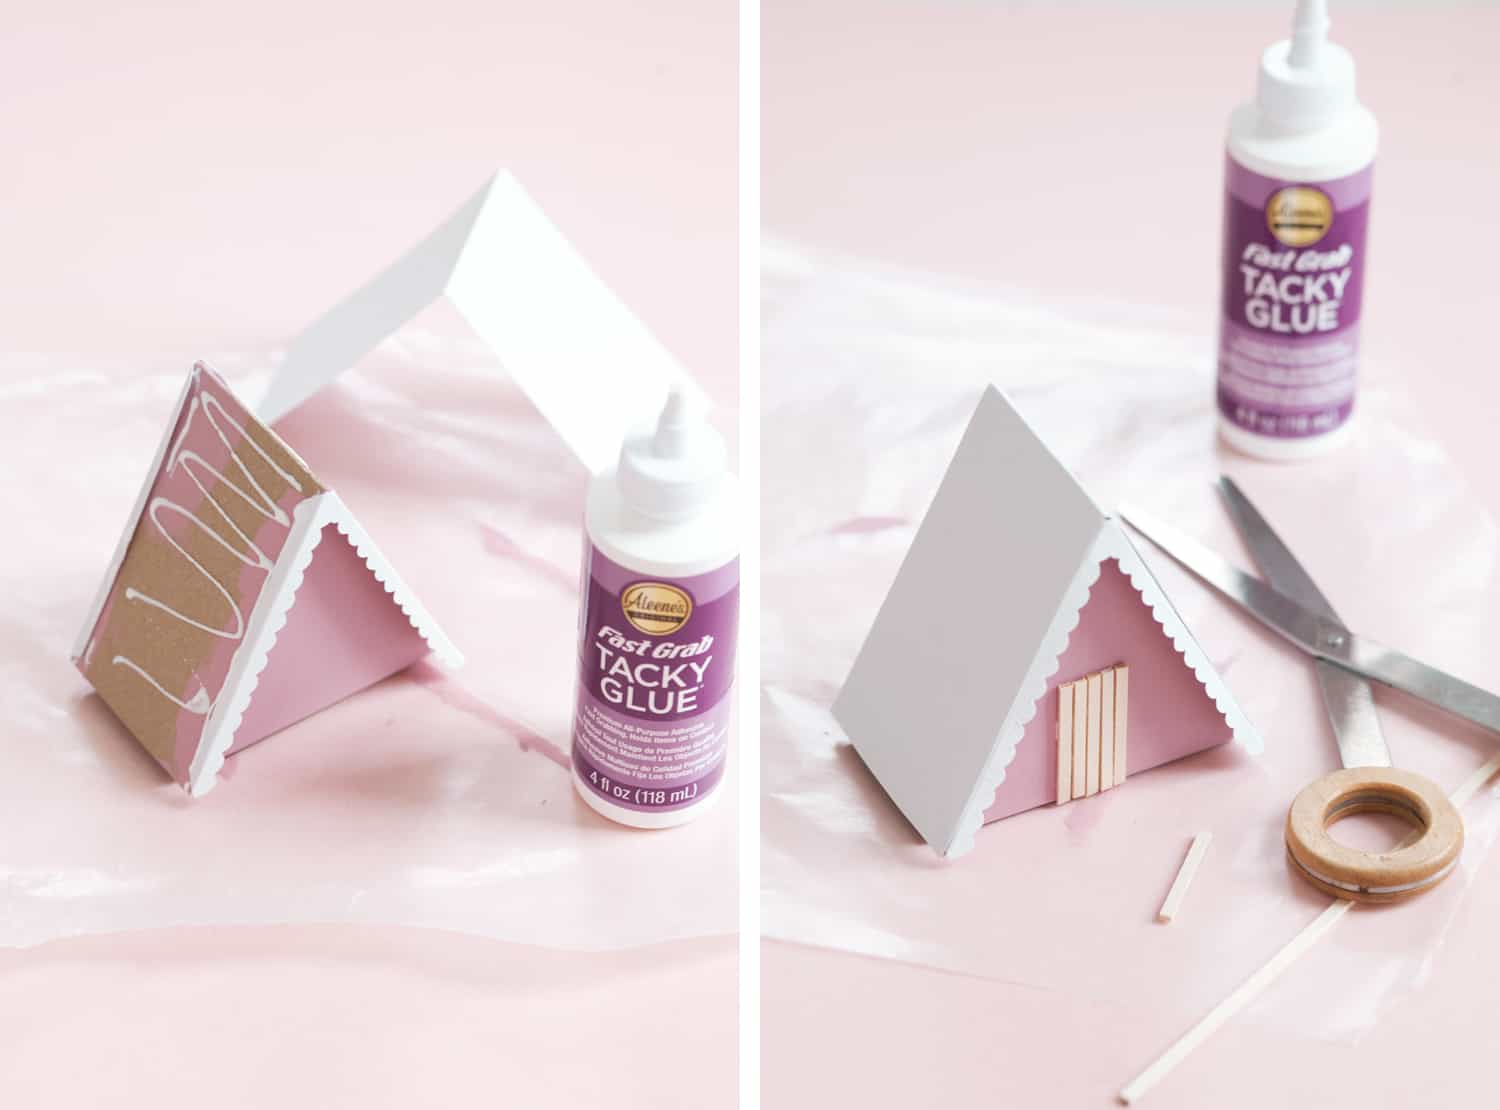
Step Five: Cut little strips of your balsa wood to create a planked door on the front of the cabin, and glue then into place.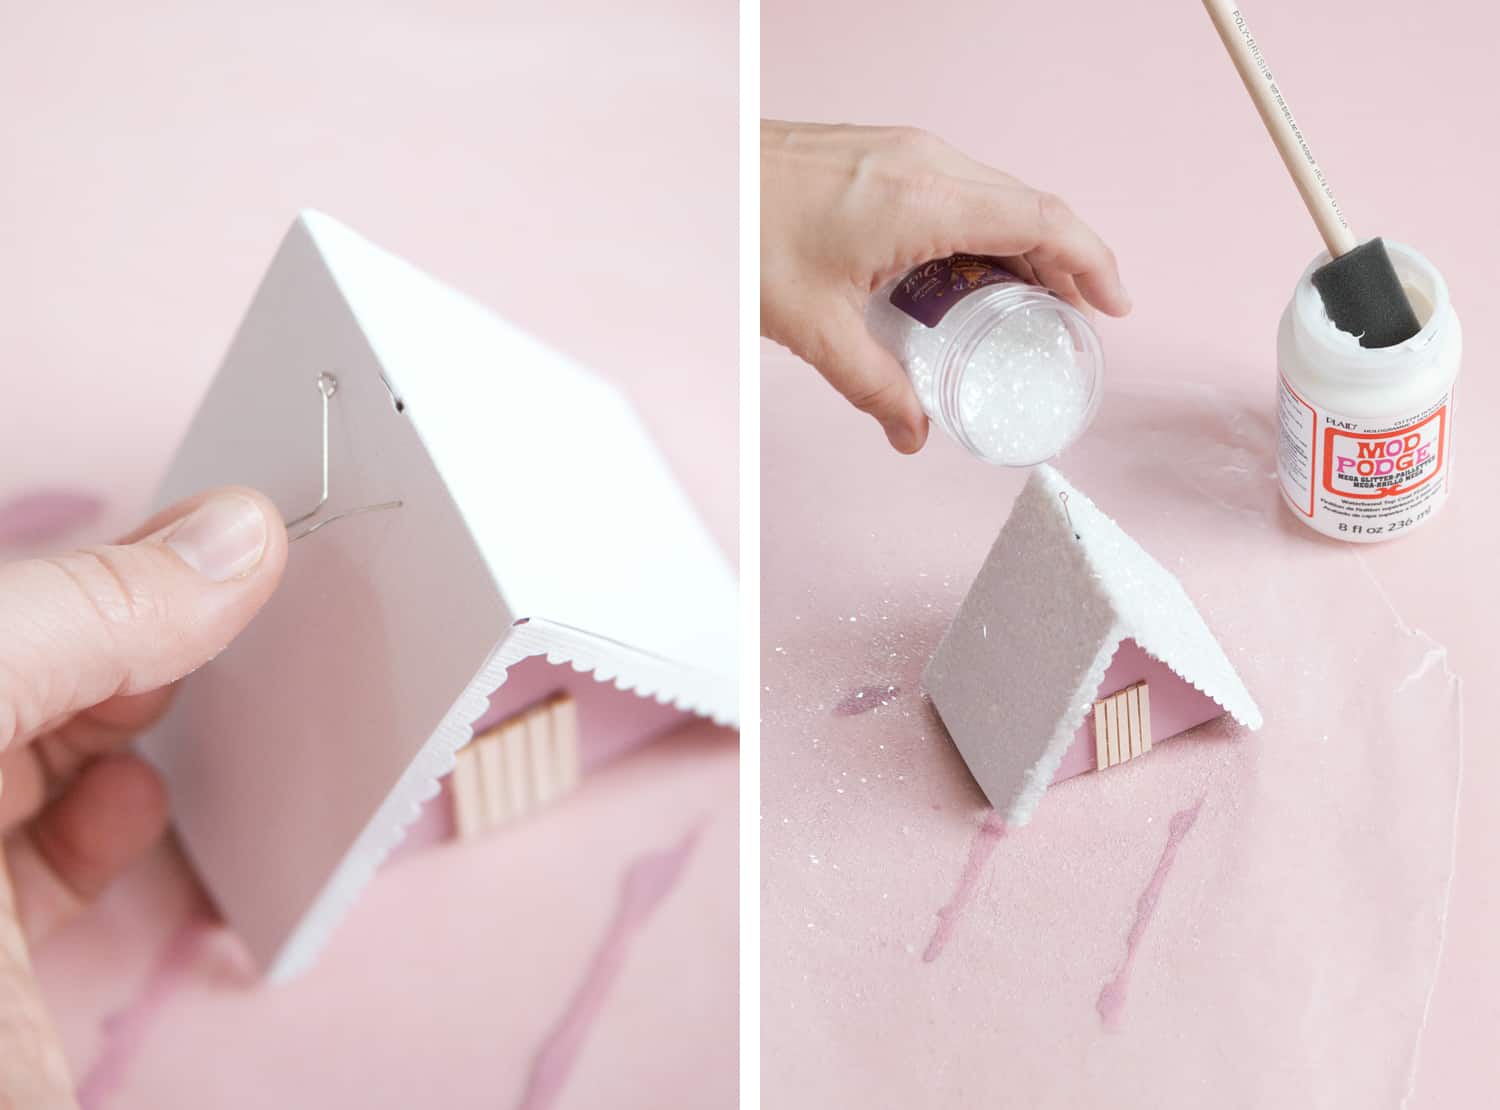 Step Six: Poke a hole through the pitch of the roof so you can hang the ornament. I bent an eye-pin (found in the jewelry section of the craft store) for this purpose, and slipped it into the hole. But you could easily thread yarn or a ribbon through the hole and knot it on the inside of the cabin to keep it secure.
Step Seven: Generously brush the cabin all over with Mod Podge (the white glitter version is perfect for this!), then sprinkle it with crystal glitter.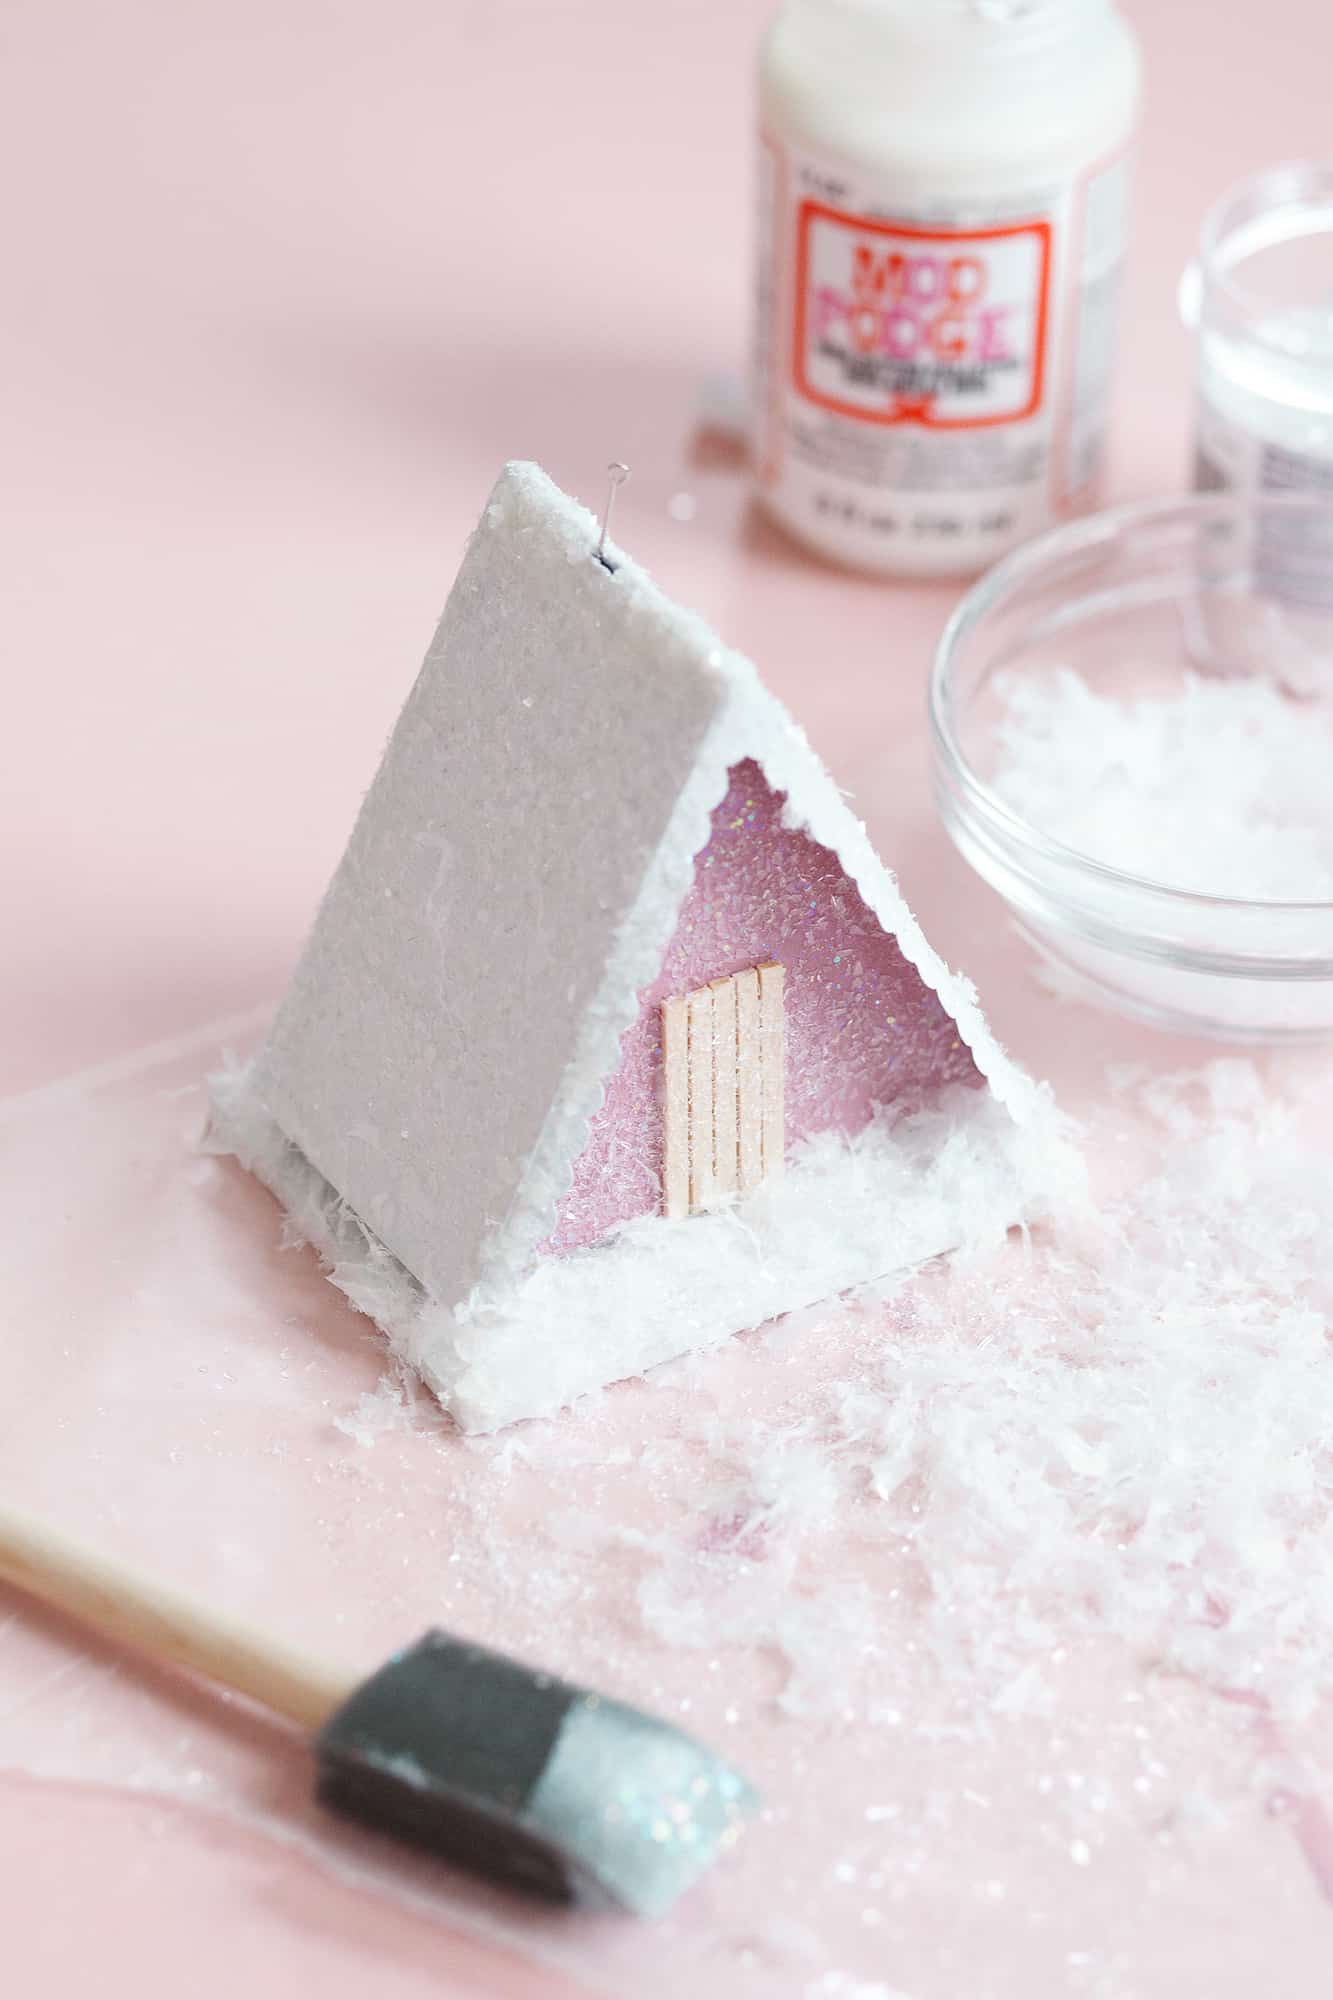 If you don’t want to stop at just glitter, add some more Mod Podge and sprinkle fake snow onto the “lawn” and roof of the cabin.
At this point, I realized my miniature wreath was probably too big for my tiny cabin’s front door, so I fashioned a smaller one out of a pipe cleaner and tiny bow I made from a very narrow piece of ribbon. I attached it to the front door with hot glue. It turned out to be so quick and cute!
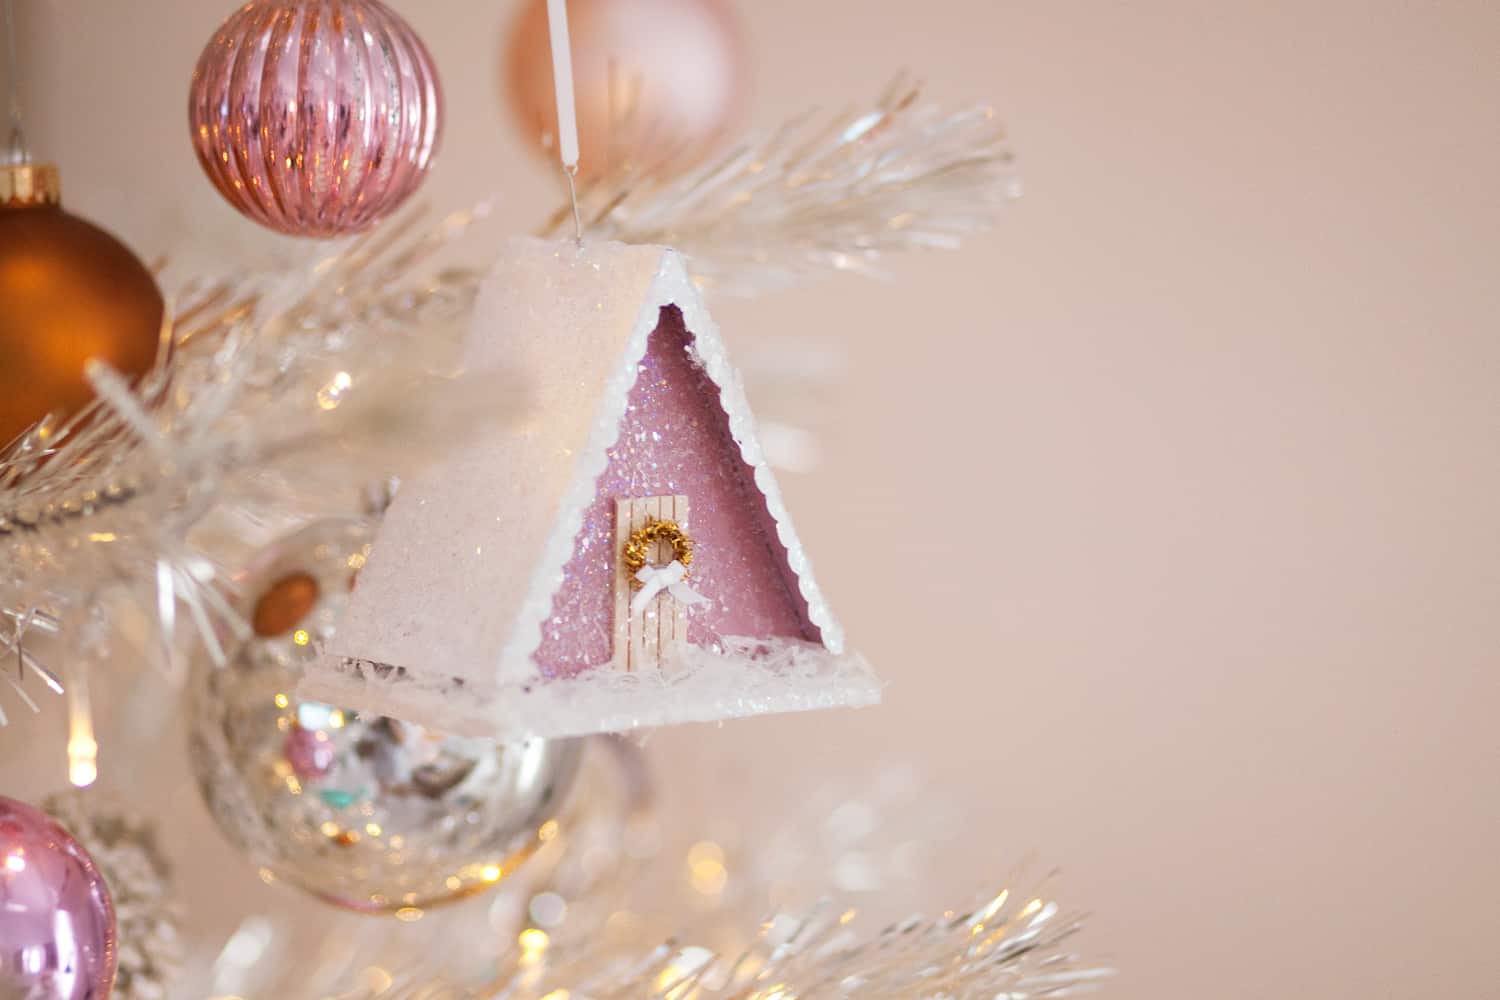 After the glue was completely dry, I hung the ornament on the tree and admired my tiny creation, wishing I could snap my fingers and make it life-size. The kids were super into it after they saw it hanging on the tree, so we decided to have a craft night and whip up a few more of these little guys! I’ll do the cutting and gluing, and the little hands will paint and sprinkle glitter.
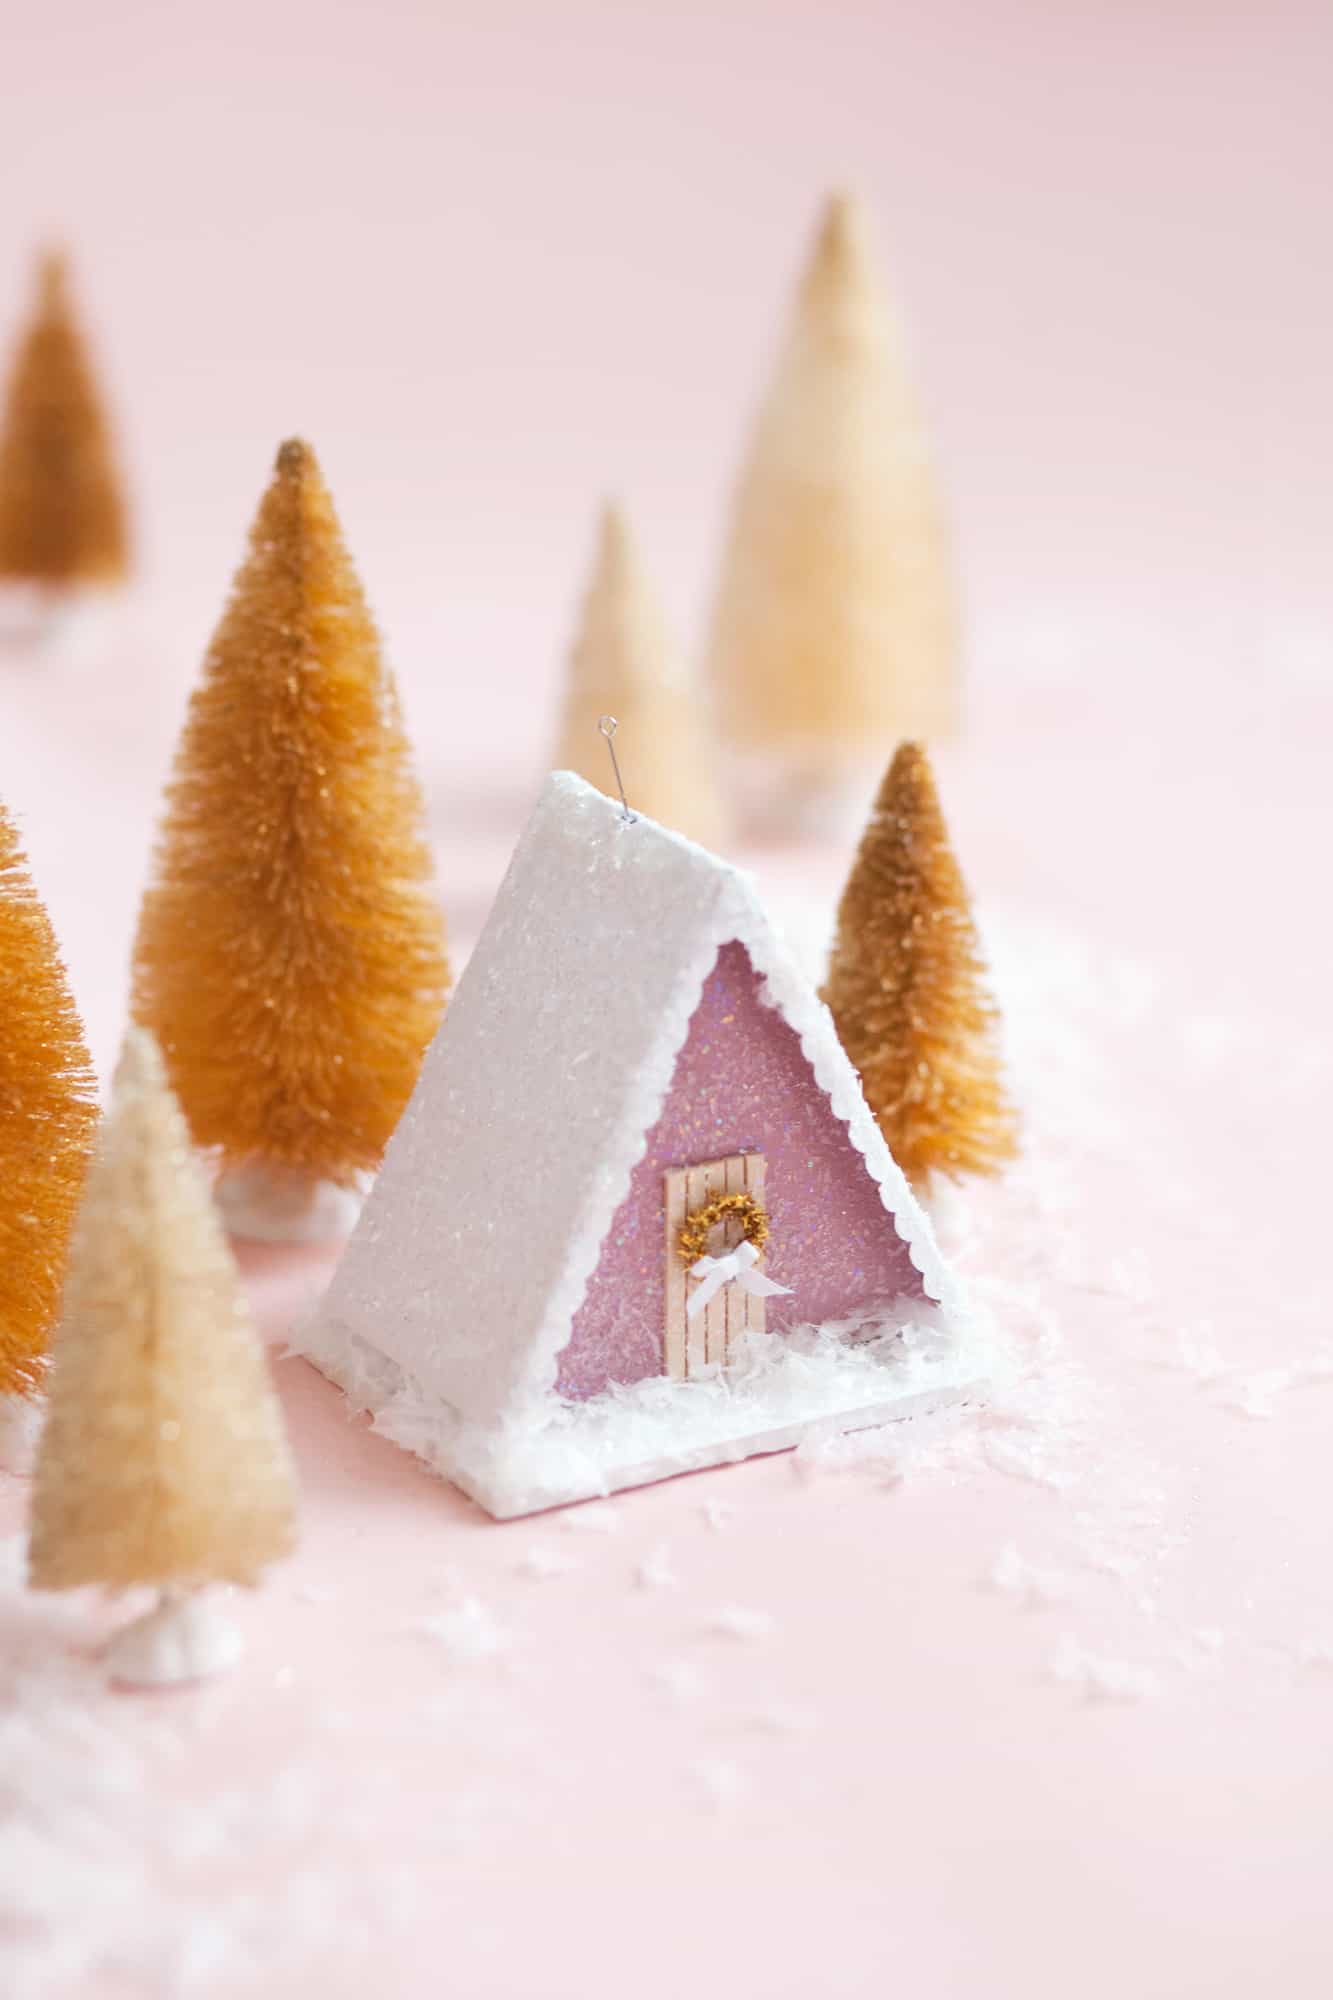 My dream cabin! Just needs a hot tub and a view. What color would you paint yours? – Mandi
Can’t wait to make a house. They are so cute and different. Thank you for sharing.
Adorable and easy!
Actually there is! Check out the Christchurch transitional cathedral. It’s made of very thick cardboard tubes! After the Christchurch earthquakes the cathedral was destroyed and has yet to be repaired. This special ‘cardboard cathedral’ was built as a temporary replacement. It’s actually rather stunning.
Ok, this is amazing. ???? If only the true-to-size A-frame could be constructed out of cardboard!!
Haha! RIGHT?! That would be amazing.
This is so sweet! You could do so many of these in various colours!
Debs @ https://tiger-mint.com
Beautiful! I probably would paint mine a deep rich blue. Thanks for the step by step.
As someone who owns an A-frame house, I am freaking out over the cuteness! And I love the upcycle factor. Can’t wait to try it myself. Thanks, Mandi! ❤️
Ahhhh! You are living my dream!
This is cute, I love the pink colour of the house! 🙂 It’d be such a great tradition to make one ornament a year for Christmas!! ❤️
Charmaine Ng | Architecture & Lifestyle Blog
http://charmainenyw.com